Monday, 14 October 2013

Steampunk ATC Shrine For Craftsupplies1

Design Team Project for Craftsupplies1
Steampunk Altered ATC Shrine
 
 
Hi Everyone! and WELCOME to all my new blog subscribers! Its great to have you along on this crafty journey with me! Today I want to share my Design Team project for Craftsupplies1. I have created this super cute little ATC Shrine. It doesn't house an atc, but it does have a sweet little owl tucked away inside, from Craftsupplies1's metal embellishments. I really love how this turned out and I hope you do too!

 
You have probably guessed that I have used the Steampunk Spells from Graphic 45, and I just love this collection! It is a lot of fun, and great for this time of year! I have used some gorgeous black and white trim around the box from CS1 and it fit in perfectly on here, as it picked up the black that I painted the box.

 
Above here you can see a beautiful flower from Julie's store, along with the sweet little penny farthing, again from CS1's metal embellishment selection.


 Here is another close up of the gorgeous flowers from CS1, the Orange flowers were originally white, and I used my Lindys Spray, Cape Cod Coral to colour them to pick up the orange tones in the paper line. You can also see the little black roses too, that Julie sent me this month in my DT kit.
 
And here is a shot of the lovely lady with some striking feathers in her cap!

 
I hope you like my little steampunk shrine, I had tons of fun making it and please stop by and visit Craftsupplies1 on ETSY!
Thanks for stopping by today, please feel free to comment if you wish, I love to hear from you!
Hugs, Kim :)


Thursday, 3 October 2013

Angel Wing Assemblage Box

DT Project for Gina's Design Lasercuts
http://www.ginasdesigns.net/Store/


 Hello everyone! I am very excited to share with you today my very first "off the page" design for Gina's! As you can see I have used four of the Bagatelle boxes, which come in the kit of twelve, a great deal by the way ;) and also three of the ATC Shrines, which are another favorite of mine. This was all very easy to put together, I used Glossy Accents to put the boxes together, as it dries smooth and clear, and then my hot glue to attach the boxes to each other.
I found a way to match up the different styles of boxes and ATC Shrines and came up with this configuration of them and then added the wooden wings to the sides.  Inside each of the boxes you will find a little surprise, here above you can see the Hot Air Balloon Shrine, with a couple of the smaller boxes and inside you can see, below, some more of Gina's pieces, including the Fleur de Lis, dress form and the Boarder and Corner Gears.

Here you can see a close up of the Birdcage and Love script from Gina's!

I added texture to the boxes and the wings by using some masking and lovely Graphic 45 Paper, to give it a soft and romantic look.

 
I love how the Boarder And Corner Gears add dimension!
 
 
 I used the small square Bagatelle box with the Love Script for the centre focal point.
 

I think this one might find a new home on my bedroom wall...it might just be a keeper!
I hope you have enjoyed looking at my creation, thanks for stopping by today!
 
Gina's Designs Products Used:
 
Other Products Used:
Graphic45 A Secret Garden Paper 8x8 stack
ButterBeeScraps Metal Gears, cameo and Chandelier
Alter Me Happy- Metal Angel and Boarders
Kaisercraft Wood Wings
Flowers, texture paste, 2 wooden cogs and mask from my stash.
 
- See more at: http://ginasdesigns.blogspot.ca/2013/10/angel-wing-assemblage-box-by-kim.html?utm_source=twitterfeed&utm_medium=facebook#sthash.nFVIrkD4.dpuf

Saturday, 14 September 2013

Kitty's Scrap Post September DT Projects
Altered Cards
 
Well its that time again...I would like to share some lovely projects from http://kittylicious11.blogspot.ca/ Using the Time Traveller and Hallow's Eve digital Scrapbooking paper and kits!  please check out Luisa's store on Zibbet as well
 
Below you will find my 2 Cards that I have created, both are unique and both are something different than a regular card. The first one is made with the Hallow's Eve Paper, which is a Halloween Themed paper. I just love the colours in this paper, it has a lot of  blacks, browns, tans and orangy rusts.
I have used a Gina's Design Chipboard Door for the front of the card.


I fussy cut out the eyes from the paper line, that are peeking out at you!

All the laces and trims are from Luisa's kits from her Zibbet shop, she creates the kits to match with the papers, and they are just super amazing to work with!
Below is one side of the inside of the card, here you can see I fussy cut out the pocket watch and embellished it with flowers and a metal butterfly that I made to look rusty.


 Top of the door on the inside of the Card....
View of both sides inside the card. I created a little pocket on the right hand side with a tag I cut from the paper line, this is where I will put my sentiment before I sent it off to a friend!


My second card is an Easel Box card. I really loved making this one, its with the Time Traveller paper, and its something that has a dual purpose, its a card but also you can tuck a little gift inside the drawer.
 
Here you can see the hot air balloon I cut out from the paper line, I also cut out the vintage dress, tag and butterfly as well.

 
Side View of the Box card. You can see the gorgeous laces and trims from Luisa's kits here as well.

 
Inside the card, here is where I will write my sentiment before I sent it off to my friend. I used a wooden dressform from my stash, some flowers and of course more of Luisa's beautiful trim kit.

 
With the drawer open...

 
Close up of the embellishments, trims and flowers...

 
I hope you like what I have created this month for Kitty's Scrap Post, don't forget to check out Luisa's shop here:
and also on Zibbet..


Thanks for stopping by!

Wednesday, 4 September 2013

Design Team Call Entry for
Discount Paper Crafts on Etsy


Hi everyone! Well, I have decided to throw my hat in the ring for a Design Team call for Discount Paper Crafts on Etsy! I just adore Cathy's store, she is my "go to" person for all things Prima and Tim Holtz!  I have been shopping in Cathy's store for a while now and I am always impressed by the customer service, quality and friendliness she provides, not to mention the great prices!
 
I have created an Exploding Cigar box, well not literally lol! But this vintage box is made to look like all the yummy goodies are just bursting out of the box. Most of what I used I got from Discount Paper Crafts, so do be sure to check out Cathy's store, the link is above. There will be a complete list of items I used at the bottom of this post. Enjoy!
 
Front of box
|Here you can see the front where I have used the Prima brick mask I got from Cathy's store, along with the TH clock key

Top of box
 
Lots going on here! you can see all the gorgeous goodies, the gears, flowers and lightbulb
 
Top of box

Here you can see the TH clock face and spinners with some vintage metal wings from my stash.


Full view of box
I used the Prima Divine Paper for the box

Side of box
Here you can see some of the paper that is rolled up to give that exploding effect. I also used my homemade texture paste all over the box.

Side view


Top

Front of box

Inside Box


Full View of box

Items Used:
Prima- metal gate, Junkyard findings, Vintage trinkets light bulb, Prima flowers from the Engraver collection, Brick Mask and Mechanical Number 8
Tim Holtz: Gears, face plate, clock key, metal clock face, game spinners
From my stash: wood clock, Paris art tile, WOC flowers, metal corners, metal filigrees.wings and vintage lady metal embellishment.
Lace is from Lavish Laces.
Thank  you for stopping by today, I hope you have found a little bit of inspiration here today, feel free to leave a comment or subscribe if you wish. I love to hear from you!

Saturday, 24 August 2013

August Guest DT Projects for
Craftsupplies1
 
Hi Everyone! Its been a while since I have been around!! Its been a super busy month for me and finally I have found some time to blog some of my new projects for this month. This time I want to share some projects that I altered for Craftsupplie1 on Etsy. Julie has an amazing store, so please do go check it out, there is so much goodies in stock you wont believe it! lol!
 
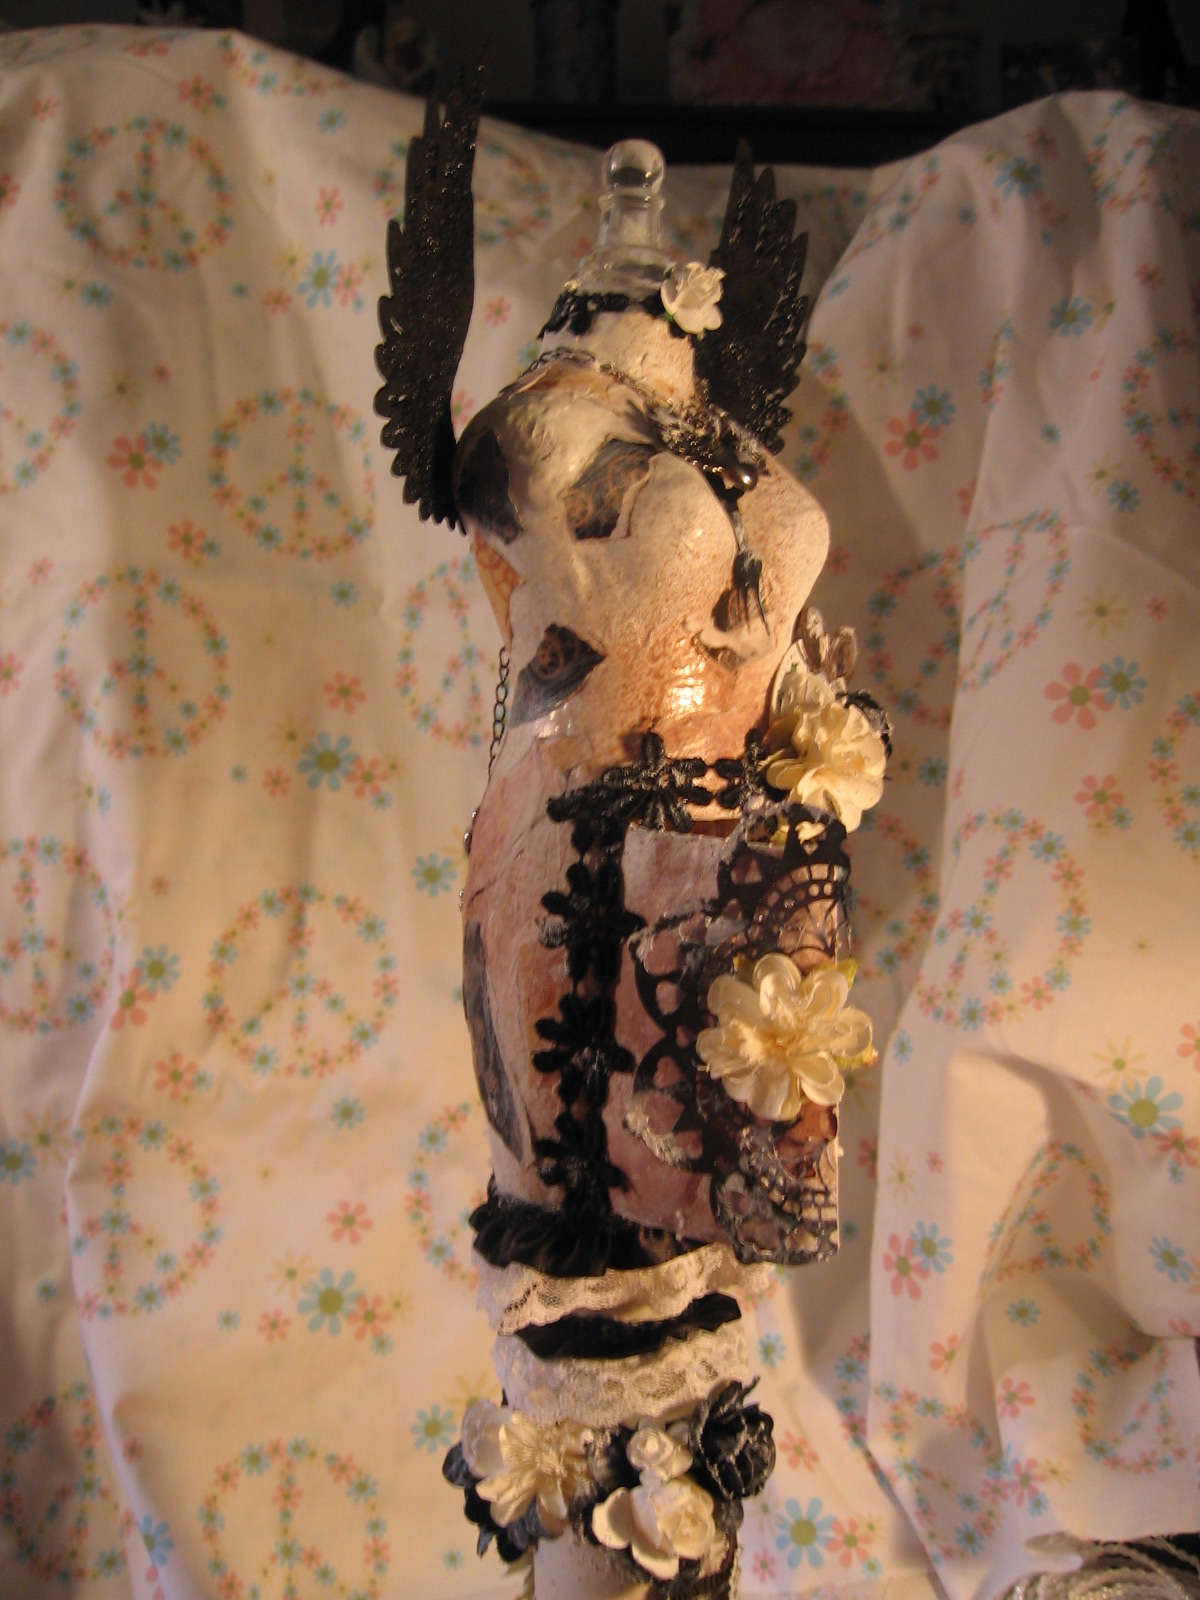
Here is an altered dressform I created for my Guest DT spot this month. I have used a Michaels dressform ontop of a vintage wooden candle stick I got from a thrift shop.  The wings are from Gina's Design Lasercuts on FB. 
 
The heart charm with wings is from Craftsupplies1

Side View, here you can see some of the gorgeous embellishments from Julie's shop, including the black lace trim and flowers.

Back View, here you can see the charms dangling down the back, again from Craftsupplies1 on Etsy.


You can see the inside of the dressform here, I cut a door way in the front of it, to make a little niche, inside are some scrabble tiles spelling "ART", and some more gorgeous Craftsupplies1 flowers.

Base of dressform, here you can see a lovely copper key from Julie's shop, more pretty flowers and some extra hardware from my stash.
 
Here is another view of the top of the dressform.
 
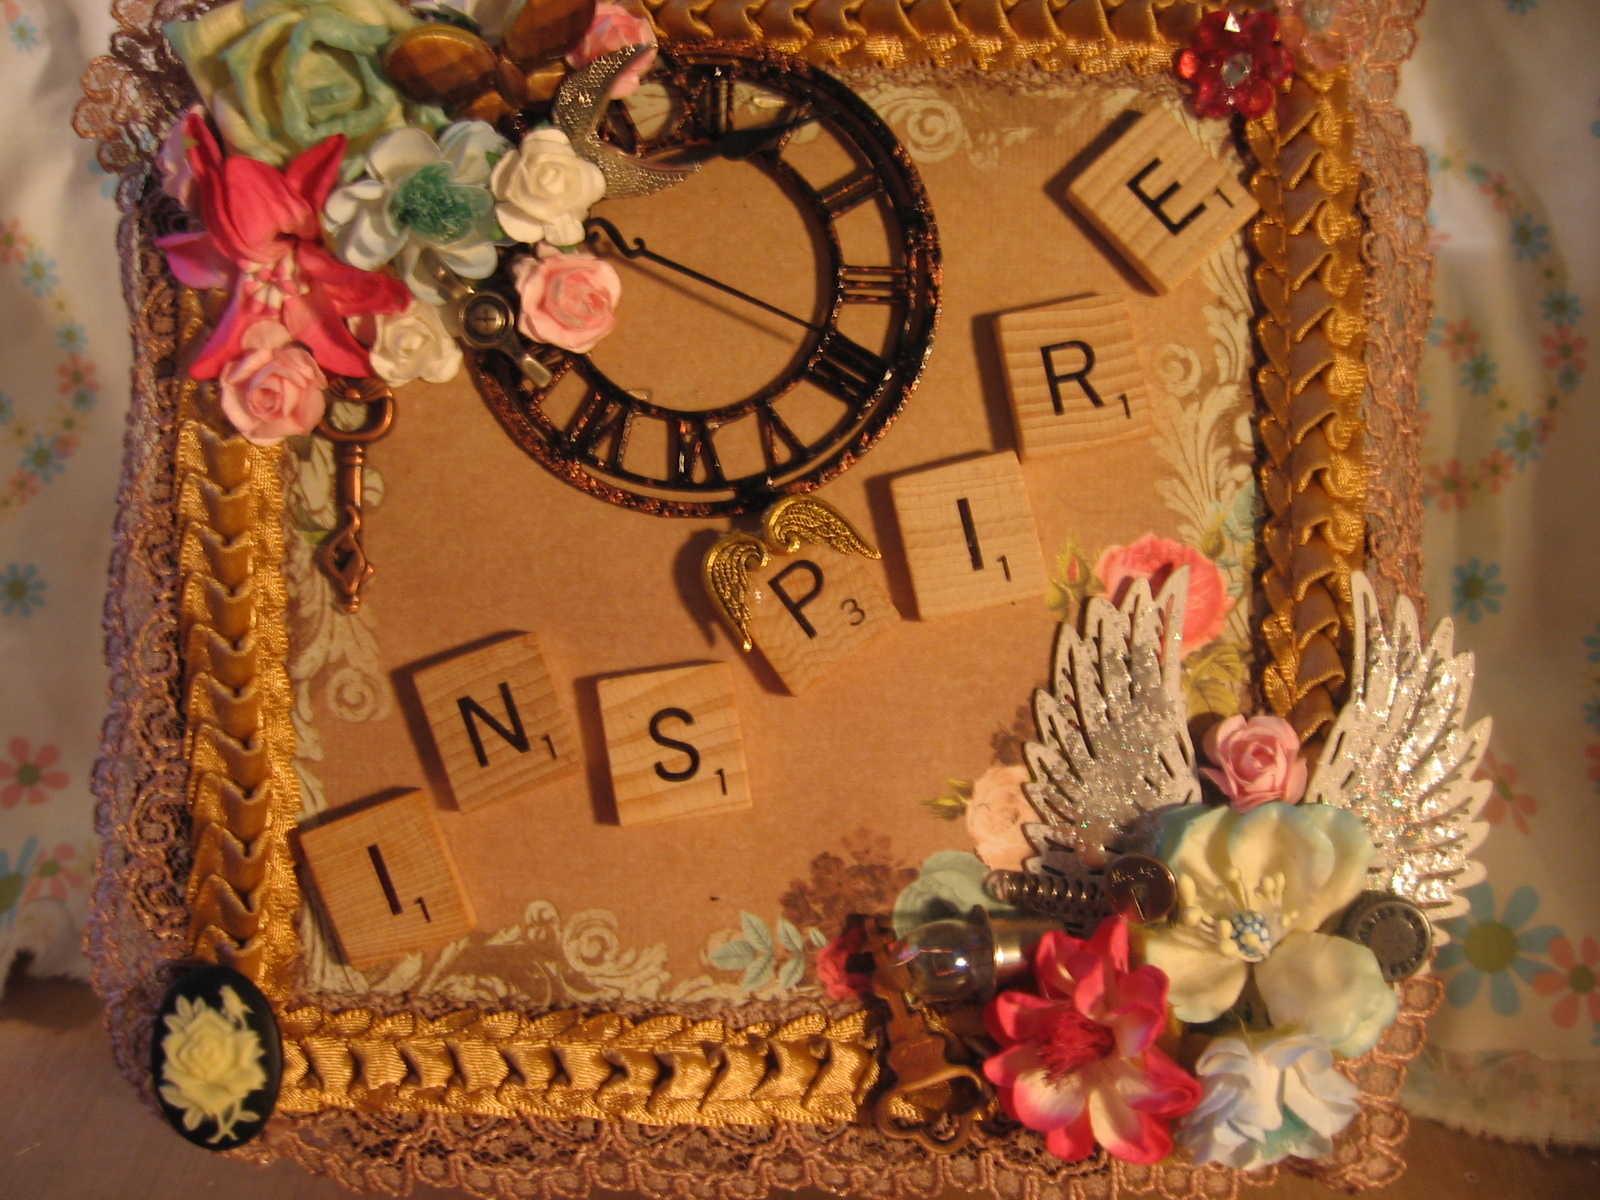
Here is project #2 an altered box. The box itself and the Wings and paper doilies are from Gina's Design Lasercuts, but all the embellishments and trims and lace are from Craftsupplies1

This is a side view, I have used the Prima Madeline collection for the paper on the box.

Craftsupplies1 is now selling these gorgeous metal filigree pieces as well as the pretty acrylic butterfly and the gorgeous trims and laces.


 Here is a close up view of the gorgeous flowers, wing charms, key and acrylic butterfly. The clock is from Gina's.

 
And Finally the other corner of the box with more of the gorgeous flowers from Craftsupplies1

 
Thanks so much for stopping by today. Please feel free to leave a comment or subscribe to my blog. Remember to check out Craftsupplies1 on Etsy
Thanks!!