Showing posts with label craftsupplies1. Show all posts

Friday, 5 December 2014

A Ladies Diary Shadowbox for Gina's Designs Lasercuts


Hi Friends, I would like to share with you my Ladies Diary Shadowbox.  I love this paper from Graphic 45 and wanted to make a shadowbox with it for a while now. This large Shadowbox from Gina's was just perfect for it.

 I used several other chippy pieces, including the arch windows, which was layered under the lovely lady I fussy cut out of the paper. I used the main page of the paper to add the name and another picture of a vintage lady into some of the shadowbox squares. 


Here you can see I used one of the number plates in white, to add to this little section, along with a nest, bird, vintage lightbulb and flower to finish it off. 
Above here in this photo I used one of the dress forms with wings, and added some fun embellishments to it, and embossed the wings in a metallic silver. 
Below here you can see some of the texture I created on the box. I achieved this by using some crackle texture paste, the using some sprays in matching colors to bring out the cracks.
Thanks so much for stopping by today!
 Gina's Designs Items Used
Other Items Used
Flowers, Metal and Lace from Craftsupplies1
Ladies Diary Paper Graphic 45
Imagine Crafts Fireworks Sprays
Golden Crackle Paste
Prima Resin Pieces

Friday, 21 November 2014

Snow Mitten Banner Gina's Designs DT Project

Hello friends, today I am here to share with you my take on the Micro Mitten Mini Album. I turned the mini into a vertical banner for my front door.  I started off my banner by using some of the pieces from the Winter Shape Set, the tree and the "Let it Snow" sentiment.  I embossed the words and layered them over the tree which I used some Snow Tex on to give the illusion of snow, and topped the tree off with one of the bling buttons from Craftsupplies1.


Here is the mittens which hang below the Let It Snow sentiment, it hangs on my front door.


 Below here are my mittens, I used some Lawn Fawn paper on them, then went around with some chalk inks to distress them a little. I topped the mittens off with some gorgeous laces, flowers and trim from Craftsupplies1, along with some fun Christmas mini lights I had in my stash.


I used some of the snowflakes from Gina's Snowflake set, which I textured and added some tinsel embossing powder to give them some shine. For the letters, I used some of the lady bug Prima chalk ink and then embossed on top of them  with a clear glitter embossing powder. I also used some embossing paste and a Tim Holtz stencil, Stars, to create a wintery background on the mittens.


I am really happy with how this turns out. Deann and I loved making this so much, that Gina is going to make a Snow Mitten Banner which will be in the store soon!

Thanks for stopping by today to check out my and Deann's projects.

Gina's Designs Items Used

Other Items Used
Lawn Fawn Paper
Flowers, Lace and Trim by Craftsupplies1
Prima Chalk Inks
Wendy Vechi Embossing Paste
Tim Holtz Stencil
Ranger Embossing Powders


Friday, 14 November 2014

Happy Friday friends! Today I am sharing my Cabin In The Woods Shadowbox by Gina's Designs. This is such a great shadowbox and comes with some fun extras, including the chipboard fireplace, cabin and trees.
 
I used the Honey Chai paper on this box, but first I give it some paint and a crackle finish to pick up on the blues and brown tones in the paper. It worked well with the theme of the box.  I also used some of the Queen Anne's Lace chipboard and layered in some resin butterflies, dragonflies and flowers from Craftsupplies1.

 
There is plenty of room to decorate or store your favorite items!


 Here you can see the top of the box and the cabins and trees that come with the shadowbox. I used layers of inks on them to give them their muted tones.
 
I hope you have enjoyed seeing my project today.


Gina's Designs Items Used
 
Other Items Used
Kaisercraft Honey Chai Paper
Prima Chalk Inks
Prima Resin Pieces
Tim Holtz Metals
Paper Artsy Paints
Martha Stewart Paints
Crackle Medium
Flowers, Metals and Laces from Craftsupplies1
Cameos from my Stash

Friday, 27 June 2014

Mixed Media Canvas "Discoveries" A Gina's Designs Lasercuts DT Project

Happy Friday everyone! Today I have created a fun mixed media canvas using some of Gina's amazing products.
I have used the Flourish Circle Frames as the main focus on my canvas, and used several layers of mixed media on them, including paints, inks, texture paste and Tim Holtz distress paint.  In the center of the Flourish Frame, I have placed a bee which I made from some clay.


Below you can see some of the techniques I used on the Flourish.
I embellished around the Flourish Frame with some lovely flowers in whites, blues and yellows, along with some of the gears from the Gears Borders & Corners Set.  I also used one of the Steampunk doilies.  After distressing it, I cut the gears out from the doily and tucked them in with the flowers. In the background you can see some of the Chain Link Fence, which I embossed in black to contrast with the bright colors I used.  I topped that area off with some of the numbers from the Chunky Borders set.
I used a sentiment stamp from Rubbermoon as you can see below.  It is a quote by Picasso, which I just love. To the right you can see a close up of the Numbers from the chunky borders set, which I embossed.
I hope you have enjoyed taking a peek at my canvas today, thanks for stopping by!

Gina's Designs Items Used

Other Items Used
Lindy's Stamp Gang Mica Powders and Sprays
Prima Wing, Light bulb, Zipper and Clock
Rubbermoon Picasso Stamp
Wild Orchid Craft Flowers
Craftsupplies1 Flowers
Tim Holtz Metal Sentiment
Ranger Distress Paint
Delta Soy Paint Turquoise
Iced Enamels Embossing Powder


Tuesday, 11 March 2014

Graphic 45 Design Team 2014 Audition

This is my official Graphic 45 Design Team 2014 Audition.
I would like to share these 9 projects with you, which I have created using Graphic 45 Paper
This first project is using Steampunk Spells. I have created a Steampunk Clock Shadow Box. I have also used one of the Graphic 45 Staples the Door Plate. I just love this paper line! I have done a lot of fussy cutting out of this paper, the vintage lady on her bicycle is one of my most favorite images. This is a working clock.
 
 
Here I have created an altered wooden box using the Typography Paper Collection.  This is another of my favorites, I really love the color tones and graphic quality to this paper line!
 
This is a Shabby Chic Alarm Clock by Tim Holtz, that I used some of the gorgeous Once Upon a Springtime Collection on.  I Love this paper, its so fun and whimsical!

 
Here is one of my all time favorite projects! This is an altered Frame using The Ladies Diary paper.  I had fun with this one, and even used an old Christmas Ornament, (the ladies dress in the bottom right corner)as it went so well with this gorgeous paper!

 
This is a fun project I created using the Graphic 45 Secret Garden Paper. I really love the shabby chic look of this paper and the floral designs are just amazing!  I used some ATC Shrines to create this box (From Gina's Designs) and added some wooden wings to the sides to give a fun look. I papered the wings with the beautiful paper then did some mixed media on top with a script stencil and modelling paste.

 
This is another Steampunk Spells Project (I said I loved that paper didn't I? lol) I have altered another of the ATC Shrines here, and decorated it in a more Halloween Style, which this paper carries off just perfectly!

 
I think this one might be one of my all time favorite projects using the beautiful 12 Days of Christmas Paper. I created this shadow box, doing a great deal of fussy cutting, which was a true labor of love!
I then decorated the individual boxes  with more of the paper and added a few trims and chipboard snowflakes to the project. This project is one of my most commented on YouTube Videos!


...And how could I resist not using the gorgeous Botanical Tea Paper! I just adore this paper, and this was a super fun project to make. The teapot itself is made from Paper Mache, and I have used some chipboard pieces and fussy cut out some of the beautiful images from the paper to add to the teapot.  
 
Finally...I have created a mini album using the Graphic 45 Couture Paper. Here I have created some dimensional looks to the cover of the page, by creating a flower box and awning using paper from the collection.


I hope you will consider not only my projects but also my body of work on YouTube, Pinterest, My very active Facebook Page and also on my blog here.   I am thrilled to be auditioning for your amazing Design Team. Thank you so much for taking the time to look!
 

Vintage Travel Luggage a Craftsupplies1/Ginas Designs DT Project


Hi Everyone! I would like to share with you my Vintage Travel Luggage today. I have created these out of Wooden Book Boxes from Gina's Designs Lasercuts.  They were tons of fun to create, and are something new and different to use these book boxes for, rather than making them look like books. I have created a set of two. Below are some still photos and above here is the video if you would like to take a peek. If you have any questions please just ask!


Items Used
Compass (Coming to the store soon!)
 
Flowers, Laces, Chinese Braid
Metal crown, camera, steam punk key
Filigree Metal Piece and Filigree Heart
 
Other Items used
Wood Tags from WhichCraft on Zibbet
Carta Bella Paper "World Traveller"
Rust Guilder's Paste
Stampendous Embossing Powder


Saturday, 8 March 2014

Standing Oval Frame A Gina's Designs DT Project

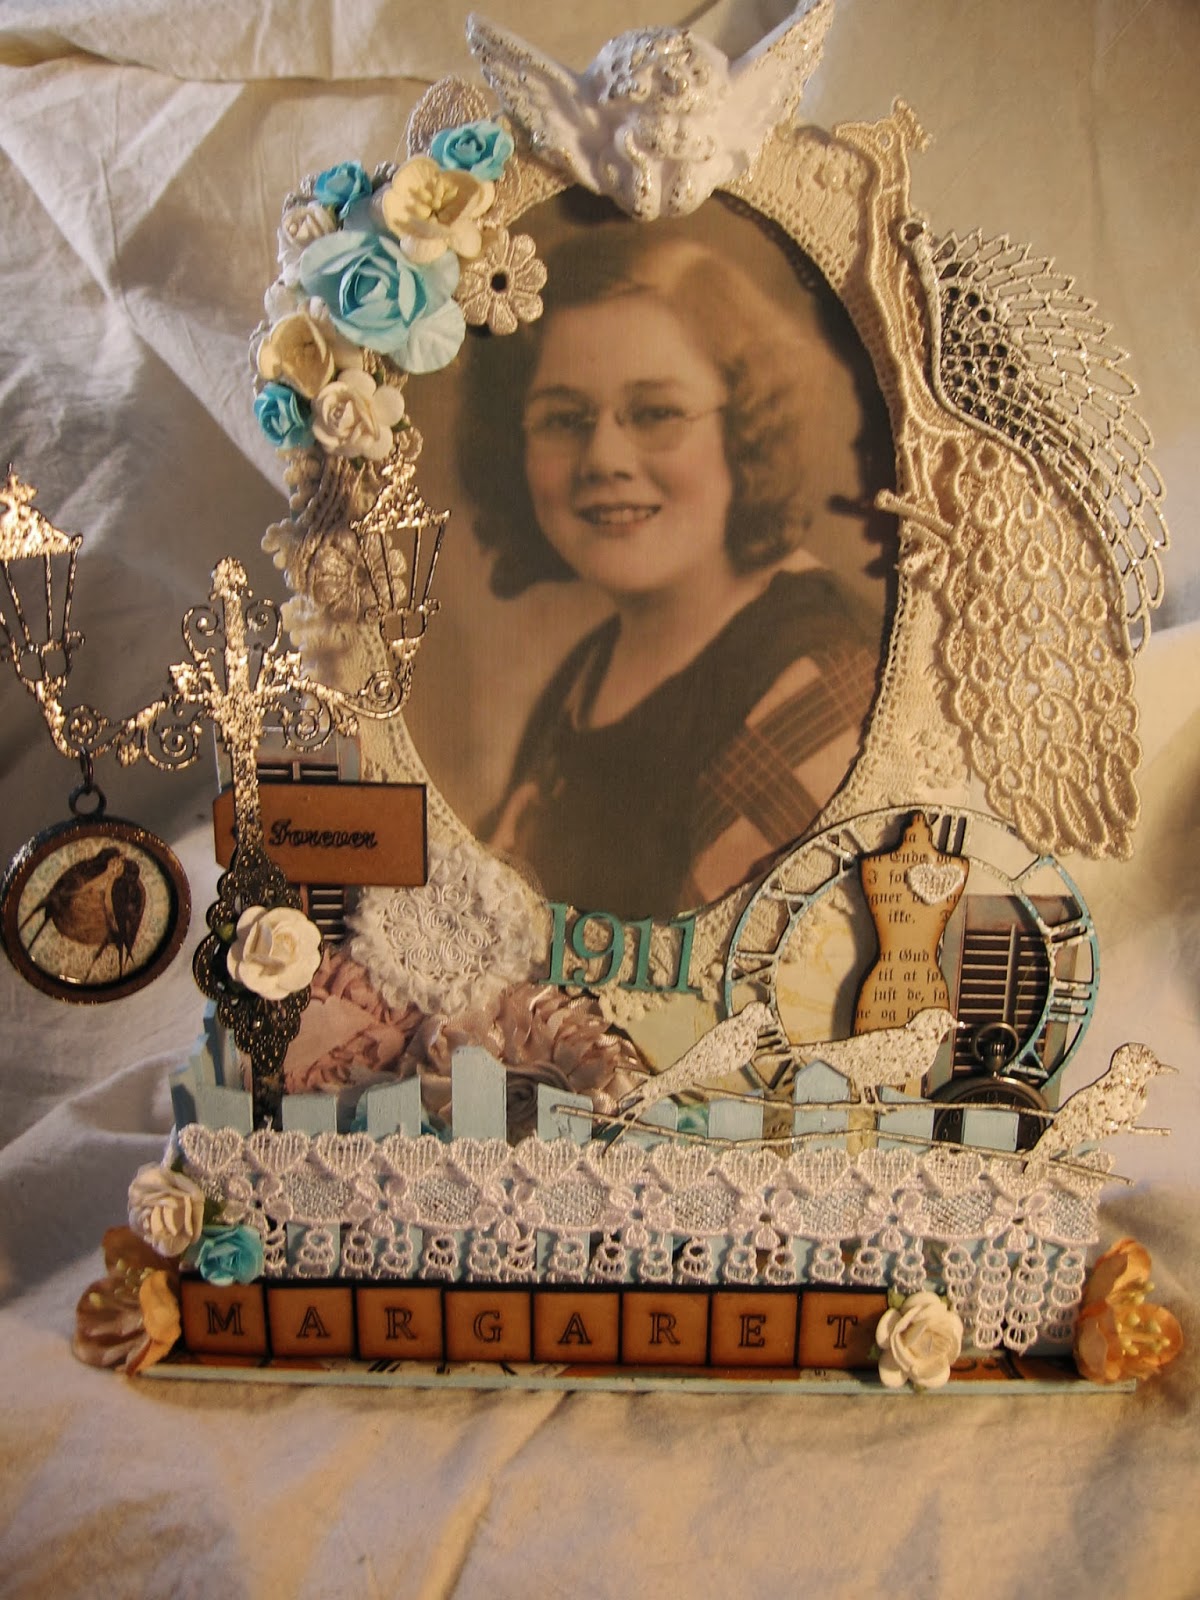
Hi everyone, Kim here!  Today I'd like to share a very special creation. This is the Standing Dome Frame in an Oval Shape.  I have used a vintage photo of my lovely Grandmother, Margaret.  She was the one who first introduced me to crafting.  I think she would be thrilled to be featured on Gina's Blog, and it makes me smile every time I think about it.
This frame comes with a stand and also with some gorgeous picket fencing. I have spelled out my Grandmothers name with some lovely scrabble tiles from Which Craft, and added some white floral lace to the front of the fence.


Above you can see one of our skeleton clocks, and a lovely wooden dress form from Which Craft. I cut out some of the shutters from the Bo Bunny "The Avenues" paper line, and added a metal pocket watch.


Above you can see the Birds on a Wire sitting on the fence.  I embossed them with shabby white embossing powder.


In the area behind the fence, I have used some gorgeous flowers from Craftsupplies1 in a lovely sky blue color. I also added the clock paper from the Bo Bunny paper here and then I topped it off with some rosette trims. 


And Finally here is a shot of the Lamp Post with the Large Round Charm hanging from it. I used some metal embellishments from my stash and another lovely flower from Craftsupplies1. I embossed the Lamp Post with aged silver embossing powder.  On the wooden charm,  I added a bit of aged gold embossing powder to give it some interest.  The birds on the inside were cut from the paper line and glossy accents were applied over top of it. You can see in the background another shutter I cut out of the paper, and topped with a wood sentiment from Which Craft.
Thanks for stopping by today!

Gina's items used:

Other Items used:
Vintage Trims from Lavish Laces
Other Venice Trims & Rosettes from Suhafuah
Wood Dressform, Scrabble Tiles and Forever Sentiment by WhichCraftdoyoudo?
Flowers from Wild Orchid Crafts & Craftsupplies1
Appliques by Cathy's Crazy by Design
Metal Embellishments by ButterBeeScraps
Antique Silver, Shabby White Embossing Powder by Stampendous
Recollections Light Blue Embossing Powder
Paper is Bo Bunny The Avenues

Friday, 21 February 2014

Graphic 45 Couture Boutique Mini Album A Gina's Designs DT Project

Hi Everyone! Today I'm sharing my Boutique Mini Album. I have created this album using the Graphic 45 Couture Paper line and tons of Gina's wood and chipboard pieces.
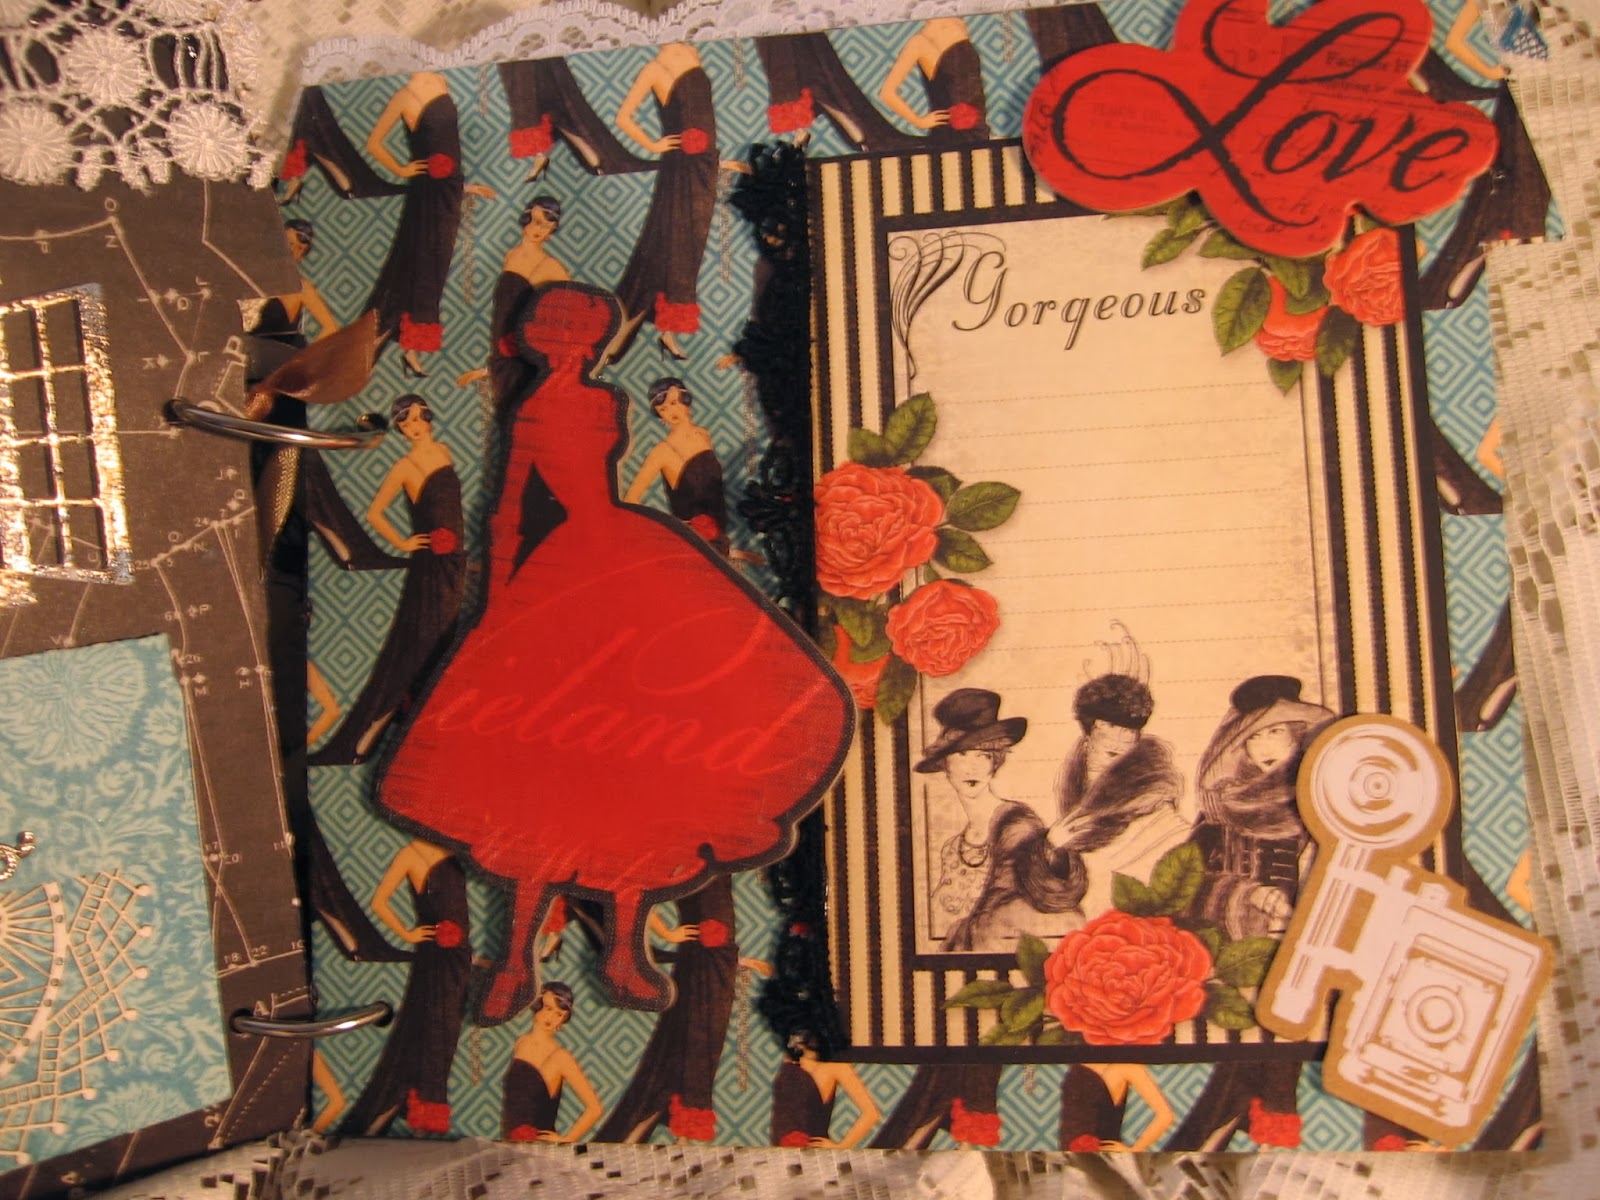
On the cover I have styled the album to look like a vintage Ladies Dress Shop. This Album of Gina's certainly lends itself to being created this way! You can see below I have made an awning and window flower box out of chipboard to give lots of dimension to the front of the book. On the door that comes with the album I have embossed and decorated with more items from the paper. In the window box I used some of Gina's fern fronds, as well as on the top right corner of the awning, further adding to the 3D look. You can also see a lovely dress form featured in the window as well.
Below are the first two pages of the mini album. I have created a  interactive waterfall to place some photos or journaling. The next page features a large pocket, in which I used one of Gina's Tags, and Postage frames. I have also used one of the Stackable Labels on top of the waterfall feature to place a sentiment from the paper line. In the corners at the top of the page are another dress form from the Dressform Shape Set, and a Hanger from the Vintage Seamstress Shape Set.

Above you can see that I have decorated one of the manila tags with layers of different stamps in different color tones and then topped it off with a dress form stamp and spool in black ink.  The Postage frame behind the tag was embossed and features a photo from the paper line, on which I used glossy accents and then added some tiny micro beads for texture.
 
 This page above features a folded photo mat and tag envelope, with some wood sentiments and flowers from my stash.

 Above here you can see a Flip Photo Mat section with chipboard pieces, lace and wood sentiment from my stash. Below I have created this page with one of the Dream Frames from the Delicate Frame and Ornament Set, 2 photo mats and another of the Postage Frames.

 This page below features another Postage Frame, and dress forms decorated to match the page. I have also created a pocket with some cut outs from the paper.

 
Above here is another page from the album featuring another Postage Frame,  intricate doily and cottage window. The top left is a fold down photo mat, and the bottom left is an envelope to keep photos or journaling tags in.
Below is the last page of the album and is one of my favorites. I love the colours!
Back of the Album
I hope you like my mini album, to see more photos, please visit my blog.
Thanks for stopping by today!

Gina's Designs Items Used

Other items used
Graphic 45 Couture Paper
Stampendous Aged Sliver, Shabby White, Aged Teal Embossing Powder
Ranger Fine Black Embossing Powder
Wild Orchid Crafts Flowers
Petaloo Flowers
Craftsupplies1 Flowers
Prima Chipboard Welcome to Paris Set
Seam binding & Lace from my Stash
Maya Road Paper Cameras