Tuesday, 20 October 2015

Rebecca Baer Design Team Hello Card


Good morning and happy Tuesday! Today I have a fun and easy card to share with you featuring the Diamond Weave Petite Stencil from Rebecca Baer.
 
 
At first glance, this card may seem like its a lot of work but I can assure you in a few simple steps you can make a card that will look like you took hours to make!
This is a 5 1/2 x 4 1/4 card.
 

 The first step was getting out the diamond weave stencil and my distress inks.  This stencil is great and you can get so many different designs from it, I just started on one side of the card and worked my way over to the other side. Overlapping the stencil gave a lattice look which I was really please with.

 
The next step is to take a darker Distress Ink in the same colour family and use the lattice part with the flourishes and lines on. Again starting at one side and working your way over gently put your ink on and the impression will be on top of the lighter coloured lattice.


After I was finished with the stencilling, I got out my heart die and ran it through my Big Kick to create a row of hearts across the lower part of the cardstock.
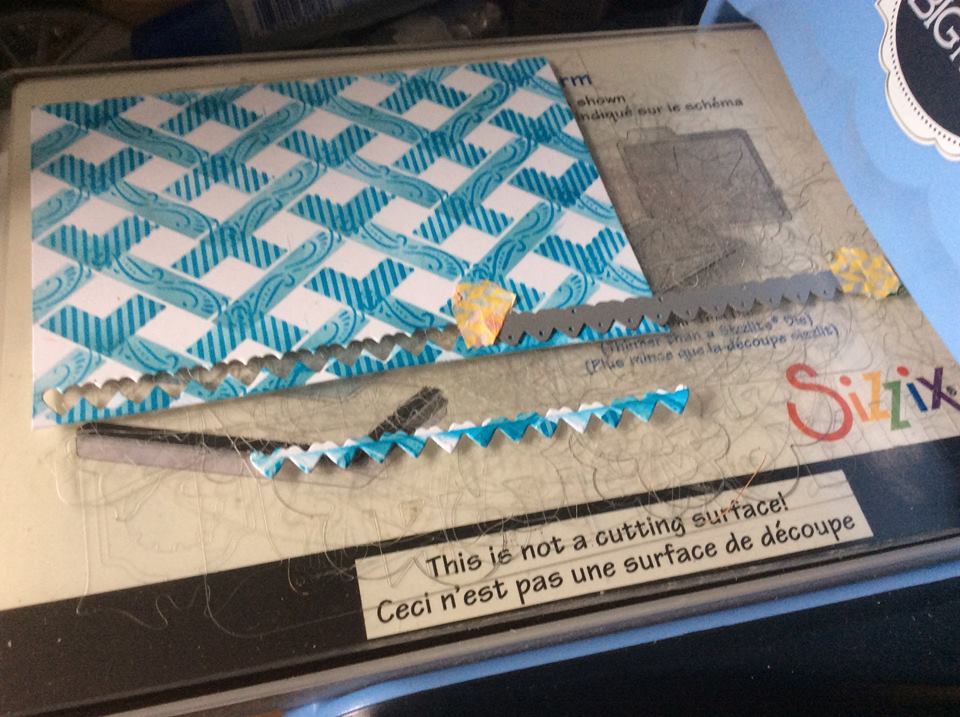
 

I used the same die cut to cut out some more hearts in some fun colours.  I cut the hearts into pieces and added two at a time and created a row across the lower part of the card with the die cuts insetting them in to the part I cut out.


I also used a fun Hello die from Spellbinders and die cut that three times so I could layer the die cuts in a staggered pattern to create dimension. Now its time to put it all together.


You can see here a close up of the hearts, and also the Hello sentiment, I love the staggered look of the die against the lovely lattice background.


I mounted it on some navy card stock, and added a few fun sequins for finishing touches.


I hope you have enjoyed my card today, remember to check out all the fun  items in Rebecca's Store and also the DT blog as well.
Thanks for stopping by!
 
Rebecca Baer Stencil Used
 
Other Items Used
Spellbinders Hello Die
Paper Smooches Heart die
Recollections Card Stock
Distress Ink From Ranger

Friday, 16 October 2015

A Purrfect Day Featuring Newtons Nook Designs

Good morning friends!  Today I have a fun card to share featuring the stamps of Newton's Nook Designs. I recently purchased them and I am truly in love! I am totally a crazy cat lady, and these stamps really are fun and inspiring.
 
I created a 5 1/2 x 4  1/4 card on Recollections White Cardstock and designed my own background using fun images from the Newton's Antics Stamp set.
 
 
Newton's Antics is a really great set of stamps, it has lots of little images that really are great for creating your own custom background with. I used several images from the set and used some bright colours of inks to show them off.  I randomly stamped four images around the cardstock until I was happy with the outcome. I added some clear Wink of Stella to the solid images for some glitter.
 
 
Now it was time to turn to my image from the Naughty Newton Stamp set. This set is so cheeky! Being a Kitty Mom myself, I loved that the images really captured the true personality of our furry friends.  This image in particular reminded me of some fun I have had with my kitties!
 
I used my Spectrum Noir Markers to colour.  I used three of the grey tones for the kitty to create  his fur, and added shades of tan and brown for the flower pots.


The earth that has spilled out of the broken pots was created again with my markers. I used dots and started with a light colour for the background, dotting it around and continued with a few more tones, going darker each time until I was happy with it.
I added some tiny silver bling to the centre of the flowers and some Wink of Stella glitter to the leaves and the plant and kitty collar.


For the sentiment of the card, it is again from the Newton's Antics set, I stamped it on white card stock and added a fun little mouse toy beside it.


I added a few sequins and a fun little bow for finishing touches.
I hope you have enjoyed my card today, and don't forget to check out the links below for the stamps I used and more fun things from Newton's Nook.


Other Products Used
Simon Says Stamp Orange Peel Ink
Hero Arts Shadow Ink Red Royal
Spectrum Noir Markers
Stayzon Ink Black
Recollections Cardstock
Sequins From My Stash
Mini Bling From My Stash


Tuesday, 6 October 2015

My Friend Owl A Rebecca Baer DT Project


Good morning friends and happy Tuesday. Kim here today to share with you a fun card project using the Petite Diamond Plaid stencil from Rebecca Baer. I created this 4 1/2 x 5 1/2'' card using white card stock as the base. 
 I love fall, and was inspired by the season, but also by a dear friend who loves green and owls. I will be sending this card to her for a little thank you. I started off with white card stock and die cut a leaf image out of the blank card, I set it aside to use later.
 
I started off with layering on the Petite Diamond Plaid stencil. This stencil comes with three layers. I love working with layers it gives such a great opportunity for dimension and colour.  There is no right or wrong way to layer up this stencil so I just laid one on top of the other, using my Distress Inks in  three different tones.
Once the plaid design was achieved. I got the die cut leaf out and stamped and inked up a cute little owl. I added some stamped pine cones in the background as well.
 
 
I popped up the plaid piece with black foam tape and mounted it on some chestnut brown card stock from Recollections. Once the plaid piece was in place I used score tape to tape down the leaf and inserted it into the card. By layering on the plaid and not the leaf it gave it some more dimension to the card.
 
Lastly I die cut out the word friend and added some bakers twine and a small flower embellishment.


 Here is the finished product! I love how it came out, and this stencil is fun and versatile, so watch for me to use it again soon, it has become one of my favorites!
 
I hope you enjoyed my project today and will check out all the great items in Rebecca's Store and also the DT blog as well.
Thanks for stopping by!
 
Rebecca Baer Products Used
 
Petite Diamond Plaid Stencil
 
Other Items Used
Cardstock from Recollections
Inkadinkadoo Owl Stamp
Paper Smooches Friend Die
Recollections Flowers
Spectrum Noir Markers
Distress Inks
Kool Tak Black Foam Adhesive


Tuesday, 15 September 2015

How To Create a Stenciled Window Die Cut Card for Rebecca Baer Design Team

Hi friends, today I have a fun die cut window card to share with you all.  This was my first try at creating a window card, but I am please with the results. I hope you will be too!  I was totally inspired by Jennifer McGuire on this project, I have posted a link to her inspiration video at the bottom of the post.
 
I created this 4 1/2 x 5 1/2'' card using white card stock as the base. I got out the Flight of Fancy Stencil from Rebecca's Store and the larger Artiste Stenciler Brush to apply my Distress inks.
 
 
I taped down the stencil with the RB Mini Masking Tape to ensure that my stencil wouldn't move as I wanted a nice crisp image.   I applied several layers of the ink and
 
 
Once that was completed it was time to die cut. I used my inked piece and used more of the RB Masking Tape to hold down my die, (this stuff is invaluable to me now, I just love it) and ran it through my Big Kick.
 
 
I cut out the circle first with my circular die and then cut the word out of the circle, I just found it easier this way.
 
 
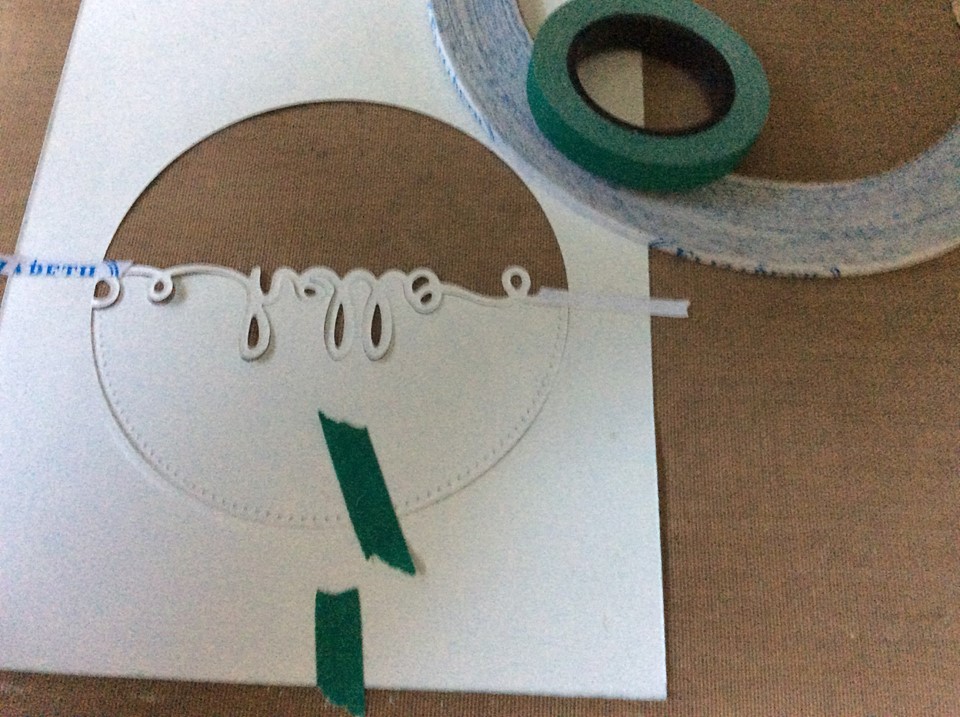
Once I had the circle and the word cut out, I used more of the tape to hold the top half of the circle in place and then attached the word across the middle of the tape. I wanted to make sure I had the pattern lined up on the card as well so it was an easy way to ensure I had the word lined up.
 
 
 Now that this part was ready I added some foam tape to pop this part of the card up and set it aside.


Once that was completed I got out my second piece of card stock and used my embossing paste and the same stencil to create some texture on it.
 
 
I lined up the patterns from the embossing paste card and the Inked up card to ensure the patterns matched, I wanted it to look like one continuous pattern on the card. The die cut hello just floats nicely in the middle, I added a tiny bit of clear foam tape for some stability on the back of it, and some silver sequins to finish it off.


This card does have a lot of steps to it, but I felt it was worth it for the fun look I got.

 
Also, this card created an extra circle die cut, and I used it and the tiny die cut pieces to create a small note card to go along with this card.

 
I hope you enjoyed my project today and will check out all the great items in Rebecca's Store and also the DT blog as well.
Thanks for stopping by!


Other Items Used
Evergreen Bough Distress Ink
Sizzix Hello Die
Die-Versions Circle Die
Wendy Vecchi Embossing Paste
Doodle Bug Designs Sequins
Big Kick Machine
 
Jennifer McGuire's Inspiration Video


Tuesday, 1 September 2015

The Sky is the Limit! DT Project for Rebecca Baer

Good morning and happy Tuesday friends. Today I am sharing a fun DT project for Rebecca Baer. I was eyeing my stencils I had from Rebecca and was thinking what other ways I could use them.  I like to get lots of mileage out of my crafty tools and I think this technique will allow you to look at your stencils in a completely different light.
 
I started off with the Flights of Fancy stencil I wanted to create a fun and whimsical sky look and I thought that just using a portion of the stencil in a repeating pattern would be good for this. I used the circle images on the stencil with different colours of Distress Inks, moving the stencil over and over on the cardstock.


I used the RB Mini Masking Tape to hold down the stencil, this is great tape, and allows you to move the stencil easily over the page while retaining its sticky-ness!  I also used the RB Artiste Stenciller Brush to add the ink, I really love these brushes they flow smoothly on the cardstock and don't seep under the stencil.


I used three different shades of blues in the Distress Inks and continued to move the stencil over the page, overlapping the circles and also leaving some negative white space in the background. 
 
Here is a look at the finished background. I also think this stencil would be good for creating a chain look as well....so that might be on the agenda for another project coming up soon!


 Now its time to add some fun die cuts. I am using a hot air balloon theme on here I thought it would go great with the background. This die set also comes with a matching stamp set, so once the dies were cut I could stamp the image on top and then just colour them in.


Here are some of my die cuts......


I added some glitter to the clouds and banner on the hot air balloon and popped up some of the stars to add dimension. I also added a few fun sequins for sparkle.
 
I matted the 6 x 6 card with some coordinating cardstock, added my sentiment and now it's ready to send to a friend.
 
 
I love that I was able to completely create a different background with a stencil I have used often, this really made me look at all my stencils in a new light!
 
Thanks for stopping by today and don't forget to check out Rebecca's Store and the DT Blog for lots of fun and exciting info!


Other Items Used
Lawn Fawn Blue Skies Die Set
Lawn Fawn Blue Skies Stamp Set
Evergreen Bough, Stormy Sky and Broken China Distress Inks
Spectrum Noir Markers
Doodle Bug Design Sequins
Wink of Stella Glitter Pen


Tuesday, 18 August 2015

2 Cards 1 Stencil DT Project for RebeeccaBaer.com

 
 Good morning friends and happy Tuesday. Kim here today to share with you two fun card projects using the same stencil.  Its amazing that you can get two different looks with basically the same stencil and embellishments. I have used opposite colours of pink and blue distress inks for these 4 1/4 x 5 1/2'' cards.
 
I used the Fleur De Lis Stencil from Rebecca's Store, and taped it down to my white cardstock with some of the mini masking tape that can also be found in Rebecca's Shop.   I used some pink tones in the distress inks and started off with the lightest colour, and gradually moved down the page until I got to the darkest tone.


I ended up using some Simon Says Stamp ink for the final row as I wanted it to be very dark in comparison to the first light row. 


Next I used my die cuts that I had ready. I used the Eiffel Tower and embossed it with two different tones of embossing powder, one in a pewter, and one a verdigris tone to pick up on the metallic look. I die cut out the "hello" sentiment and stamped on top of it with my script stamp and then adhered it to some bright pink cardstock, creating a dovetail at the end of the banner.
 
 
 I stamped a postal image on top and added some sequins and pearls for a final touch.
 
 
For the second card, I used the same stencil, but reversed the way I used it. This time I put my blue tones of inks down first, creating a faux ombre effect going from lightest to darkest.


Next, I taped the stencil down again and got out a baby wipe and rubbed over the stencil removing some of the inks. Note, that this will only work with water based inks, and not with dye or pigment inks.   When I removed the stencil I was left with a lovely shadowy effect and the Fleur De Lis appears lighter than the inks.
 

I used the same die cut Eiffel Tower, and a different script sentiment. I embossed them with some embossing powder, and again, added the stamp, some sequins and bling to finish it off .

 
Here are the two finished cards, side by side. You can see what a fun difference you can get using one stencil for two different cards.


I hope you enjoyed my project today, thanks so much for stopping by and don't forget to check out Rebecca's Store and Blog for more info!
 
 
Other Products Used
Lindy's Stamp Gang Embossing Powder
Ranger Embossing Powder
Prima Stamp
Doodlebug Designs Sequins
Anita's Brand Pearls
Distress Inks
Simon Says Stamps Doll Pink Ink
Multi Matte Medium
Die Versions Dies
Die-Namics Dies