Friday, 28 October 2016

Vintage Lace Sewing Book A Shabby is Chic Boutique DT Project

Good morning Shabby is Chic Boutique Fans!  Kim here today with a fun project that was years in the making!
 
 
Today I am sharing a lace book I have created. This book is filled with antique, vintage and some new trims, making it filled with memories and lush goodies!
 
Some of the laces I used are antique, I have had them in my stash for years, and have finally decided to unlock my hoard vault and create this very thick book.


The base of this book is made from felt. I used FabriTac Glue to make the base of the book and its binding.  All of the fabric images in the book are digital images I created as I wanted to really make this book feel old, worn and very, very shabby. I also stuffed all the images to make them more dimensional, using some quilt batting from my stash.

 
There are tons of hand sewn items on the cover, including the vintage buttons you see in these photos above and below.

 
I have also used the heart applique you see above from SCB, and I also added this gorgeous mini spoon, which I hand stitched to the cover, which is also from SCB.  I also hand stitched on some pearls to give a very feminine touch.

 
Along with the digital images, I also created some sentiments and printed them off on the same fabric. Below I have used the phrase "Sewing Supplies", and written it in French, to pick up on the theme of the book.  You can also see a safety pin attaches the sentiment, to which I added some pearls from my stash and also some fun charms from the SCB store.

 
As you can see the book is quite thick with lush laces, trims and vintage findings.


The flower on the bottom corner of the book finished off the cover nicely. I used bits and pieces of antique trimmings, some satin ribbon and a gorgeous pearl and bling piece from SCB for the center.


The first page of the book is created with a large vintage doily which I coffee dyed. I also coffee dyed some bridal appliques as well which surround the Prima Initial Card in the center. A beige seam binding bow finished it off. 

 
The next page I added some hand made stick pins and more appliques, doilies, and vintage laces. I created a small bow out of some left over muslin, vintage doily, flower applique and heart applique.
At the top of the page you can see another of my fabric sentiments, this one says "sewing".


The next page is all about this lovely lady and her parasol.  I kept the page in mostly deep browns, and added some white wedding appliques, trims and doilies for an accent color.  I also had stitched some vintage buttons and created a tassel out of some trim.
You can also see another of my fabric sentiments at the top of the page.
The doily, applique and dangle trim are from the SCB shop.
 
 
I also hand stitched on a lovely silver tea bag charm in the top right corner of the image from the SCB shop.
 
 
Flanking this lovely lady is another fun image I created. This time the page is all in tan's and dark navy blue. These are unusual colours for shabby chic, but I love them! This lady has a gorgeous fan she is holding and I framed her in some very old insertion lace I have had for ages in my stash.
 
 
The page itself is once again made from an old doily I attached to the felt base. I layered on lots of trims and pretty dangle laces at the bottom.  I created a focal point in the corner with a heart applique from SCB, a vintage doily and some vintage navy silk seam binding from my stash.  

 
You can see in the top left corner a cameo and bling bow brooch from my stash as well.


The second to last page is this lovely little Madame! I layered on lots of white laces for the background and then created a lace "frame" in an oval shape around her. Adding many, rows of vintage trim and gorgeous SCB laces. I also added more appliques to the top and bottom from SCB, and cut up some Venice Trim from my stash with a rose pattern, then hand stitched on some antique buttons with a rhinestone center. A hand made stick pin and hand made flower finished off this page nicely.

 
And finally, the last page. Here is where the sewing supplies reside in this fun little bag attached to the back page. This bag has two pockets, one to hold the sewing kit and the other to hold extra needles and measuring tape.


Finally, we are on the back cover. This image is from some fabric I had and I surrounded the image with more beautiful laces from SCB, Antique from my stash and Vintage findings.

 
I also created an little handmade by me tag for the base of the image.
 
Once again, here is the cover of my "little" book.
 
 
I hope you are inspired by my project today and will try making a vintage book for yourself.  They are so fun to make, and something you can keep and treasure for years to come.
Thanks for stopping by today, please check out Shabby is Chic Boutique on Zibbet.

Wednesday, 26 October 2016

Vintage Inspired Notepad For Under A Fiver! ScraPerfect DT Project

Good morning friends, I have a quick and easy project to share with you today for ScraPerfect.
 
 
I love to make gifts for friends, and this one is super easy and quick to make and under a fiver, thanks to the Best Glue Ever! 
I began with a notepad I got from Michaels out of the $1.50 bin, now that is a bargain! 
 
 
The notepad had a cardboard front on it with a pattern, but I wanted to alter it and make it as a gift, and even though it cost under a fiver to make, it looks like a millon bucks when you are done.

 
I decided to cover the patterned front of the notepad with some lovely vintage inspired paper from my stash. I punched holes in the top of the paper so it would line up with the wire binding on the pad. I also designed a digital image of a vintage lady, colorized her, added some roses to her hat and corner of the photo and some script to really make it feel vintage. I used The Best Glue ever here as well to glue her down. I love that this glue dries so flat, and my printed images do not ripple at all when I use this glue.

 
I of course used The Best Glue Ever for sticking down the papers on the front and back. I love this stuff, and if you are like me and always glue things on crooked, then fear not, Best Glue Ever to the rescue!  It is repositionable! Yes, once the glue dries to a tacky feel, you can then stick it down on your project and then if it is crooked, lift it and reposition it. To me this is Heaven sent, I am forever getting my paper on crooked.


Now its time to start decorating my little note book. I used up all scraps of laces and trims from my stash. See? I told you it would be under $5 bucks to make!
 
 
I even used some left over morning coffee to dye my laces, so I wasn't even using up my expensive sprays in my stash. 

 
I also covered the back and used more left over laces and trims. The brown trim at the bottom is a cut up old doily I had in my stash, it makes great trim for the bottom of things.
 
Once again, here is my finished project.

 
So here is the break down for under $5 dollars.
Notepad from Michaels -  $1.50
Scrap laces from my stash - $1.00
Left over morning coffee - Free
Digital image I created - Free
 
Thanks for stopping by today, I hope you will check out the ScraPerfect store for all the great goodies they have in stock and check out the ScraPerfect Blog as well for lots of great inspiration from the Design Team.


Friday, 21 October 2016

Halloween ATC's Fernli Designs DT Project

Hello Fernli Designs fans! I have some fun Halloween ATC's to share with you today. 
I love Halloween, and doing ATC's are so much fun! Fernli has some great ATC products in their shop, so let's get started on how to make these!
 
 
I used the Fernli Designs ATC Frames Set for this project, and below you can see what the blank wood looks like before I decorated it. These are super sturdy and so fun to make.
 
 
For my first witchy gal, I painted her with gesso first, then added a layer of Prima clear crackle. I wanted all the ATC's to look worn and very distressed. Once the crackle was dry I added some silks acrylic glazes in some lovely fall colours to pick up on the grooves of the crackle.
 
 
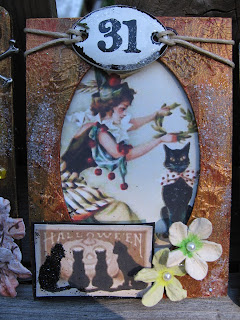
I gave each of the ATC's a similar treatment, only varying the colours of paint slightly. I added several of the Tim Holtz metal pieces, his pieces work so well for Halloween.  The top ATC has a cut out of a moon that I printed off from the internet. All the images in the ATC's are from Google Free images, I love the vintage feel they add to these pieces.

 
I added some flowers to soften the look of the one above and another Halloween sentiment to it featuring some lovely black cats. I added some silver embossing powder to each of the ATC's as well, for some sparkle and shine!

 
For the lovely witchy lady above, I fussy cut out a broom, which was another free image I printed off, and added some flowers, cogs and a Tim Holtz skull and crossbones to the top.  I love this image of this pretty lady and her familiar cat sitting on top of her shoulder!

 
My final ATC is of this cheeky little witch hiding behind her garden gate. I love the look on her face!  I added more cut out images I printed off, a Tim Holtz number plate and a flower from my stash to finish it off.

 
I am really happy with these, and I am going to add them to my ATC Display Tray, which I have pictured below for you. Fernli Designs has a challenge in their Facebook group featuring these ATC Trays, which you can join in here:


Fernli Designs ATC Display Tray


I hope you have enjoyed my project today, and will also join in the ATC challenge in the Fernli Facebook group, its lots of fun!
Thanks for stopping by today!
 

"Fairy Queen" - A Joggles DT Project

Good morning Joggles fans! I am very excited to share this months DT project with you. This time I have created a "Fairy Queen" canvas, using a wooden canvas, and lots of goodies from the Joggles store.
 
 
Here is a list of products you will need to make this project.
Distress Ink Dauber
Martha Stewart Sycamore Paint
DecoCoat Grey Paint
Deco Art Soy Paint Black
Beacon 3 in 1 Glue
Hot Glue
Artificial Ivy
Paper Clay
Shimmers Texturez Sand Colour
Tree Bark
Prima Art Alchemy Clear Crackle
Quilting Pins
Prima Fairy Resin Pieces
Prima Bird Nest Embellishment
 
 
I started off using a wood canvas I purchased at my local dollar store. I am using the backside of this wood canvas, instead of the front to give the impression of a notch in a tree where fairies hide!
 
 I gave the canvas a coat of gesso, then used some of the Prima clear crackle paste and set that aside to dry.
 
 
Once the canvas and crackle were dry, it was time to paint. I used several different tones of paints, and I added gesso to some of the shades to make them lighter. The idea was to make the wood look like the inside of a tree. I kept layering on and layering on until I was happy with the result.

 
I added some black and grey paint as well on top of the brown tones and also some coloured textured paste from Shimmerz, this gave more dimension and gave it more of a "bark" look that I was going for. I know it doesn't look like a tree yet...but just wait ;)

 
After I was happy with the paint, I used some bark pieces I had from some wood my husband and I have stashed away for our fireplace this winter. Please never peel bark off of a live tree if you are going to recreate this project, always use bark from previously cut wood or fallen wood, never from a live tree!

 
I glued the bark down with hot glue in various places all over the canvas. Can you start to see a tree forming?

 
Now it is time to tuck in some moss here and there. I went all over the canvas trying to make the moss look natural, picking out different shapes and colour tones from the bag. I adhered the moss with hot glue, but please be careful in doing this, its very hot stuff when it has hot glue on it.
 
 
I love how the bark looks with the moss, it really ended up looking and feeling so natural.


Now it is time to add some mushrooms.  I created my own, but did watch a tutorial by a super talented lady named Nichola Battilana, who has a fantastic tutorial for making clay mushrooms on her Youtube channel which you can find HERE


I made my mushrooms different, but did use long quilting pins in a similar fashion as she did to create the stem of the mushrooms.  I dry brushed on some brown, black and white paints and also gave the mushrooms a coat of Diamond Stickles as well, because they needed to look like they had fairy dust on them!

 
Here you can see my little mushrooms peeking out from the bark and moss.

 
Continue all the way around the canvas with the moss until you are happy with the result.  I also added some artificial ivy to mine as well to add a different texture and layer to the green moss.

 
Now it is time to cut out the collage images. This one of the fairy with the butterfly crown is one of my favorites! I placed her in the middle, gluing her down with some Beacon 3 in 1 glue. I had a wooden crown from my stash which I added to the top of the picture, as every queen does need a crown!  I added some more stickles to the crown for added sparkle.
 
 
I tucked moss around her as well, as she is peeking out from the centre of the notch in the tree.
I also fussy cut out several of the butterflies from the Papillion 1 and Papillion II collage sheets and placed them fluttering around the Queen.
 
 
I added more Diamond Stickles to each of the butterflies, and also edged them with Vintage Photo Distress ink to make the edged look darker, rather than have the white of the paper show through.


I added a rustic little birds nest with some loose feathers from my stash around it in one of the corners of the canvas.


I also added some Prima resin fairies, which I went over with the Vintage Photo Distress ink and more of the Stickles.

 
You can see the Queen's little fairy helpers are spreading their fairy dust all over the forest!


A finishing touch was some gorgeous Petaloo flowers in the corners to add some softness.


....And again here is my finished piece. 
 
 
The collage sheets from Joggles really made this piece come to life. I love how the butterflies look like they are in flight, and the beautiful Fairy Queen image who is holding a magical court over her fairy and furry friends.
 
Thanks so much for stopping by today. I had tons of fun with this project, and I hope you will give something like this a try too!
Please check out all the great items in the Joggles store!