Showing posts with label Kim. Show all posts

Tuesday, 20 August 2019

How To Create Your Own Ribbon White Rose Crafts DT


Good morning friends, Kim here with my next DT project for White Rose Crafts.
This week the team is celebrating all things Tim Holtz!  
I have a good selection in my stash of Tim Holtz items, thanks to the WRC shop.
I decided this week to play with his Stampers Anonymous Stamps and the Distress Oxides and make my own ribbon.  
Here is how I did it!


I started off with some of my favorite colours of Distress Oxides, Victorian Velvet, Vintage Photo,
I ripped strips of muslin fabric for a blank base, but you could use some printed fabric or any cotton fabric for this project.


I stamped several different images on each of the strips and on some of them, such as the one with the Union Jack from the Euro Elements Set, I used a subtle colour for that and then the darker, vintage photo on top, which is the post card stamp.


I loved the effect of layering the stamps on top of each other.


Because I used the Distress Oxides, the stamping came out quite chalky looking, and if you choose you can give the ribbon a light spritzing with water to make the images more faded looking, as the Oxides are water soluble so water will make the images run a bit. To me that would be a wonderful look if you are going for a more vintage and tattered vibe.


I just love how these came out! This is the first time I have stamped with the Oxides on fabric and they worked amazingly well.


I plan on using my new ribbons on some upcoming WRC projects so stay tuned for that!


Thanks for stopping by today, I hope you have found some inspiration here.

White Rose Crafts Products Used

Tuesday, 7 July 2015

Mixed Media Art Journal Page for RebeccaBaer.com


Hi friends, and happy Tuesday! Today I would like to share with you a fun and colourful art journal page I created using stencils from RebeccaBaer.com
 
I started off with some paint daubers and layered on some bright colours in the background. Once that was completed I used the "All you need is love" stamp from Rebecca's Store.  After that I took the Harlequin Damask stencil and some embossing paste and added it on top.
 
Next I got out the artist tool stencil and this is a layered stencil, so you get two pieces with it. I love that you can do the bottom layer and then ad the fine lines over top of the piece.
I chose black for the palette, and then used some texture paint to mimic paint splatters. I then got some white texture paste and used the top part of the stencil to create the lines on the brushes and palette.

I chose some fun chipboard and flowers to embellish. I used some metal pieces for unusual flower centers.  After they were all attached I got out my white sharpie pen and went around some of the lines from the stencils to highlight them.

I love to art journal, it is always a fun surprise when ever you start off with a blank page, you never know where you will end up!
Thanks for stopping by today, and don't forget to check out all the great items in Rebecca's Store.
 
Rebecca Baer Items Used
 
 
Other Items Used
Metal and Clock Button from Kraftsupplies4U
Ranger Paint Daubers
Sharpie Paint Pen
Shimmerz Textures Paint


Sunday, 17 May 2015

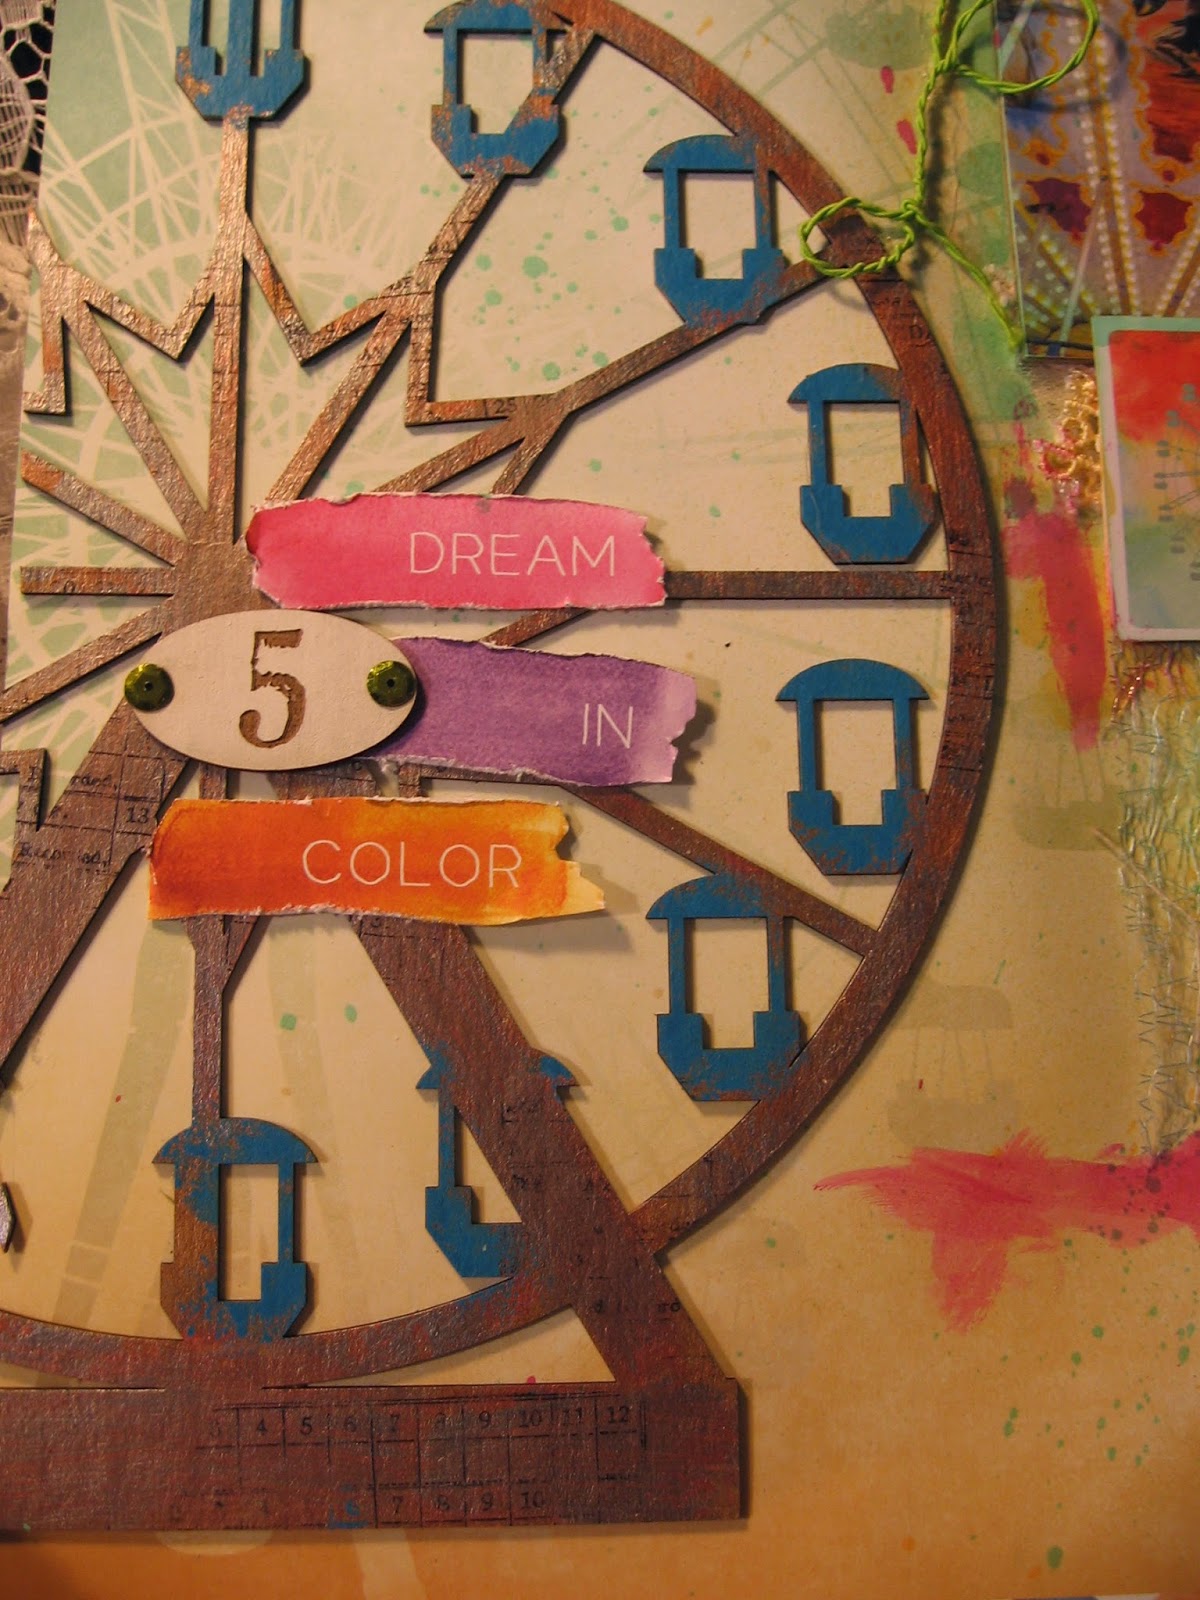
Good morning friends! Today I would like to share with you a layout I created with Gina's Designs circus set. I really love the feeling and colours of a circus, and I was very inspired by this Ferris Wheel piece in the set.
 
 
I started off by creating some texture in the background of the layout and used my sprays and paints to achieve this. I then layered on some more paper from the Dream in Colour collection from Webster's Pages. This set has lots in it, including the balloon I used on the corner of the merry go round picture on the top right of the layout.
 
 
 I used some Ranger paint daubers on the Ferris wheel in copper and silver to give an aged effect and used a brighter blue for the seats. I used more paper from the paper line to add the sentiment "Dream in colour" which frames the number 5 from the number plates set from Gina's Designs.
 
 
Lastly I added one of the word elements which says dream, and some flowers and metals to finish off my project. I really love this circus set, it is so much fun to play with!
Thanks for stopping by today!
 
Number Plates

Other Items Used
Webster's Pages Dream in Color Paper
Petaloo Flowers
Shimmerz Sprays
Ranger Paints
Prima Metal Zipper
 

Sunday, 20 July 2014

Hi Everyone! Today I have my take on an inspirational item. I was on Pinterest and discovered this great inspirational piece which you can find Here, and I decided to do my own take on something that inspired me. This is what I came up with! It not only shows the versatility of Gina's chipboard items, but shows how you can be inspired by something and make it your own!

I have done a 5 x 7 inch canvas for my project and used lots of fun summery colors.

 I have used lots of layers on this canvas, including ripping up paper, melting crayon wax on the butterfly, lots of bright colors of sprays and some pretty flowers as well.


Here in the center I have taken the scissors from the Vintage Seamstress Set and used them as the body of the butterfly, which was another inspirational point for me. I added some gears which I painted white, then sprayed with Shimmerz orange and a Lindys blue colored spray.


I hope you have enjoyed my take on my inspiration.

Gina's Designs Items Used

Other Items used
Lindys' Stamp Gang Sprays
Shimmerz Sprays
Faber Castell Crayons for Adults
Wild Orchid Craft Flowers
Paper, Bead and Stamps from My Stash