Showing posts with label Kelly Creates. Show all posts

Monday, 19 November 2018

Mixed Media Art Journal Page for White Rose Crafts


Good morning friends, Kim here with my next design team project for White Rose Crafts.
This time I have made a page in my art journal using lots of fun items from the White Rose Crafts Store.


I have a full video tutorial at the bottom of the page for you to see my whole process in how I created this page.


I have a full supply list at the bottom for you to check out all the great products I used as well!


Thanks for stopping by today and you can check out more on my YouTube Channel as well or watch this video posted below for my process in making the art journal page.

https://www.youtube.com/watch?v=zTjjUkzMxwk&feature=youtu.be

Have a great day!


Other Items Used
Tim Holtz Ephemera
Versamark Black Ink
Tim Holtz Small Talk Words
Gesso
Dyan Reaveley Art Journal
Stampendous Stamps
Elegant Writer Pen
Rebecca Baer Stencil
Baby Wipes


Sunday, 28 October 2018

Holiday Gift Tags White Rose Crafts DT Project


Good morning everyone, Kim here with a fun project featuring lots of embellishments from White Rose Crafts. This week the team is Embracing our Embellishmental Side! Which means you get $5 off when you spend $30 or more in the Embellishments section of the store (which includes a HUGE array of sub-sections). Use the Code: BLING IT UP at the check out.

This week I decided to create some whimsical gift tags for the upcoming holiday season. I cut out a star shape from some chipboard and covered it with some of the Pastel Chic paper from the White Rose Craft Store.


I covered both sides of the stars with the paper, and distressed the edges of the stars with my distress tool.


Once that was done, I got out some coordinating paints and went around the edges of the stars with the paint, so no plain chipboard would show.


Next, it was time to stamp on a sentiment. I used the Kelly Creates Quotes 1 Stamp Set for this, along with the Tumbled Glass Distress Oxide and also the Tattered Rose Distress Oxide.


Once I had stamped them on, I used some of the Vintage Pearl Embossing powder and embossed the words on the stars. The effect is quite subtle, but I like how it looks.


Now its time to play with the embellishments!  I first went around each of the stars with some wool fibers to make them look festive. After that was done, I got out some of the Recollections Flowers, I used two different sets, The Flower Garden and the Dimensional Paper Flowers in White.


I added some fun with some of the Tim Holtz paper dolls from my stash and then used some of my favorite embellishments from the store, the  Dress it up line!


I used the Dress it up snowflake buttons and mini cookie cutter set for these tags. 


Lastly, I added some Doodles Paper Playground Sparkle Blend pieces from the Vixen set to give the tags some glitter. I used Glossy Accents to adhere them down, which is available in the White Rose Shop.


I finished each of the star tags off with some ribbon from my stash. I left the back of the star blank, so a name for the gift can be added to it.


I hope you like my little star gift tags, and have found some inspiration here today!


Thanks so much for stopping by!


Other Items
Ribbon
Chipboard
Wool Fibers
Tim Holtz Paper Dolls
Americana Paints

Sunday, 21 October 2018

How To Create A Scripty Resist With Stamps & Distress Oxides White Rose Crafts DT


Good morning friends, Kim here with my next design team project for White Rose Crafts.
This week you get 20% OFF everything in the Kelly Creates section of the store. There are some gorgeous stamps in stock and now is the time to take advantage of this great discount! Use the code: GET SCRIPTY at the check out.

I have made a clean and simple card and envelope set with the Neenah A2 heavy weight card and envelope packs in the White Rose shop as my base for my card.
Next, I got out my Kelly Creates Quotes 1 stamp set and used some VersaMark clear ink and stamped my sentiments all around the card stock and then embossed them while the ink was wet with Vintage Pearl embossing powder.


I got out my Distress Oxides in Tumbled Glass and Shaded Lilac and went over the embossed sentiments, blending both colours together until I was happy with the result.


I decided I wanted to add a little Evergreen Bough as well, so ...I did! The Oxides are so beautiful and blend so well, using this technique with the embossing powder creates a great resist for the Oxides.


I heat set the Oxides and then buffed the embossed script with a clean cloth to make the embossed words stand out.  I wanted to activate the Oxides so I got out some spray in a pearl white from my stash, and spritzed over the top of the card. You do not have to use a spray, water works great on the oxides as well.


You can see the droplets in the photo below, it really gives the card a fun effect.


Now it was time to play with the Doodles Paper Playground Sparkle Blend mix called Vixen. I added lots of sparkle to my card with them and used some Glossy Accents  to adhere them, which is available in the White Rose Store.


I really love this Sparkle blend mix, and the fun reindeer sequins!  I also stamped "Wish" and did the same resist technique on a small band for across the front of the card. I used the Shaded Lilac Distress Oxide for the background so it would stand out a bit from the background of the card.


I also decorated the envelope by blending the same colour of Oxides lightly around the edge and stamped the Wish sentiment from the Kelly Creates Quotes 1 stamp set, and finished it off with a few more pieces from the Vixen sparkle blend.


I hope you have enjoyed my tutorial today and have found some inspiration here!
Thank you for stopping by!


Thursday, 11 October 2018

How To Create Faux Tiles With Embossing Folders & Distress Oxides White Rose Crafts LLC DT


Good morning White Rose Crafts fans! Kim here today with my very first Design Team project, and I am so excited to share it.  I have altered a simple wooden frame, and used some fun techniques with lots of WRC goodies!


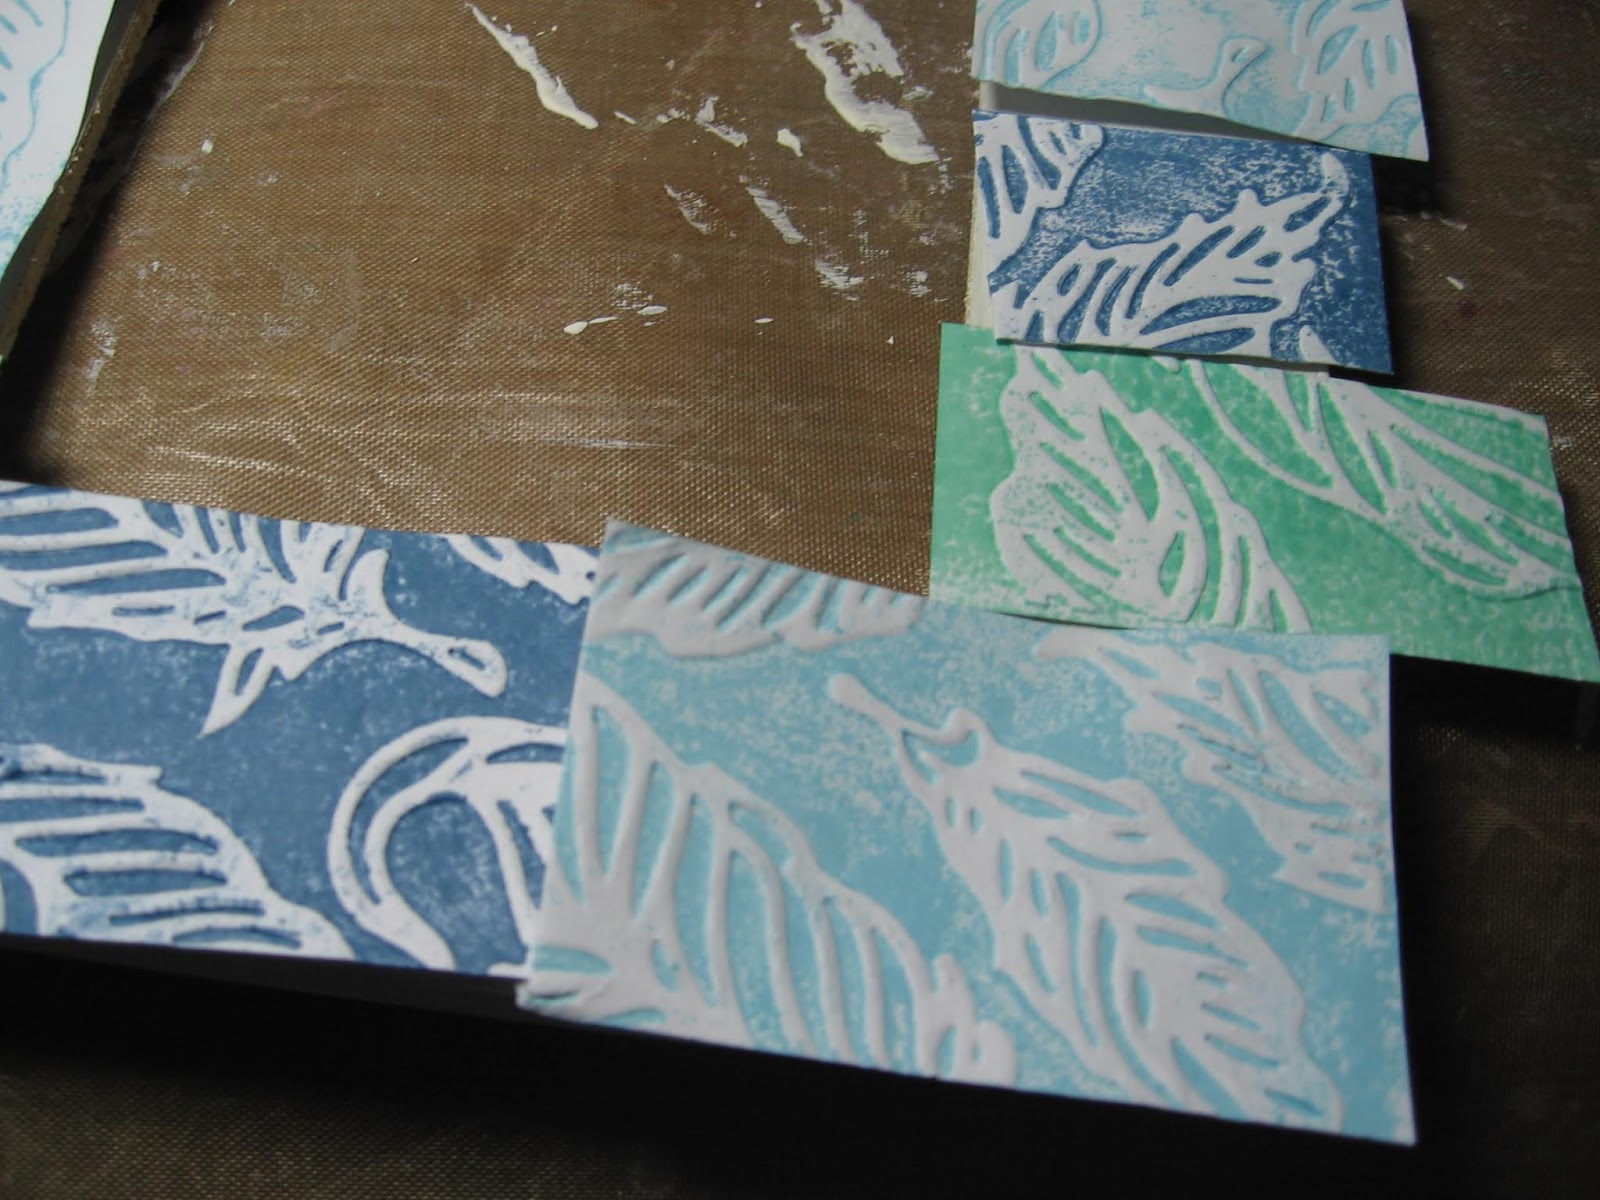
The first step is to choose your Distress Inks and Oxides which you wish to make your tiles into. You rub your inks directly on the flat side of your embossing folder. I am using an Elizabeth Craft feather embossing folder which you can find in the WRC shop.


Ink up your folder generously, I used Faded Jeans for this, and you may have to re ink it and run it through a second time, but be generous with the ink. I prefer the worn look, but for a more solid look on your paper you can run it through as many times as you wish. I used Cracked Pistachio and Tumbled Glass in the Distress Oxides


The result when it is embossed is that you have the dark space which you inked and when embossed, the white from the card stock will be raised up. Its a really cool effect and has so many applications!


The next step is to prep the frame, which I used some Americana Decor paint, but you can use what ever colour you like. 


Once the paint was dry, I took my paper and cut it up into squares and rectangles to make my faux tiles. I laid them out in a pattern I liked and alternated the size and colour of the tiles.


I glued the tiles down with a strong glue and cut off the excess and then sanded the frame to ensure the tiles looked even and smooth around the edges.


I wanted to make some embellishments that matched the feathers from the embossing folders, and decided to make some paper ones rather than use real ones. I did this by adding some thin wire in between two pieces of paper and then cut them into feather shapes, fringing around the edges. I then used my Distress Oxide in Tumbled Glass to give the feathers a bit of colour.


I added some of the Amercian Crafts Ivory Glitter Ribbon to the top of the feathers, and then
I added some glitter from my stash, and a Doodles Paper Playground Sparkle Blend called Vixen, to the feathers for some fun sparkle.


Next I added some pearls from my stash  and the gorgeous Recollections Flowers from WRC in coordinating colours.


I wanted to keep the centre of the frame simple, so I used a piece of paper from the Winter Moments by Craft O'Clock Paper Collection, and also the Breathe Stamp from the Kelly Creates Quotes 1 Stamp Set.


I felt the tiles needed some "grout", so I used some of my texture paste and a small brush and added it around the frame on each of the tiles.


I think the effect is something fun and different, and it gives you a new way to use up those embossing folders and create a fun home decor item.


Thanks so much for stopping by today, I really hope you have found some inspiration here!

White Rose Crafts Products Used

Other Items Used
Wooden Frame
Texture Paste
Paint by Americana Decor - Colour Lace
Pearls