Monday 28 March 2016

Victorian Photo Album a Shabby Is Chic Boutique DT Project

Good morning friends! Today I would like to share with you my Victorian Photo Album I have created with some amazing items from Shabby Is Chic Boutique Store.
 
 
I bought this photo album a few years back, it is a real Victorian photo album and is about 100 years old. The cover was in red velvet, however it was very, very worn and was in bad need of a facelift! 
 
I started off with some white satin from my stash and covered the entire album with that first, then it was time to get out my gorgeous laces and trims from SCB and get embellishing.  I started off with this first lace in the top left photo, it is the large Venise lace trim you see, and this covered the book beautifully. I used the rose and pearl trim for the spine of the book.
 
 
 I added a vintage lady in fabric from my stash to the center and then used the white leaf trim and the pearl trim on either side of her. On the top and bottom I used the mesh embroidered lace and the pearl and rhinestone trim to finish it off.
 
 
I embellished the corners with one of the .96" gold rhinestone and pearl flatbacks on top of the bow applique.
 

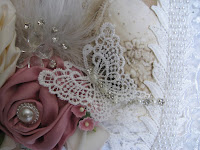
I just love these 3 inch rolled satin roses Amy carries in her store, they were perfect for this project! I added a flatback pearl to the centers of each and even made my own flower as well. I added one of my favorite buttons from the SCB store, the vintage girl button.

 
For the sides I wanted to keep the antique closure that was on the album, so I used the scalloped pearl bridal trim so as not to cover it up, it worked out perfectly.

 
The finishing touches were the butterfly applique with more of the pearl and rhinestone trim attached to it. I added some vintage millenary flowers and foam roses from my stash as well.
 I love how this came out and now I am going to add lots of my family photos to this album I will be a family keepsake now!
 
Thanks for stopping by today and don't forget to check out all the gorgeous items in the
 
 
Butterfly Applique
16 mm Flatback Pearl
Cup Chain
White Flatback Pearl Trim
5.5cm White Lace Bridal Trim
30.5cm Venise Lace
Clear Rhinestone and Pearl Mesh Trim
White Leaf Venise Trim
Pearl Chiffon Flower Trim
Mesh Embroidered Lace
.96" Gold rhinestone & Pearl Flatback
3'' Rolled Roses in Cream and Dusty Rose

Saturday 26 March 2016

Exciting News to Share Joggles Design Team!


Good morning friends! I have some fun news to share! I have been asked to join the Joggles.com Design Team for 2016. My term will be April 1 - Dec 31 of this year. I am so happy to be part of this amazing team. My fellow team mates are super talented, and so inspiring!
 
 
You can find all the info on the new DT HERE
 
So, please stay tuned for more info and some upcoming projects from me starting this April.
I hope you will pop over to the Joggles Store HERE and  also the Joggles Blog HERE check out all the great items they have in stock.
Thanks so much for being part of my happy news!
Have a great weekend!

Saturday 12 March 2016

Romantic Boudoir Pillows A Shabby Is Chic Boutique DT Project

Good morning friends! I am very excited to share with you my very first design team  project for Shabby Is Chic Boutique.  I have created some very romantic and vintage boudoir pillows today with lots of SCB gorgeous goodies!
 
 
First up is this 12'' x 10'' pillow I created. I used a vintage piece of fabric for my background which already had the embroidery on it. I felt this would be a good base for the laces and vintage image I choose to add.
I used my sewing machine to sew up the pillow and then added my image to the center of the pillow and then used lots of the beautiful trims from SCB.


 I used this pretty vintage girl button, butterfly applique and white dangle fringe lace to the corner of the pillow. I love how the dangle lace gives movement to the pillow.


I layered laces around the edges of the pillow and also created this flower as well.  I took some of the SCB seam binding and my Vintage Photo Distress Spray Stain, which I watered down a bit and sprayed the seam binding to match the pillow base in a soft cream colour.
 
 
I used the White Rose Insertion Lace and ran the seam binding thru it all the way around the pillow and with what I had left over created the center of the flower you see below.  I then tacked some more lace and a silver pearl bling for the center of the flower. SCB has such gorgeous bling for flower centers!
 
 
For the bow applique and flatback pearl I used some of the very tiny 2mm rhinestone cup chain Amy carries in her shop to go around the edge of the pearl to add some sparkle.


Here is a close up of the laces that I used to decorate the edge of this pillow. You can see the Rose lace and how lovely it looks with the seam binding running through it.
 
 
For my second pillow, I created a heart shape, and again used a vintage image from my stash as the center to which I framed in more gorgeous laces and trims.
 
 
I created another flower and this time used the gold pearl bling for the center. I did the same technique with the seam binding, this time using my Tattered Rose Distress Sprays to give the seam binding a soft pink tone.
 
 
I also sprayed the butterfly applique and added another of the Vintage girl buttons. I rolled some roses with the seam binding as well, and added more dangle laces around the pillow.
 
 
I hope you have enjoyed my projects today. Please come and join us over on Facebook at our Shabby Is Chic Boutique Store
 
Also check out the other design team members on Shabby is Chic Boutique blog.  Below is a list of what I used on my project, thanks for stopping by today!
 
2mm Rhinestone Cupchain
16mm Flatback Pearl Button
White Tassel Lace Trim
 Vintage Girl Button
Seam Binding
White Rose Insertion Lace
White Butterfly Ivory Lace Bridal Trim
White Bow Applique
Large Heart Applique
Silver Flatback Pearl Bling
White Tassel Venice Lace Trim
Dangling Fringe Lace Trim

Friday 11 March 2016

Magical Metallics - A Crafters' Palette DT Project

Good morning  Crafters' Palette fans! Kim here today and I have a fun share for you featuring lots of goodies from the  Crafters' Palette Store.
 
This month our team was challenged to create something in the theme of metallic. I love this challenge, as I am a huge metallic fan. So lets get started!
 
 
I took this challenge and decided to do up a mixed media wooden artist (or Crafters!) palette with lots of left over bits and bobs from my stash.  I have a photo below of some of the bits I used. I am also using some gorgeous Distress sprays and Paints for this project, but more on them in a wee bit!


 Next, it was time to start gluing on my bits and pieces with some silicone glue.  I used lots of pieces up from my stash, but  Crafters' Palette has a wide range of wood and metal embellishments you can use on your project. Once everything is glued down, its time to get out the Gesso and paint everything white, and by everything, I mean everything!  Fill in all the spaces in between the bits and bobs and make sure it is all covered, this will give your sprays and paints a good surface to cling to, and you will get a truer colour showing from the white background.


Now its time for those sprays and paints I mentioned earlier!  Choose what ever colours you wish, Crafters' Palette has a huge range of sprays in gorgeous metallic colours. I used Tarnished Brass, antiqued bronze and brushed pewter in the sprays and used the metallic pearl copper and silver in the paints. I didn't use the sprays in the traditional way of spraying them on, but rather gave them a good shake and used a paint brush to brush the sprays on. I also used some of the White Paper Flowers from Crafters' Palette and gave them the same treatment with the sprays and paints. I added some pearls from my stash for flower centers.


I started at the top and used a combination of sprays and paints, giving a copper/brass look to the top of the palette, and at the bottom started off with the darkest silver and worked lighter as I went so the middle of the palette would be a creamy pearly white tone.  It gave the whole piece like an ombre effect. I went over the whole piece with the Ranger metallic pearl paint and it really gave it a lovely metallic sheen.


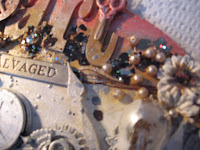
Once the sprays and paints were dry, I used some of my Mica Fragments to add that final touch of glitter and metallic shine I was looking for.
Some more metal beads, a sentiment  and some copper wire from my hubby were the finishing touches!
 
Thanks so much for stopping by today, and don't forget to check out all the fun goodies in The Crafters' Palette Store and keep up to date with the Designers as well on the Blog.


Crafters' Palette Items Used

Thursday 10 March 2016

Home Decor Fun with The Crafters' Palette DT Project

Good morning Crafters' Palette fans! I am here to day to share my next Design Team project with you.
This month our team was challenged to create a home décor piece. I chose to do a frame for my bedroom.  I love the soft colours of this piece and have used lots of goodies from The Crafters' Palette store!
 
 
I started my home décor project with a frame I have had for a while. I purchased it at a local craft store. However, The Crafters' Palette has a huge selection of alterable items in their shop, so I am sure you can find something for your home with their huge selection!


I first used gesso on the frame, then took some of my favorite paper from Kaisercraft and ripped the paper in different sizes and shapes. I adhered it onto the frame with some multi medium matte. The above photo shows the frame at this stage.
 
Once the glue was dry, I got out my stencils and some texture paste. I used a script one from my stash and a fun chicken wire one from Dutchdoobado.  I used my heat gun to speed up the drying process for then then I used a trio of colours from the Distress Spray Stains line.  I sprayed and splattered the colours on the frame as I really wanted it to look old and weathered.
 
 
 The frame came with a cardboard insert, so I used more of the Basecoat paper and covered it over to fit in the centre of the frame.
 

Next, it was time to embellish. My first stop was some of the gorgeous white paper flowers from the Crafters' Palette Store. I love these flowers, they look great white, but also you can spray colour them or even tea dye them. They take colour very well.   I stacked them up and added a pearl from my stash to each of the centres.


I also used some wood from my stash, but again you can find some amazing wood and even tin embellishments in the store, so do have a peek, you will be amazed at all the embellishments they have!
 

I glued down my embellishments, and added a bit of white paint to the wood pieces to tie it all together. The finishing touches were some resin butterflies from my stash and a nice loopy jute bow at the bottom. Some white trim, again from my stash was glued around the frames edge.
 

I hope you enjoy my project today, I had a lot of fun making it!
Thanks for stopping by today and don't forget to check out The Crafters' Palette Store for lots of new
and exciting crafty items!
 
Crafters' Palette Items Used


Tuesday 8 March 2016

Art Journaling with Rebecca Baer Stencils!


Hello friends! Today  I would like to share a fun art journal page I created featuring the amazing stencils from Rebecca Baer. 
 

I started out with my blank page in my large size Dylusions art journal.  I love this particular stencil I am using, its the Mosaic Medium stencil from Rebecca's Store because it has so many gorgeous shapes and designs to it. It was perfect for what I wanted to do.


I took out my Dylusions paint and a trusty baby wipe and created a pattern on the page randomly with several of the colours. Then it was time to use the black paint and the stencil. I moved the stencil across the page to give a cohesive look to the pattern.
 
 
Once I was finished with the black paint, I used a small stencil from my stash with a chicken wire pattern on it and some script in white paint.  Once that was finished I set it aside to dry and got out my lovely Prima Bloom Girl stamp  I used Momento black ink to stamp her and then coloured her in with my Spectrum Noir markers and added some Wink of Stella to her lips and a few of the butterflies to make them sparkle! 


Once I had completed the colouring, I fussy cut her out and used multi medium matte to glue her down to the page.  Then it was time to do some doodling with my white sharpie paint pen. I wrote a poem around the image, and I love how the white stands out against the bright bold colours of the background.
 
 
I am very pleased with the results and as you can see it didn't take much at all to achieve a very dramatic effect in the background using only one stencil. The trick is to use a stencil with a bold pattern against some bright colours.
 
I hope you have enjoyed my project today, and don't forget to check out Rebecca's Store, or join us on Facebook in our Stencil Love group, we would love to see you!
Thanks for stopping by!
 
 
Other Items Used
Dylusions Art Journal
Dylusions Paint
Prima Bloom Girl Stamp
Spectrum Noir Markers
Wink Of Stella Glitter Pens
White Sharpie Paint Pen
Multi Medium Matte
Momento Black Ink