Friday 27 February 2015

Family Life Mixed Media Wall Tag Rubbermoon Cross Promotion


Good morning friends! Today I have a special project to share with you. All this month we have been working with the amazing stamps from Rubbermoon. I chose to use the house stamps, they came with some stamping blanks which were designed by Gina for Rubbermoon. 
 
The stamps from Rubbermoon are so wonderful! They are some of my very favorites to use. I chose to do a little family life scene on one of Gina's Super Large tags. I have used these tags a lot, they are really a staple in my craft room.
I chose to do some mixed media using sprays and texture paste for the background until I got the desired effect I was going for.   I also used paintes and sprays on the stamping blanks and when I was happy with the background I used the house stamps on them, and they came out so cute!
I layered on some laces and flowers, and used some of the sprays on some vintage dictionary paper I had then punched out the butterflies and added them to the tag. I then added some fun words and metal pieces from my stash to finish it off.
Thanks for stopping by today!
Gina's Designs Items Used


Other Items Used
Wild Orchid Craft Flowers
Fireworks Sprays
Paper Artsy Paints
Other Metals From My Stash


Friday 20 February 2015

Dreamroad Mixed Media Canvas Gina's Designs DT

Hello friends! Today I would like to share a mixed media canvas I created.  When I saw the new Flight of Fancy Butterfly Girl from Gina's I was truly inspired to create something fun.  I used this
 5 x 7 canvas and sprayed several colors of my Fireworks sprays on the background. I really wanted this to be a fun and colorful piece. I then tore up some dictionary paper and layered that on top, then added more sprays and some texture paste and white gesso just to soften the look.

 
Once I finished the background, I took the beautiful butterfly girl and used some chunky white embossing powder and covered the whole piece of chipboard. While the embossing powder was still hot, I made an impression with my large script rubber stamp in the hot powder and it leaves behind a cool textured look.  After that was cooled I used some of my iris blue Gilder's Paste and gave the whole piece a light going over to pick up the script.
 
I added some lovely resin butterflies and fussy cut out some paper ones to add to her hair. I love the effect it gave. A few little flowers finished it off nicely.
I hope you have enjoyed my flight of fancy today, and don't forget to check out all the new items in Gina's Store!
Thanks for stopping by!
 
 Gina's Designs Items Used

Other Items Used
Imagine Crafts Fireworks Sprays
Crafter's Workshop ART Stencil
Viva Decor Crystal Gel
Wendy Vecchi Embossing Paste
Prima Resin and Metal
Wild Orchid Crafts Flowers
Graphic45 Le Romantic Paper
Stampendous Chunky White Embossing Powder

Wednesday 18 February 2015

Card Making Fun!


 Hello friends! Today I would like to share with you some cards I have created.  I really enjoy making cards, they are like little canvas' that you can create anything on. So lets get started and I will share what I have done on each individual A4 card. There will be a list of products used at the bottom of each card for your convience.

First up is this lovely shabby chic style card. I love to layer on different papers and laces, in this case I have used Bo Bunny paper.  I distressed each side of the paper and went around them with my distress ink in Vintage Photo.  After I layered on the papers and lace, I added some fun chipboard  embellishments from Gina's Designs.  The chipboard cameo I embossed in Ranger fine black embossing powder, and the needle and thread were also embossed as well. I used the "You leave me in stitches" stamp sentiment from Recollections.


 Items Used
Bo Bunny Madeline Paper
Ranger Embossing Powders
Gina's Designs Chipboard
Lace from Suhafuaha on Etsy
Prima Wire Thread Lime Green
Wild Orchid Crafts Flowers

Next up is this soft and romantic card. I started off once again with an A4 size card, then layered on some Recollections cardstock in light blue. I used a Prima stencil in a demask pattern and some Ranger Distress sprays in Stormy Sky. I then heat set the spray on the cardstock and got out another Prima stencil and some Wendy Vecchi Embossing Paste. While the paste was still wet, I added some Holographic embossing paste to it, and then used my heat gun on it. The result is that the embossing paste and powder puffed up and gave this card a cool dimensional look, I really love how it came out! I added some flowers, vintage lace and stamped sentiment to finish it off.
 Items Used
Prima Stencils
Recollection Cardstock
Wendy Vecchi Embossing Paste
Ranger Holographic Embossig Powder
Wild Orchid Crafts Flowers
Lace and Stamp From My Stash

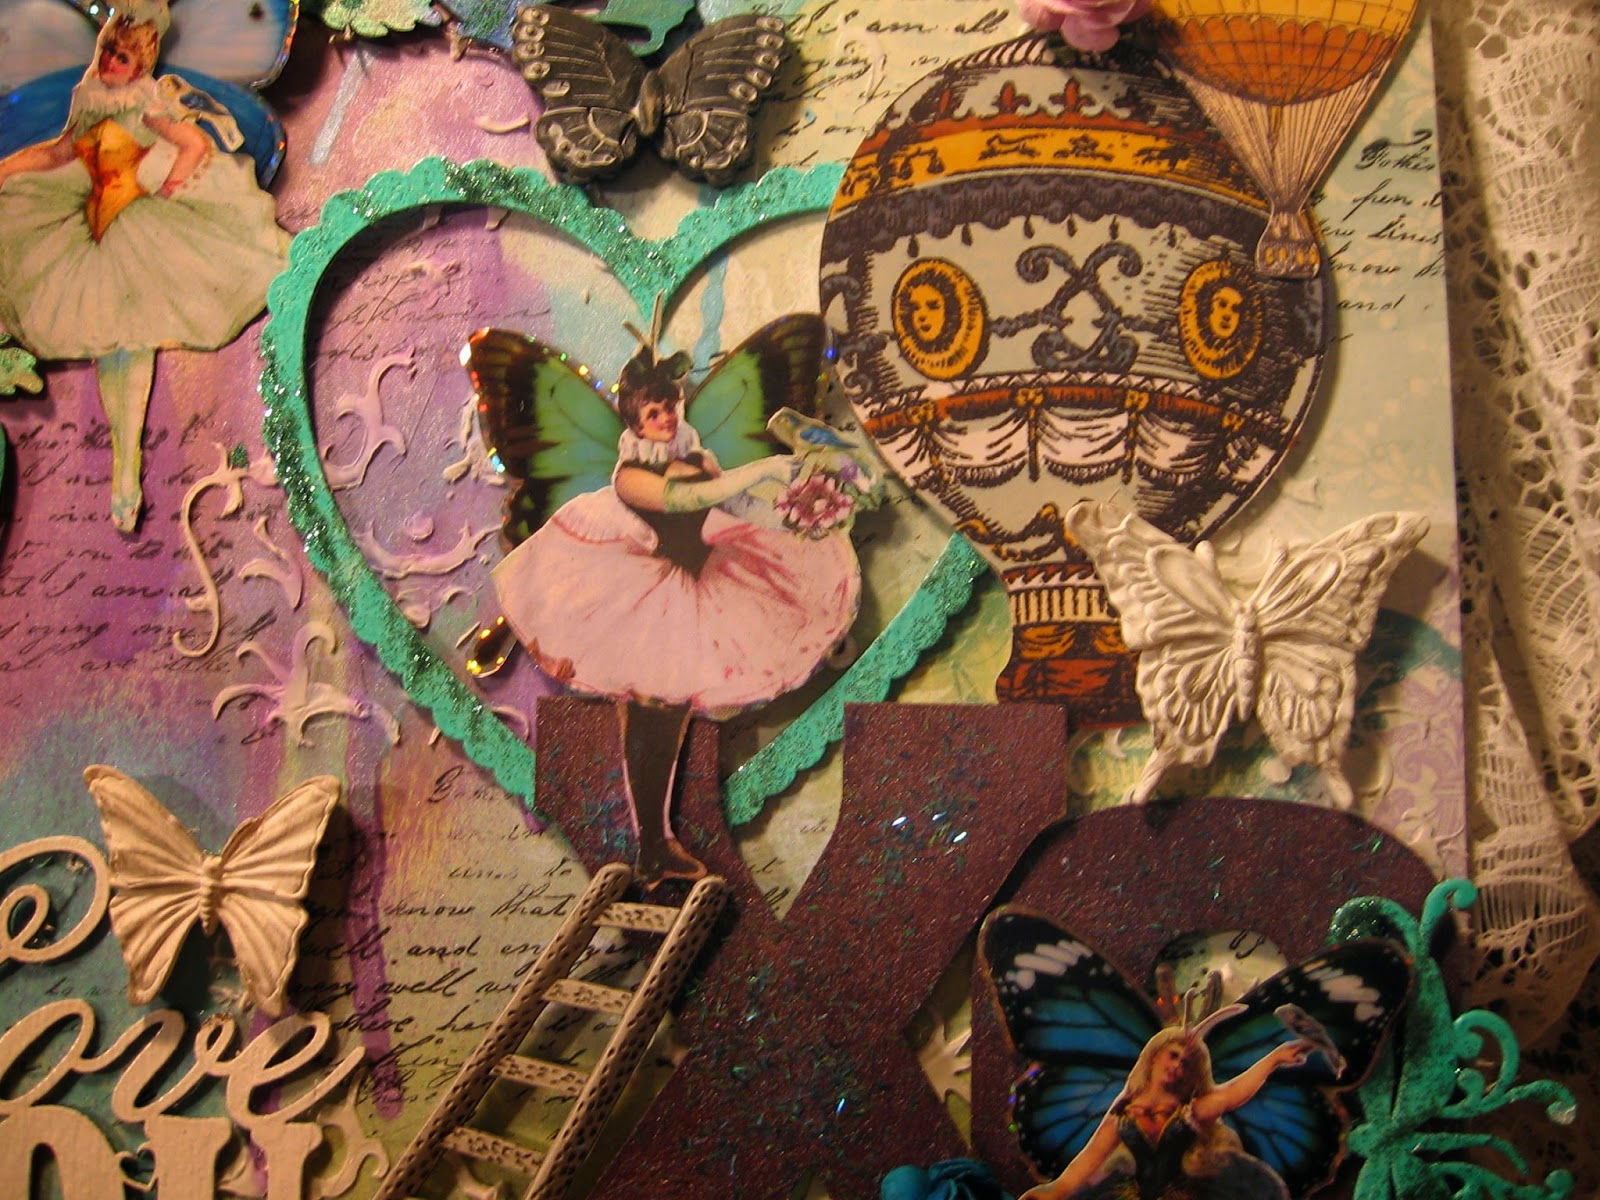
Next up are two cards I created for Valentine's Day. I love doing mixed media work, and this was a fun chance to get out my sprays, paints and even some mica flakes!
The card on the left, is first embossed thru my Big Kick machine with a celtic knot design.  I them layered on some Fireworks Sprays by Imagine Crafts in pinks and light blue tones. Then I got out some fun Tim Holtz rubons and  added them to the background. I added some fun laces along the left side of the card, along with some clay pieces I created myself out of Fimo Clay.  I used another lovely chipboard piece from Gina's Designs, I really love the scroll heart, and added some metals and wood pieces. The final touch was some Stampendous Mica Flakes in Pearl to give lots of texture.

 The card on the right was created with some of the Prima Stationers Desk paper. I distressed the paper then inked around the edges with vintage photo distress ink.  I tore the top right of the paper and added some antique lace peeking out for dimension. I layered more of the papers on, and a wooden atc card which says love, and stamped out a sentiment from a Prima Stamp. A Prima butterfly and some chipboard which I embossed finished it off.
Items Used on Valentines Cards
Gina's Designs Chipboard
Wild Orchid Craft Flowers
Prima Paper, Metal, Wood Birds and Resin Butterfly
Tim Holtz Rub Ons
Fireworks! Sprays by Imagine Crafts
Stampendous Mica Flakes
Lace From My Stash


Next up is a simpler card which I used some dies I cut out from Memory Box Dies. I love the little pouncing kitty cat trying to peek out the window!  I kept this one simple in a black, white and grey theme.  I layered the "Just a note" die cut with 4 layers of the die glueing each layer on top with Glossy Accents to give the sentiment some height and dimension.  I used some lovely flowers and appliques from Kraftsupplies for you in the top corner and a little touch of white flowers in the bottom right corner.
 Items Used
Melissa Francis Papers
Memory Box Dies
Kraftsupplies4U Fabric Flower and Appliques
Wild Orchid Crafts Flowers

Last, but certianly not least, is my lovely Prima Bloom Girl Card. This stamp is named "Gardenia". I really love these stamps they are fun to play around with! I began with the A4 card, layered o some pink cardstock and then stamped the image on white cardstock. I used my Lyra Watercolor Crayons to highlight the face and hair and lips. I also sprayed some Rose Bud Fireworks Sprays in the background to keep the pink theme of the card going.  I used a lovely beaded applique which I cut apart, then sprayed the central flower with more Light Pink Fireworks Sprays. I cut out some flowers from some lace and then layered them on around the central flower. I sprayed one piece in a darker pink and left the others white. I added some resin and ribbon flowers to top them off.  I added a sentiment to the bottom of the card and tucked in more pink lace at the top and bottom for dimension.

 Items Used
Prima Bloom Girl Stamp
Kraftsupplies4U Flowers and Laces
Fireworks Sprays
Lyra Watercolor Crayons

I hope you have enjoyed seeing my cards today, I really had fun making them!  Drop me a line anytime if you have questions!
Have a great day!

Mixed Media Canvas Tutorial featuring Kraftsupplies4U


Hello friends, today I would like to share a project I made for Kraftsupplies4U.  I have created a photo tutorial within this video to share with all of you.  I reallly love working with mixed media products and this was a fun way to incorporate some of the gorgeous items from Kraftsupplies4u.
Enjoy the video, and feel free to ask questions if need be. Have a great week!

 List Of Items Used
Lyra Watercolour Crayons
Shimmerz Sprays
Wendy Vecchi Embossing Paste
Prima Paper and Metal Findings


Friday 13 February 2015

Love You Valentine Layout Gina's Designs DT Project

Hello friends and Happy Valentines Day tomorrow! I wanted to show a rather non traditional Valentine project today, and the X0X0 Wall Hanging was the perfect base for it! I used some of the Enchanted Garden paper from Bo Bunny as my base, then used some sprays in matching colors, and some texture paste and script stamp. This completed the background and I was ready to embellish.
 
 The heart above is from the Build A Layout Love Birds Set which I embossed in a teal color and added some glitter for sparkle. The X and 0 from the wall hanging I also did the same treatment to just using a different color.

Below here is the Love You Script, also from the Love Birds set. I used just some fine white embossing powder, as there was enough color going on, and I wanted the sentiment to stand out.
 The fairies are fussy cut from the paperline and for their wings I used some butterfly stickers I was sent from a friend, they worked out perfectly.
 Finally, in the top corner of the layout, I used the Butterfly Corner, which is a new piece from Gina. I painted it with some Silks Acrylic Glazes in different colours to pick up on the color theme I was going for. I added some flowers to the corner and also used some Prima Resin Butterflies throughout the piece to finish it off.
I really enjoyed making this piece it was a lot of fun to think outside the box and use some very non traditional colors and themes for Valentines Day. 
I hope you will pop over to Gina's Store and check out all the new pieces she has in stock!
Happy Valentines to everyone!


Other Items Used
Silks Acrylic Glazes
Prima Resin, Damask Stencil, Script Stamp and Metals
Flowers from Wild Orchid Crafts
Bo Bunny Enchanted Garden Paper
Bo Bunny Ephemera
Wow Embossing Powders and Glitter Tinsel

Friday 6 February 2015

Mixed Media Art Tag for Gina's Designs DT Photo Tutorial

Hello Friends, happy Friday! Today I would like to share a fun mixed media tag and tutorial I have created especially for the blog. I started off with one of Gina's Large Tags and covered it in vintage Norwegian dictionary paper that I got from a friend. I mod podged the paper on  and then it was time to get out the paints!

  
 I used my Silks Acrylic Glazes and my Prima stencil, first using the stencil with some vibrant colors and then once that was dry, I got out more colors and did a light stripeing effect over the top of it. The result was great as you can see the stencils show through the glazes so you get a lot of color coming through.
 Next it was time to get out the stamps and embossing paste to start layering more on top of the paint. I used some fun words and meanings to pick up on the dictionary paper in the background.

 Next is embossing the chipboard pieces I chose to add to the tag. I love the new Collage Borders Gina has in the store, and also the new Fancy Dragonflies as well. For the dragonflies, I used several different embossing powders, layering each one on, heating it and adding a different color. I really wanted the dragonflies to be in lots of fun tones.
 Here is the result of all the embossing power layering.
 I used some fine black embossing powder for the collage border.
 Here is the finished result! I added some flowers, burlap material along the side, metal gears a frame and game spinner to finish it off.
 I hope you have enjoyed my tutorial today, I had so much fun making this tag!
Mixed media is so much fun I hope you will give it a try!

Gina's Designs Items Used

Other Items Used
Petaloo Flowers
Prima Frame
Tim Holtz Metal Pieces
Silks Acrylic Glazes in Various Colors
Burlap From My Stash
Wendy Vecchi Embossing Paste
Crafter's Workshop ART Stencil