Tuesday 21 April 2015

Art Journalling Fun with RebeccaBaer.com Stencils


Good morning friends, and happy Tuesday! Today I would like to share with you a fun art journal page I created for RebeccaBaer.com.   I am so in love with the stencils from Rebecca's Store, they are usually the first thing I reach for when I get out my art journal. 
This time I wanted to try out a fun technique I saw by Dyan Reveley who created these fun paints I just aquired. They were a perfect match with Rebecca's stencils!
I got out my trusty art journal book, and a baby wipe, and started off with this lovely turquoise background, its super easy to start your background off this way. Then it was time to get my stencils out.  I wanted to try a bit of tone on tone with them, so using the Harlequin Damask collage stencil, and the Artiste Stenciler Brush I added more of the same colour, and voila!  You can see a slightly darker shade of the same colour.  This was the beginning of my layering on my background.

Next I got out one of my favorite stamps from Rebecca's Store, The Fleur De Lis.  I used black stayzon ink and randomly stamped it around the page.
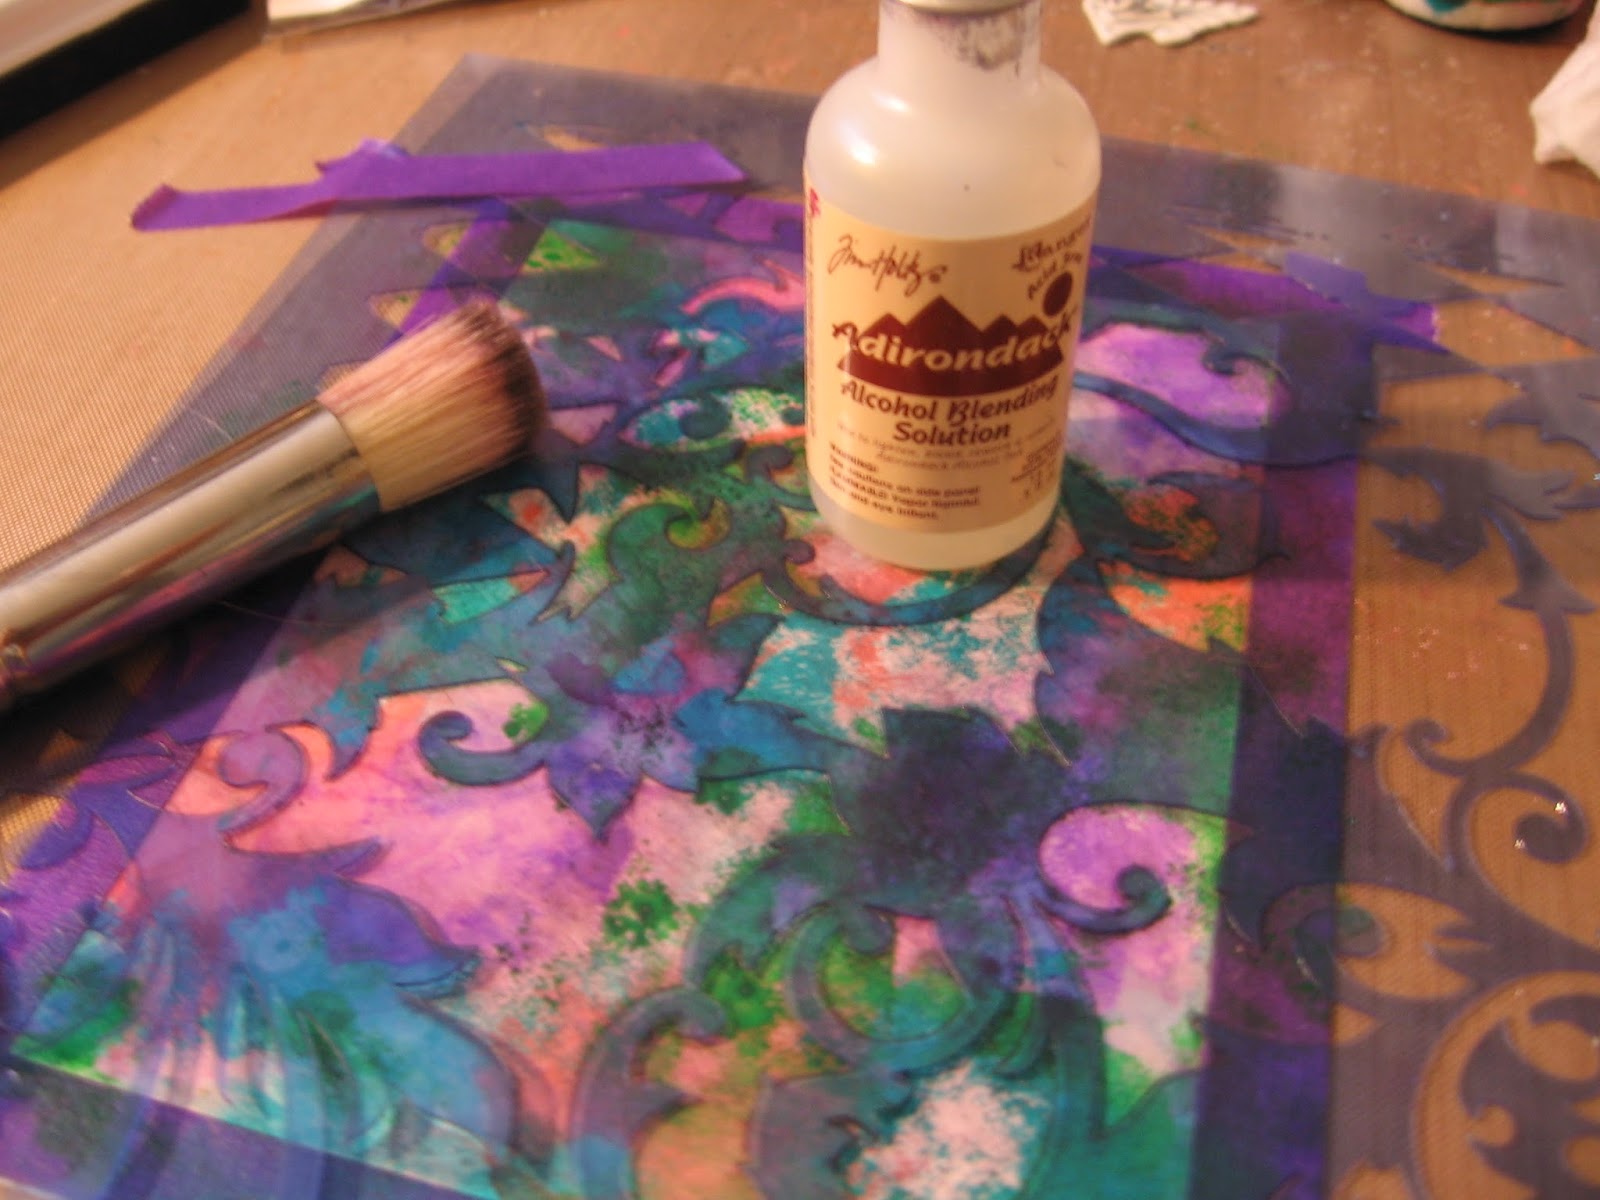
 Once the stamping was complete, I used the Dragonfly Fantasy Stencil with some different colors of the paint. Then the last layer was some white spray to give a subtle effect on top of the stencilling I had already done.  This gives further depth to your background.
 Here is where we are at now. You can see using the stencils with varying colour tones and adding the white on last you get a very deep background full of lovely layers.  The first colours added fade more into the background and the white pops more as the top layer.
 Now here I had a little bit of a brain storm!  I was getting out some of my masking tape from Rebecca's Masking Tape Set, and I thought the colour of it was a perfect match with the tones in my background.  So, I decided to use it as kind of a washi tape in my background to anchor my embellishments I wanted to go in this area. It worked out great!
 After I had layered on the tape, I used a chipboard heart, added more of the Dragonfly Fantasy stencil in white and then added some paper strips for dimension.  I then grabbed some white bloom flowers from my stash and added sprays and purple alchohol inks to pick up on the colours in the background.
 With a few finishing touches with my white sharpie pen, and a lovely quote from Walt Whitman, my page was complete.  Here is the final result below.
I have really discovered a love for art journalling, and Rebecca's stencils and products have really come in handy for this, they make it so easy to create a mini masterpiece!
Thanks so much for stopping by today and don't forget to check out Rebecca's Store.


Other Items Used
Dylusions Paint
White Sharpie Marker
Cracked Pistachio Distress Spray
Ranger Purple Alchol Ink
Chipboard Heart from Gina's Designs
White Bloom Flowers, Acrylic Hearts & Script Stamp From My Stash

Sunday 19 April 2015

Prima Design Team Call 2015


Hello artsy friends! Today I have something very special to share with all of you. While visiting the Prima blog one day, I saw that they were having a design team call.  After my heart skipped a beat, I decided to toss my hat in the ring and try out! I am thrilled to be trying out for the team! Below are the results of my hard work and fun. 
I have always been a Prima girl, right from the beginning of my crafting experience. Prima was one of the first paper pads I bought and some of my first embellishments. I always reach for Prima pieces when crafting. This is why I felt that being part of the Prima team would be a great fit for me.
 First up is a mixed media canvas I created.  I chose to use this round canvas for its unconventional shape and used some of my favorite colors and pieces in it. This canvas features many of my favorite Prima Pieces.  I just adore the metals, resin and stencils!


I have created a start to finish process video for this piece as well. You can see all the beautiful Prima pieces I used on my YouTube Channel HERE
My next project is my Finnabair Sunrise Sunset Art Journal. I have been using this art journal a lot and left the cover for a while, but thought this was a good opportunity to give it some Prima love!  Originally it came to me looking like this:
So you can see it offers up a great deal of space for embellishment.  I started off with my gorgeous Finnabair Vintage Vanity Paper. I love this paper line!  It had the neutral background that I wanted to start with and the color tones worked perfectly with the direction I was going.
I took some of the paper and tore it into strips and layered it with some of my paints in blues and ivory tones. Once I had that as a base, I got out my sprays and texture pastes and used the Prima Sunrise Sunset Flower Stencil.  I then used my Fairy Belle Script stamp in black ink and my background was complete, now for the embellishments!
First up -  my Prima Wildflower Pillar flowers I had in my stash (a staple for me!) I love these blooms as they come in many different sizes and they take sprays, paints and inks so well. I sprayed them in coordinating colors  and added some fun centers to them. You can see one of the Prima Vintage Trinket Zippers on the larger bloom. I then used some more of the Junkyard findings and also a pen nib from my stash for the remaining centers.
I got out some of my Prima Wood Icons, Resin Butterfly in Black, and of course my favorite Junkyard finding and Shabby Chic Treasures. I added some of the Prima Mechanicals Numbers to the handle of a well loved paint brush and got out my Ingvild Bolme Chalk Ink in Teal Damask and added some colour to the brush.  I also used the Rusty Keys Chalk Ink on the Clock Wood Icons as well.  The Create bulb is from the Junkyard Findings collection and I added one of the Waterworks pieces to to top of it for some fun.  You can also see some of the Waterworks around my "ART" stamp.
Next up is two cards I made. Both are unique and different. On the first card, I used the Prima Lyric paper for the background. It's one of my favorites; just love the pinks!  I fussy cut out several more pieces of the collection and layered them on the right side, using foam tape to add further dimension. 
Once that was complete I used my sprays in the background in coordinating colors, using my brush and dipping it in the bottle to get the color where I wanted it to go.
Next, I used the gorgeous and beautiful Prima pieces. I used the ballerina to the left, and added some wings from the Stamp and Add Stamp Set to her back and one of the Prima Clocks behind her head.  The bird on the right is from the wooden Princess Collection, and I use the Prima Mechanicals Roman Numerals on top of the bird. I added the love sentiment to the bottom
and added my flowers and Prima wax cord for a final touch.


Last, but certainly not least, is my favorite Prima Bloom girl! Ok, I don't really have one favorite, because they are ALL my favorites! This is Bloom Girl Sharon, and I had a blast creating her as the focal point on the card.  I again used the Prima Lyric paper for the background on this one, and stamped my Bloom Girl on. I then got my sprays out again and my trusty paint brush and used the sprays in a watercolor effect.
First I gave the areas I wanted to "paint" with my sprays a light misting with water, then went to town adding different shades and tones to her. I really wanted to convey the message of spring, so that is where I went with my color palette.
Once the sprays were dry, I used my modelling paste and the Prima Sunrise Sunset Flower Stencil.  I mixed some glass beads  into the modelling paste to give some extra texture, and used the stencil on the top butterfly and a wee bit down in the far right corner. I love the effect of mixing things into my modelling paste!
After everything was dry it was time to play. I knew I wanted to add some my favorite Prima Wire Thread in Lime, but I wanted to use it a bit differently. I thought to myself, "Self, what would I love to do in the spring time?" Well my first thought was get out and ride a bike! I got out the wire thread and played around with it until I had created a simple little bicycle.  It was so easy to do and fun as well. I was pleased with the outcome. Next, I used more of the Princess Collection wood icons butterflies and roses, and added some lovely Prima Flowers and Explore sentiment.  The finishing touch was the wax thread from Prima tied with a tiny bow in the left hand corner.
I thank you for taking the time to check out my blog post today, and I hope that you will pop back here and visit soon. Thanks for stopping by!

Tuesday 7 April 2015

All You Need is Love Mixed Media Card for RebeccaBaer.com Design Team


Good morning friends! I am very excited to share with you my first official design team project for RebeccaBaer.com 


Rebecca sells the most amazing stencils, art mediums, paints and even digital papers. Today I have created a tutorial featuring several of her items, so lets get started!


I have started off with some Ranger glossy paper and my alcohol inks. I have used the Harlequin Damask Stencil . Rebecca sells these stencils in several sizes, which is great for any form of art you choose.
Once I had my items ready I used some of Rebecca's Masking Tape , I love this tape it holds so well and makes your paper stay put instead of moving around which makes stencilling so much easier! 

Here you can see I started off with my first colour of inks and dabbing it on the paper, I continued on layering my ink colours until I was happy with the outcome.

Next I got out my Harlequin Damask Stencil , my alcohol blending solution and my beautiful Artiste Stenciler Brushes from Rebecca's Store.. These brushes are totally unique and different, in that they have a sheared end which keeps the bristles on top of the stencil material and makes it so much easier to move around on your work.   Using the blending solution and the stencil, I was able to "erase" some of the inks on the first layer and create an amazing pattern with this beautiful stencil.

An unexpected surprise with this technique, was that the blending solution reacted with the paper and the edge of the stencil, and created what now looks like thin pencil lines against the edge of the stencil.  It is actually the solution slightly pooling up against the edge of the stencil, but I totally love the effect it gave!

Next I got out one of my favorite stamps from Rebecca's store, she has a great range of fun stamps, but I really love this All You Need Is Love Stamp. I stamped it on some paper with clear ink and clear embossing powder.  Once that was done I got out my Heritage Flora Stencil and my distress inks. I used several colours and when you do this effect, the clear embossing powder resists the ink and you are able to see it through the colours.

Here is how it looks so far

I used a light blue ink on top of the sentiment itself and then took a baby wipe and burnished over the embossing powder and it reveals the stamp sentiment. Its kind of like invisible ink as it appears like magic under the ink colours!

Now that I had the sentiment done it is time to put the card together. I wanted to add some texture to the card so I got out my Vintage Charm Petite Stencil and added some embossing paste to the corners of the card. I love the white contrast against the colours in the background.  I popped up the matting for the card and the background piece with dimensional foam tape, then added some white ribbon across it and my stamp sentiment. I did go around the edges of the sentiment with some Vintage photo distress ink to have some contrast of colour against the background.


I added some flowers to the corner and some fun pearls and bling for final embellishments.
Here is my finished card!


I had so much fun playing around with all these amazing stencils from Rebecca's Store and I hope you will pop over and see all the amazing goodies she has in her shop!
Thanks so much for stopping by today!


Other Items Used
Ranger Glossy Paper
Petaloo Flowers
C'est Joli Ribbon
Ranger Alcohol Inks
Anita's Bling
Wendy Vecchi Embossing Paste
Imagine Crafts Clear Embossing Powder
Versa Mark Clear Ink