Gorgeous Altered Items Featuring
Lavish Laces
Today I want to share with you all some items I have created for the DT call for Lavish Laces. I am very excited about this, as you know I adore the laces and trims Jaizella sells in her Etsy shop, and use them all the time! This was really a labor of love to create using these gorgeous trims, but also it is amazing to use Wild Orchid Craft flowers as well, because Jaizella now sells them in her shop too!
Here is my first project. It is an altered candle holder. I used a regular drinking glass for this, and the gorgeous new black gothic style lace Jaizella is now carrying in her shop. When I looked at this it reminded me of a stained glass window, so I took the opportunity to create one using this lace.
I used my alcohol inks to create the colours in the back ground by dripping different colours on to the glass, then taking a straw and blowing the ink around the surface. This created a wonderful and colourful look on the glass.
Here you can see some of the colour peeking through the lace. After the ink had dried I wrapped the lace around the glass and added some embellishments.
In this photo you can see the gorgeous rosette applique from Lavish Laces on the front of the piece. I added some bling mesh and there you have a stained glass look effect! It is a quick and simple project to make for a gift or for any occasion.
My second project is a more practical one. It was an old mail wall storage piece I picked up at at thrift store, it was dark brown and rather old and boring looking lol! But I thought this was just the item to help me display my favorite Lavish Laces.
I used the Prima Fairy Rhymes paper for this piece, it was the perfect accompaniment to the beautiful laces. I then created some cardstock holders for my laces to fit into the slots on the piece, here you can see two of them holding the gorgeous lace.
I then embellished the piece with a sewing room theme, and you can see below one of the lace cards being stored inside it.
Here is a full view of the storage piece, it is so handy and now I have my favorite Lavish Laces right at my fingertips!
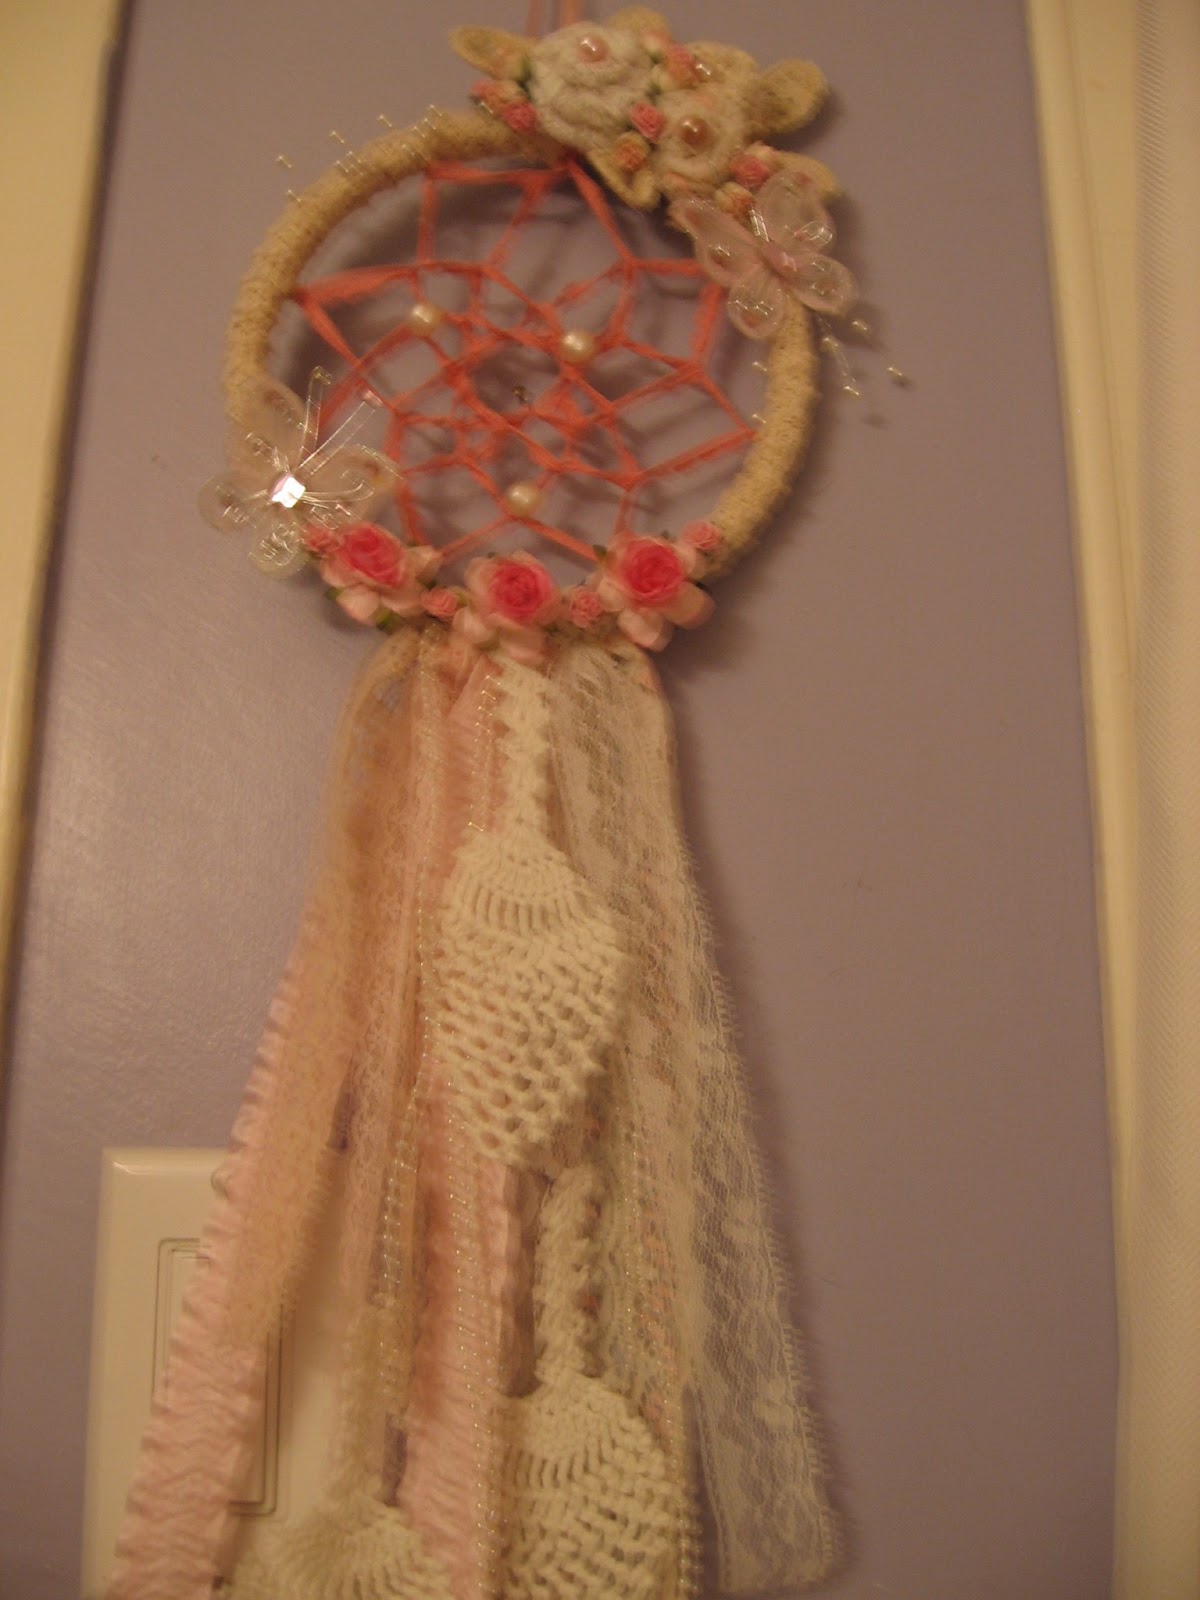
Next I wanted to make something different and a little more decorative. I love dreamcatchers and I have made them often but I have never used lace and this was the perfect opportunity to do so, it was a lot of fun to create!
Here you see the top of the dreamcatcher, all the weaving in the centre is some beautiful small lace from Lavish Laces, I then added a few pearls. The dreamcatcher is made out of an embroidery hoop.
I have also used some more of the Wild Orchid Craft flowers that you can get in Jaizella's shop and added some butterflies to create a shabby chic type of look.
Above here you can see a close up of the rolled lace flowers I made using more of the lace from the shop, I added pearls for the centers and of course more WOC flowers as well.
In the top and bottom picture you can see all the beautiful laces I used at the bottom of the dreamcatcher. I used a vintage doily I had and cut it up to create the look of feathers on it. I also added some iridescent pearl string that Jaizella also sells in her shop.
And Finally a full view of the dreamcatcher. It was fun to create and will be hanging in my craft room now!
Thanks for taking the time to look at my projects and don't forget to stop by Jaizella's shop, Lavish Laces. I have a link at the right side of the page there with the Lavish Laces icon, that will take you directly to her shop. Please feel free to comment or subscribe. I love to hear from you!


