Friday 30 September 2016

The Best Cleaner Ever for your Crafty Tools!! ScraPerfect DT

 
Good morning ScraPerfect fans! I have a little tutorial for you today featuring The Best Cleaner Ever and The Perfect Cleaning Cloth, so let's get started.
 
We all have tools in our craft rooms that take a beating. For me, my heat gun is one of my most used tools. It is coated with two years of paint, glue, embossing powder and all manner of crafty messes. So, I thought I would put the Best Cleaner Ever to the test.
 
Note: Please make sure to unplug your heat gun before you spray anything on it.


I used the Perfect Cleaning cloth and cleaned one side of my heat gun so you could see the difference. I was totally amazed!!


You can really see the difference in what was to what it is now!


I was so impressed with how my messy heat gun turned out, I am going to try it on a few more crafty tools and areas in my studio.


I hope you will try The Best Cleaner Ever and the Perfect Cleaning Cloth, this dynamic duo is great together!
Thanks so much for stopping by to check out my little Fall cleaning job!
 

Wonky Stamped Wood House Joggles DT Project

Good morning Joggles friends! I am happy to share with you my next design team project.
This time I have altered one of Joggles Wonky Wood Houses, and am also featuring some very cool stamps! 
 
 
Here is everything you will need to make this project
POP! Gold Micro Beads
Prima Art Alchemy Aqua Rose Paint
Prima Art Alchemy Ancient Coin Paint
Prima Peony Bloom Spray
Glue and Foils from ScraPerfect
Tim Holtz Metal Crown
Pink Glitter
Stampendous Gold Mica Flakes
Simon Says Stamps Doll Pink Ink
Delicata Gold Ink
 
 Ok, lets get started! First task is to gesso your Wonky Wood House. You can use any of the selection of these houses, and maybe even make a few of them, I love these fun houses!
 

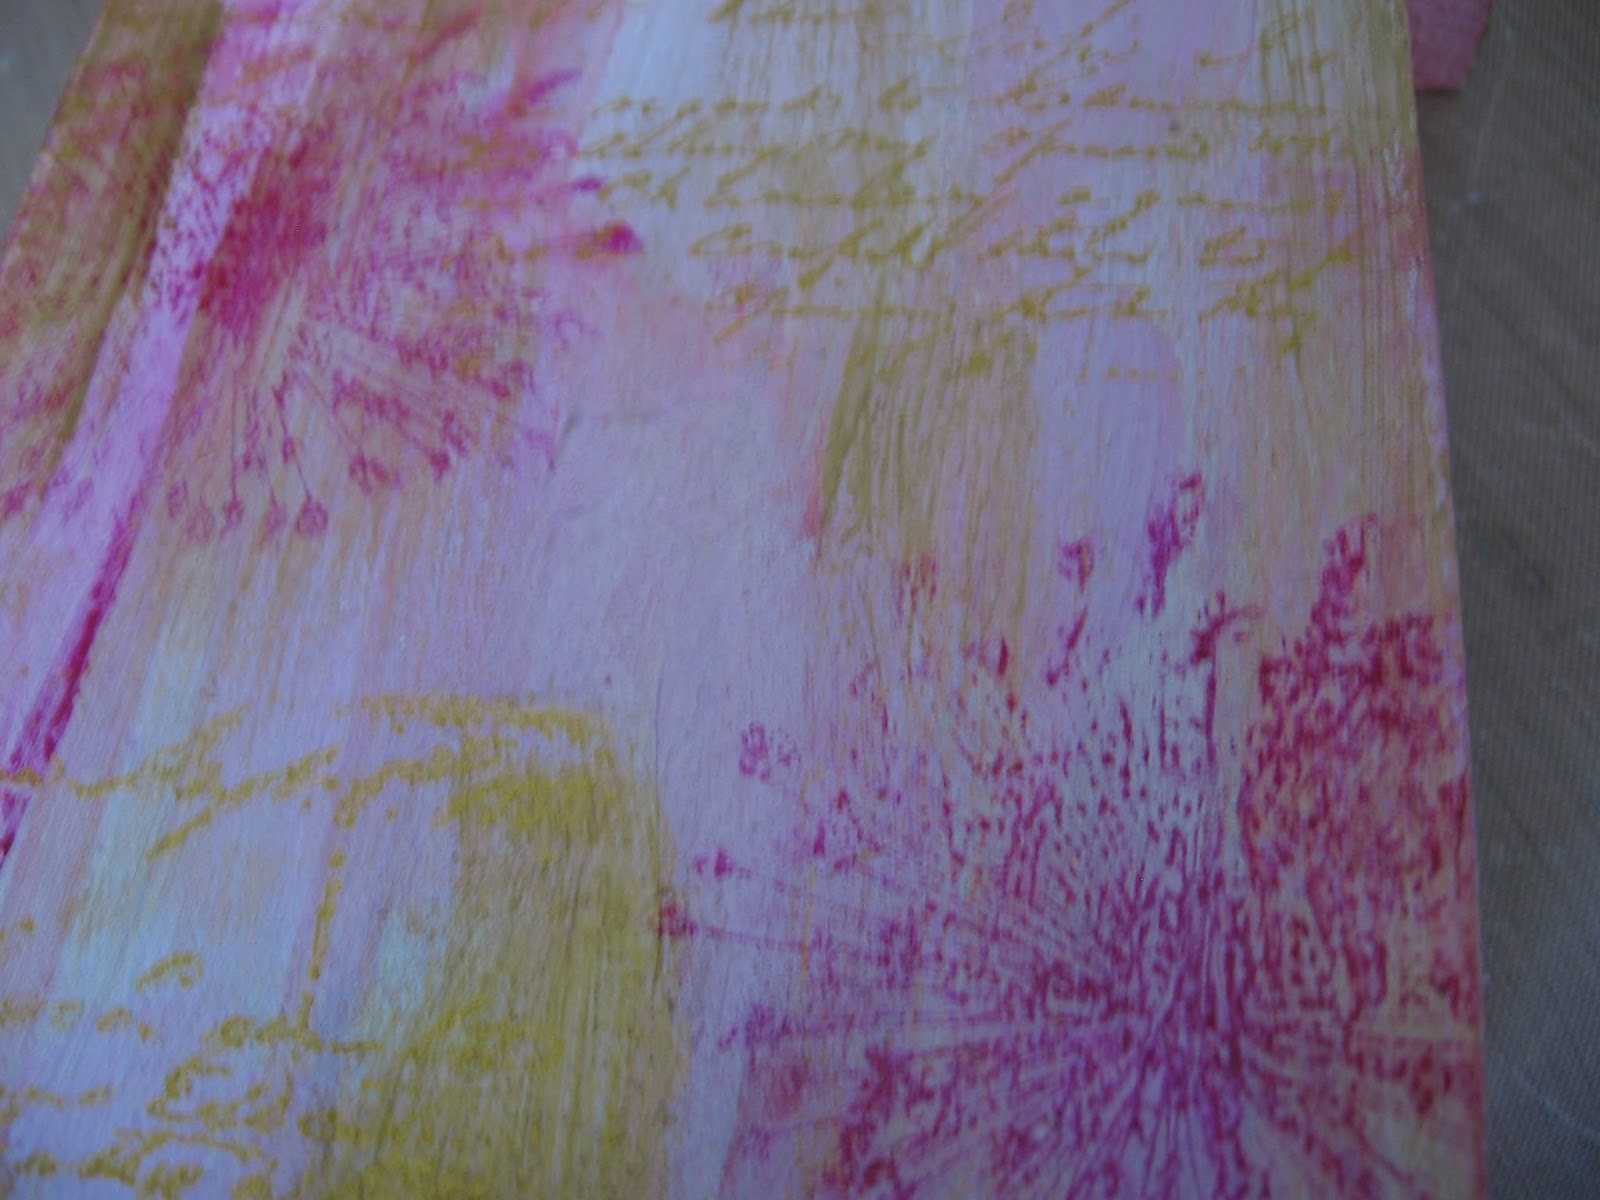
Once the gesso is dry, I sprayed on some of the Peony colour bloom spray in various places. Don't forget to do both sides of your house too!


I dried my spray with my heat gun, then it was time to apply my first colour of paint. I did a light coating just in random spots all over the house, mixing it in with the darker pink of the bloom spray.


Once this was dry, I got out the Ancient Coin paint and did the same thing. Making sure to cover the back and front, and both sides of the house.


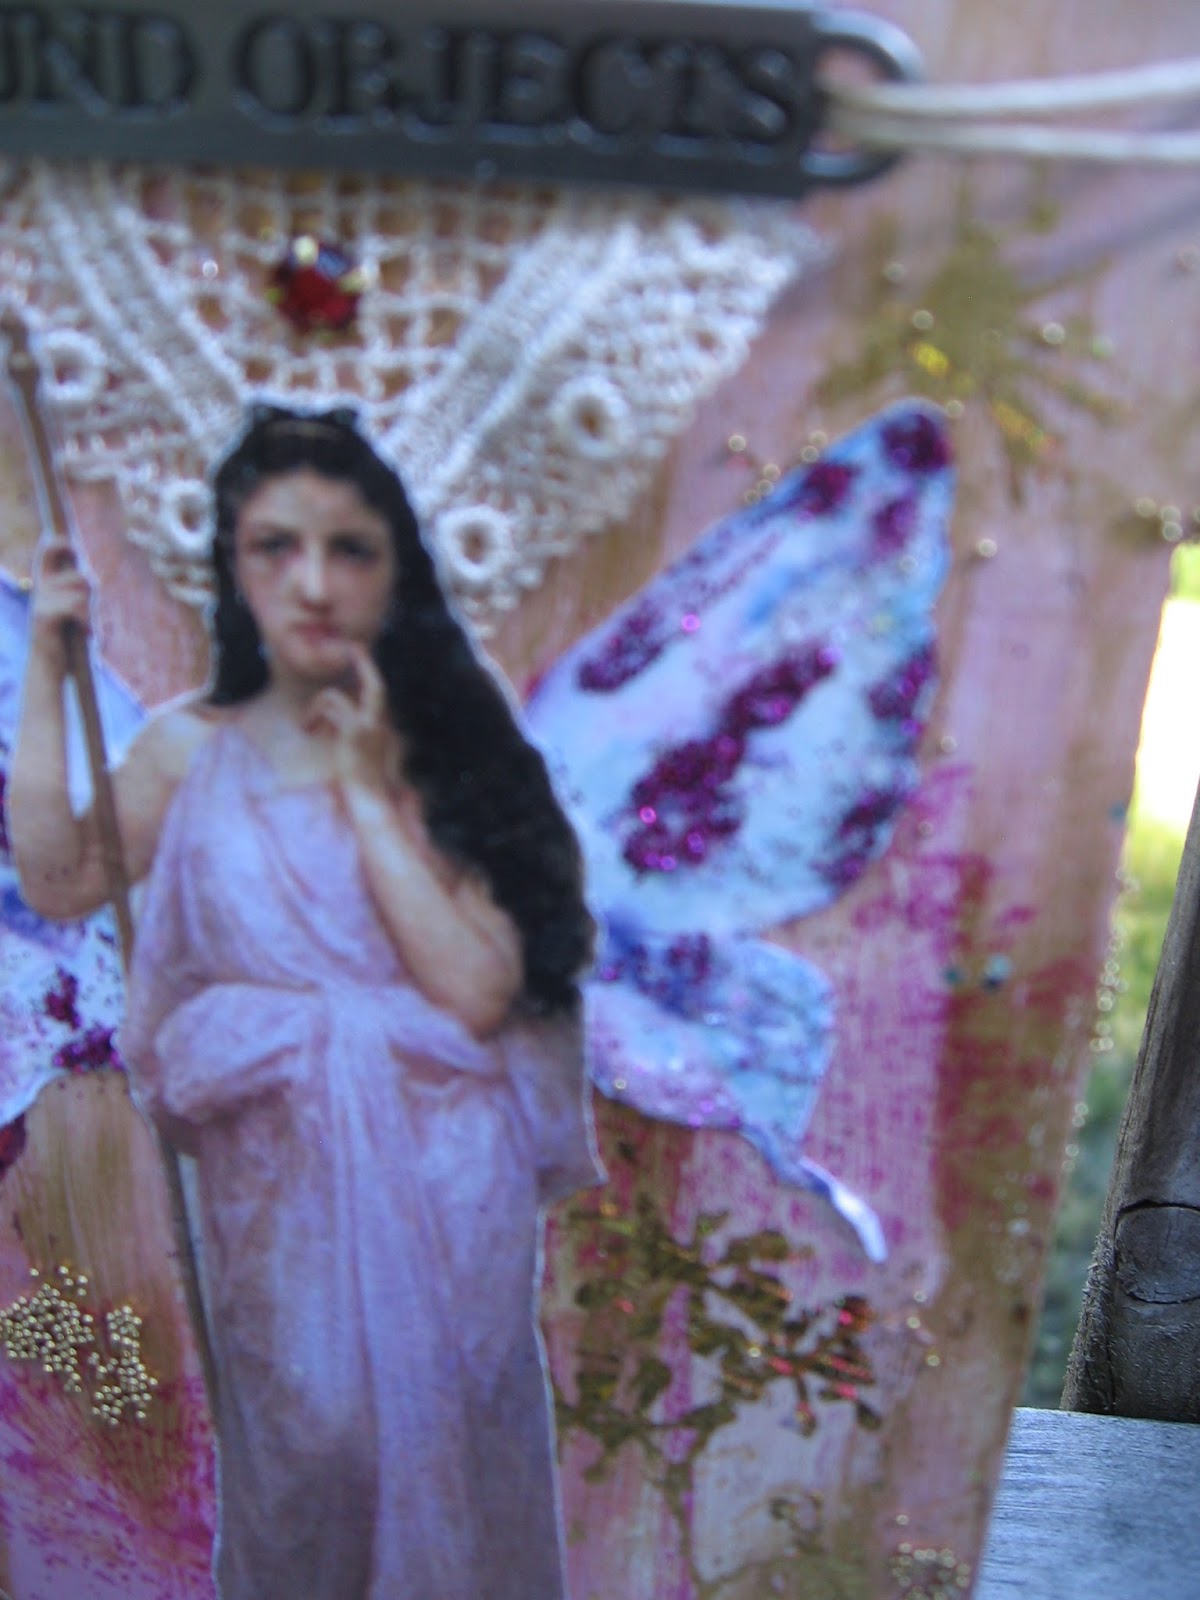
Now It was time to snip out my images from the collage sheets and set them aside.


When the paint is dry, get out your stamps. I used some dark pink ink for my Skeleton flower stamp, and stamped it randomly on the front, back and sides.
 
 
I used my heat gut to set the ink, and once it was dry, I got out my Vintage Correspondence stamp and used some gold ink for that. I stamped this all over the house once again in the same method as before.

 
Here you can see the results of the stamping and paint.

 
Now it is time to work on my cut out collage images. I used some white glue, which dries clear, on the edges of the butterfly below, and also on some of the spots. I then sprinkled the gold mica flakes and glitter mix on top of the glue and set it aside to dry.


For this butterfly, I used the same glue and some pink glitter on the butterfly, also setting it aside to dry completely.


Now it is time for some foiling! I am using the Adhesive Rub Ons from Prima for this. I chose several images and stentiments for this, making sure to do the front and the back.
 
These Rub Ons are so easy to use, just remove the paper backing and rub on your surface using the popsicle stick that is provided in the package.


Once you have your adhesive rub on down, then place your foils, coloured side up on top of it, and again using the stick rub it on, and voila! You have a cool foil image on your project.


Now it was time to add my embellishments. I started with the crown from Tim Holtz and gave it a little foil treatment as well. I also used a vintage heart applique in the middle.


I then glued down my collage sheet images to the front. I cut up one of the butterflies and made them into wings for my fairy lady from the collage sheets. I also added a metal sentiment from Tim Holtz and some twine.
Below here you can see the finished project!

 
The final touch was some gold micro beads for texture, and a few gold sparkly enamel dots as well.


I hope you will give this project a try, it was super easy to do, and so much fun to make as well.
Please remember to check out the Joggles Store for all these items I used.
Have a great day!


Friday 23 September 2016

Pumpkin People Altered Clock ScraPerfect DT Project

Good morning and happy Friday! I am excited to share my next DT project for ScraPerfect.
This time I have altered a Tim Holtz clock in a Halloween theme, featuring the Pumpkin People!
 
 
I have a lot of parts to this project, so I will try to keep it as short as I possibly can. There is quiet a few separate tutorials I could do with this project, but here are some of the highlights!
 
I started off making some of my own pumpkins out of air dry clay. I was inspired my a friend of mine, Mary TheCraftHoarder who created her own pumpkins last year out of clay. I needed some very small ones for the inside and outside of my clock and these are pretty easy to make. Just roll a ball out of the clay, make some lines for the grooves in the pumpkins and roll out a smaller bit for the stem. I added leaves to some of mine, just taking a tiny bit more of the clay and a pin to make the lines on the leaves. I am pretty happy with the outcome!  These take at least a good day and an half to dry depending on how big you make yours.
 
 
Once the pumpkins were dry, I gave them a coat of black paint. I let that dry and once it was, I dry brushed on two different shades of orange. I set that aside to dry and then dry brushed on a couple of different colours of leafy green for the stem and leaves.
 
 
I set these aside and then began to work on the clock. My first task was to take this clock from looking silver and modern to rusted and old. I gave it a coat of black gesso first, then got out some of the Finnabar Rust Effect Paste. I gave it a coat of all 3 of the rust colours in brown, orange and yellow.
 
 
Once the paste was dry, it was time to add more texture to the clock with the Best Glue Ever and some Orange Mica Flakes. I dabbed the glue on various places all over the clock and then sprinkled on the mica flakes.
 
 
I love the look it gave to the clock!
 
 
It really looks all rusty and has loads of texture now.
 
 
For the inside of the clock I gave it a similar treatment. I painted the inside black and then using the Best Glue Ever again, I went in random places inside the clock with the glue and then sprinkled the Stampendous Gold Lux Mix, which is a mixture of mica flakes and glitter.
The result is that it looks like a dark starry sky on the inside of the clock!
 
 
I next got out some of my flowers and gave them a spray with some of my Fireworks sprays in Cantaloupe and Tangelo. Once sprayed, I set them aside to dry.
 
 
Next, I used a wooden gate from Fernli Designs. I gave it dabbling of some orange and grey paints. Then using The Best Glue Ever, placed some of the glue in spots on the fence. I let this dry until it was tacky.


Once the glue was tacky, I used some of the orange Transfer Foils on top of the fence.


You Can see below the results of the paint and foils.

 
 I also used the Best Glue Ever to glue on some rhinestones on the metal sentiment and the wooden key.

 
I also used the Best Cleaner Ever and the Perfect Cleaning Cloth to clean the glass for the face of my clock. It worked so great and got all the fingerprints off the glass from me altering it.
 
I then began to add my pumpkins and embellishments to the inside of the clock. I put some moss down first to give the pumpkins something to rest on. I also added some flowers and butterflies as well.  On the back piece of the clock I glued down the fence and my Pumpkin people which I printed off a free image from Pinterest.


I also glued some of my little pumpkins to the top of the clock, added a few bits of moss and butterflies.


As a finishing touch I added some of my flowers I sprayed and also some Petaloo flowers in coordinating colours. I also added some seam binding, which I also sprayed and the wooden key from Fernli Designs.


 I hope you have found some inspiration here today!
Please check out the ScraPerfect Store for the items I used here today and lots of other great goodies to craft with!
 
 
Other Items Used
Tim Holtz Clock
Tim Holtz Sentiment Tag
Finnabar Wings
Petaloo Flowers
Flowers From My Stash
Steam Binding From My Stash
Iced Enamels Tattered Mica
Stampendous Gold Lux Mix
Free Pumpkin Image from Pinterest
Black Gesso
Moss and Fern Leaves From My Stash