

Good morning everyone, Kim here today with my next DT Project for Fernli Designs. This time I have altered one of the lovely birdhouses Fernli carries in their shop.
I used the Large Bird House, which you can find HERE

I painted the house with some white gesso, then gave it a coat of some Prima white crackle medium over about 75% of the house, leaving some areas with just the white paint as I wanted it to look like worn plaster.

Once the crackle medium was dry, I went over it with some Vintage Photo Distress Ink to give the cracks more depth.
Now it was time to move on to making the roof.

I measured the roof and used some metal tape from my hubby's workshop, which I raid often lol! I ran the tape thru my die cut machine in a script embossing folder, to give it some texture. I then got out some Martha Stewart copper paint and gave it a once over, also I used some soft teal paint from my stash in random places, as I wanted it to look like copper that had aged with patina.
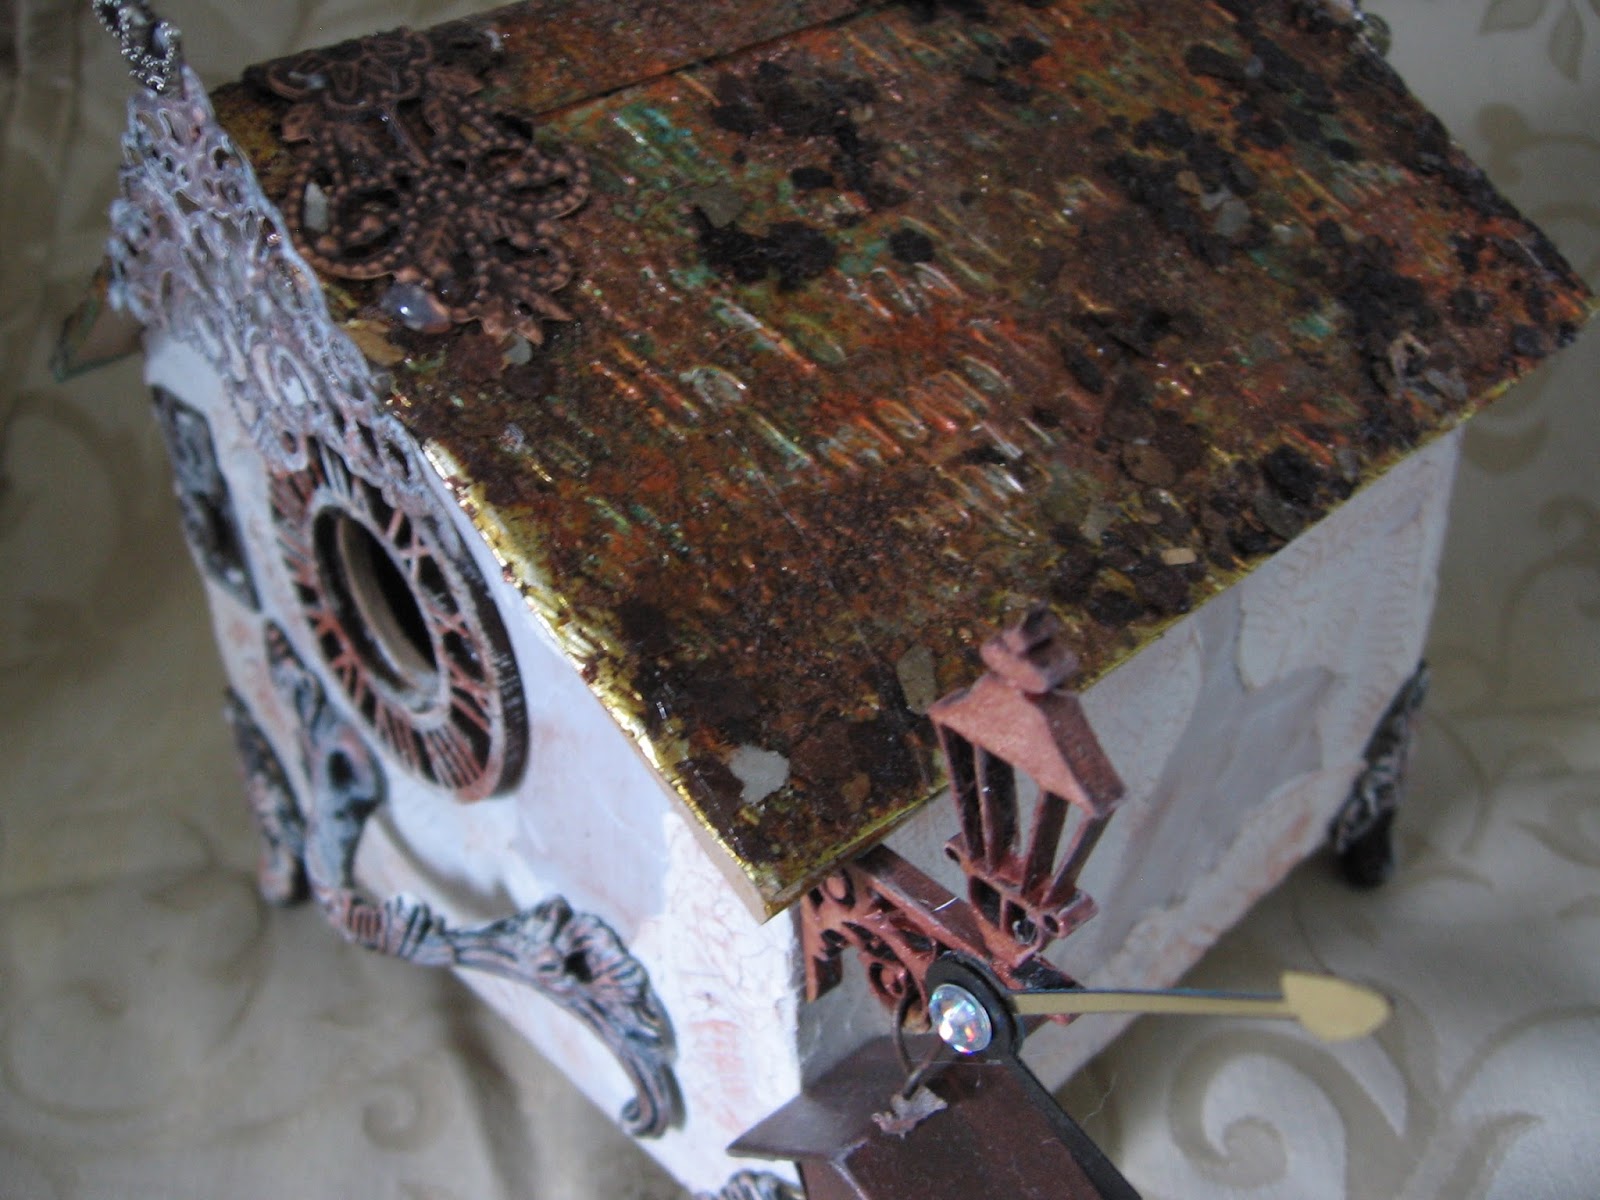
Once the paint was dry, I used some Stampendous metals embossing powder on it in random spots, then a final touch of tea dyed mica flakes, also from Stampendous.

Now that the little house was ready, it was time for embellishments. I added this lovely little light to the side of the house also from Fernli Designs. I also added some funky clock hands and bling for fun.

For the roof, I added a metal corner from ButterbeeScraps, which I gave a light coat of gesso to, to shabby it up a little, and of course I had a finishing touch of a little crown from my stash.

I used some more items from my stash, a metallic handle for the little birdies to perch on, and what is a house with out house numbers? So I added some more little numerical metals from my stash to give the house a number.

I figured the house needed a little birdhouse of its own, and I had this tiny metal one in my stash which I hung from the lamp!
I had a little wooden clock in my stash that fit perfectly around the hole in the front, and I added some feet for a finishing touch.


Once again, here is the finished project!

I hope you have found some inspiration today, and will check out all the goodies in the Fernli Shop!
No comments:
Post a Comment