Showing posts with label altered art. Show all posts

Friday, 11 January 2019

Follow Your Heart Mixed Media Bird House Featuring DecoArt


Good morning friends, Kim here today with a fun project for Deco Art! I purchased this wooden bird house at my local dollar store and I really loved the scroll work on the front of it. I knew immediately that it would be altered with lots of amazing products from DecoArt!


I started off with the DecoArt Media gesso and gave the house an all over coat with that. Next, I used the Americana Decor Chalky Finish in Lace over the top of the gesso. 
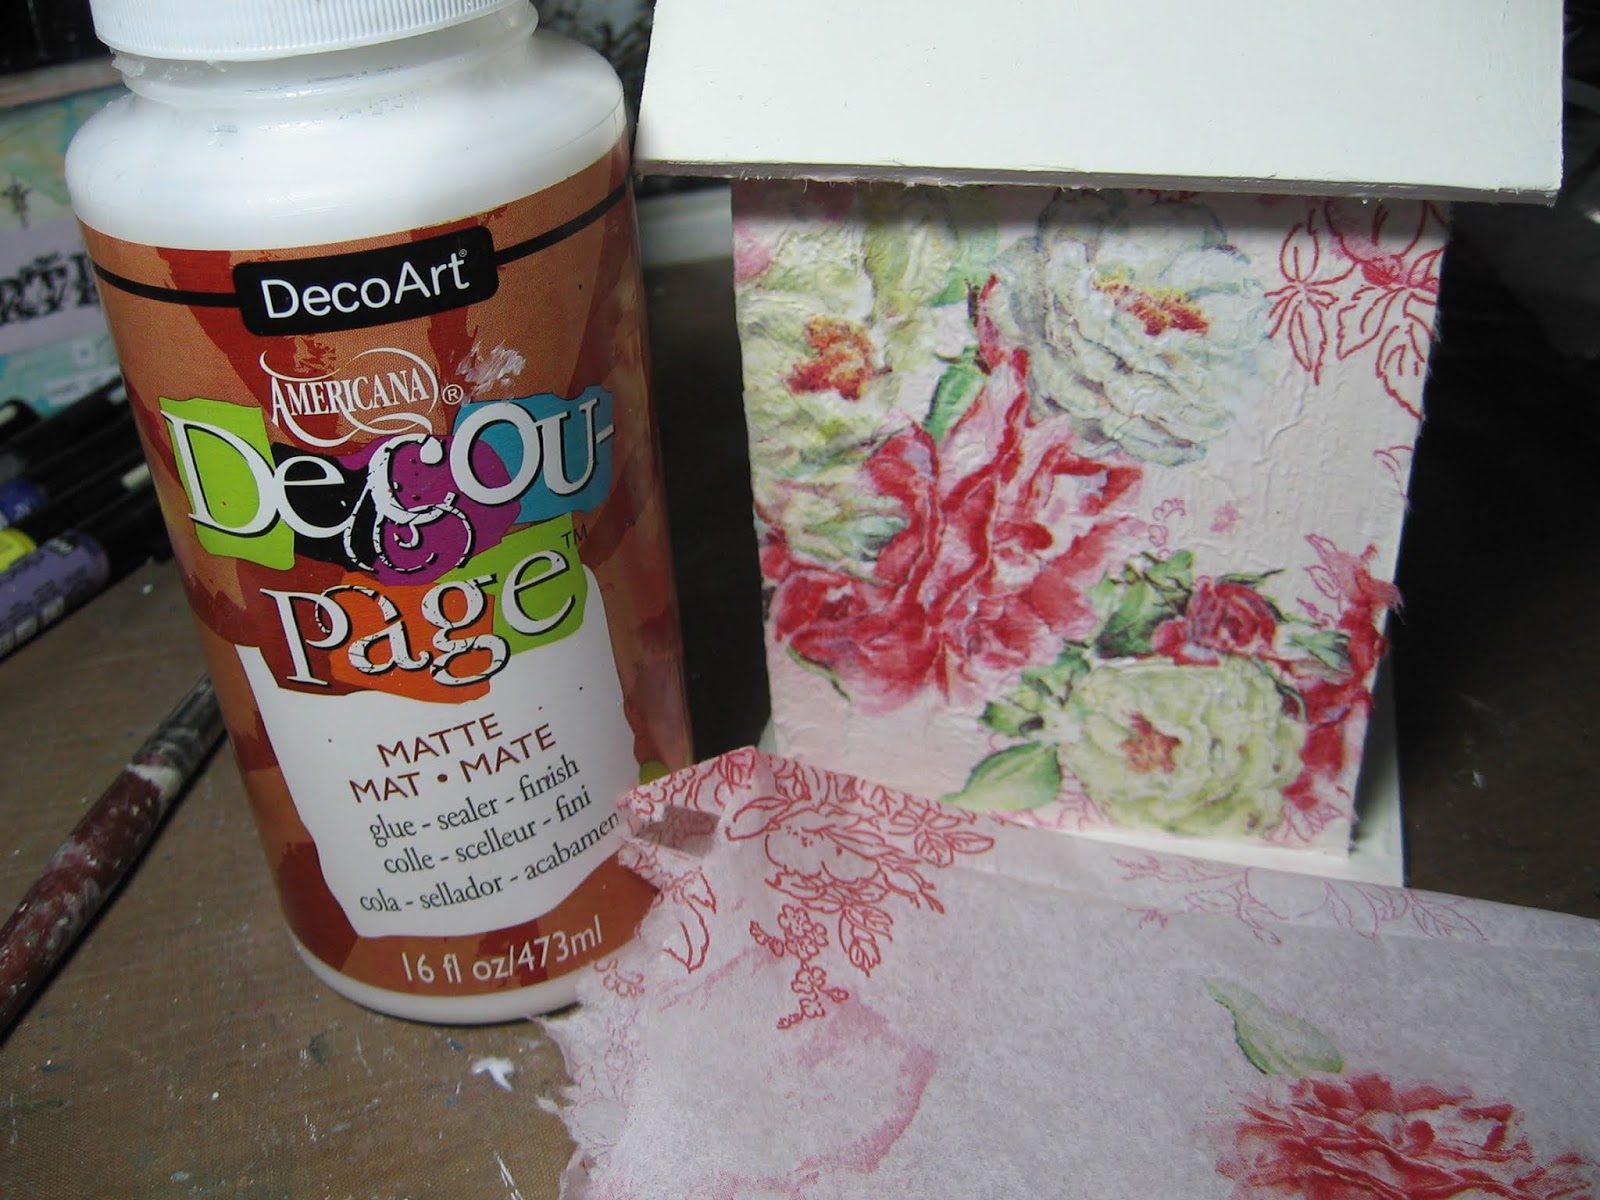

Now it was time to get out some my my napkins I had in my stash. The DecoArt Decoupage Matte Medium is perfect for this and really worked a treat for sticking down the napkins.  The Matte Medium gives a lovely finish and I don't have to worry about my napkin coming up off the birdhouse either.


Once the napkin was dry, I got out the Americiana Decor Crackle medium. I wanted the roof and the front of the bird house to have an old and weathered look.  I applied a good even coat and left it to dry naturally over night.


Now it is time for the magic to happen! Once the crackle was dry, I used my Americana Paint in Blush Pink to go over the crackle.


Remember to only go in one direction and not to paint over the crackle medium several times. One good swipe with the brush will give you great cracks like you see in the photo above. I love how the roof came out!!


Now it was time to do the front of the bird house. For this I used Americana Paint in Antique White.
The same rules apply as they did for the roof. Don't over paint with your brush, go in one direction and let the crackle work its magic.


I also gave the edges of the roof and the front of the bird house a light sanding when they were dry to add to the distressed look.


I added some wooden embellishments and flowers to the birdhouse for a finishing touch.


A little embossed wooden crown tops off the birdhouse!


I hope you will check out DecoArt.com and get yourself some of these amazing products!
Thanks for stopping by today, I hope you have found some inspiration here!

DecoArt Media Gesso
Americana Paint Blush Pink
Americana Paint Antique White
Americana Decor Chalky Finish Paint Lace
Americana Decor Crackle Medium
DecoArt Decoupage Matte Medium


Sunday, 23 December 2018

Altered Embroidery Hoop for White Rose Crafts DT


Good morning friends, and Happy Holidays! Today I am sharing a little project I created for a gift for a friend to find under her Christmas Tree. I have used lots of wonderful items from White Rose Crafts and I have a full tutorial video for you, posted below the photos as well.


I have used lots of items from White Rose Crafts and have a full list for you below the video!


I hope you have enjoyed my project today and have found some inspiration here!

Magnolia Lane Paper Pad (Sold Out)


Sunday, 9 December 2018

Captured Heart White Rose Crafts DT Project


Good morning friends, Kim here with my next design team project for White Rose Crafts

This time I have altered a tin heart I found at my local dollar store.


I have used lots of great items from the White Rose Crafts Store


You can see the full process video for this project on my YouTube Channel


Thanks for stopping by today, I hope you have found some inspiration here!

Magnolia Lane Paper (Sold Out)
Prima Tales Of You & Me Watercolour Paper (Sold Out)


Thursday, 11 October 2018

How To Create Faux Tiles With Embossing Folders & Distress Oxides White Rose Crafts LLC DT


Good morning White Rose Crafts fans! Kim here today with my very first Design Team project, and I am so excited to share it.  I have altered a simple wooden frame, and used some fun techniques with lots of WRC goodies!


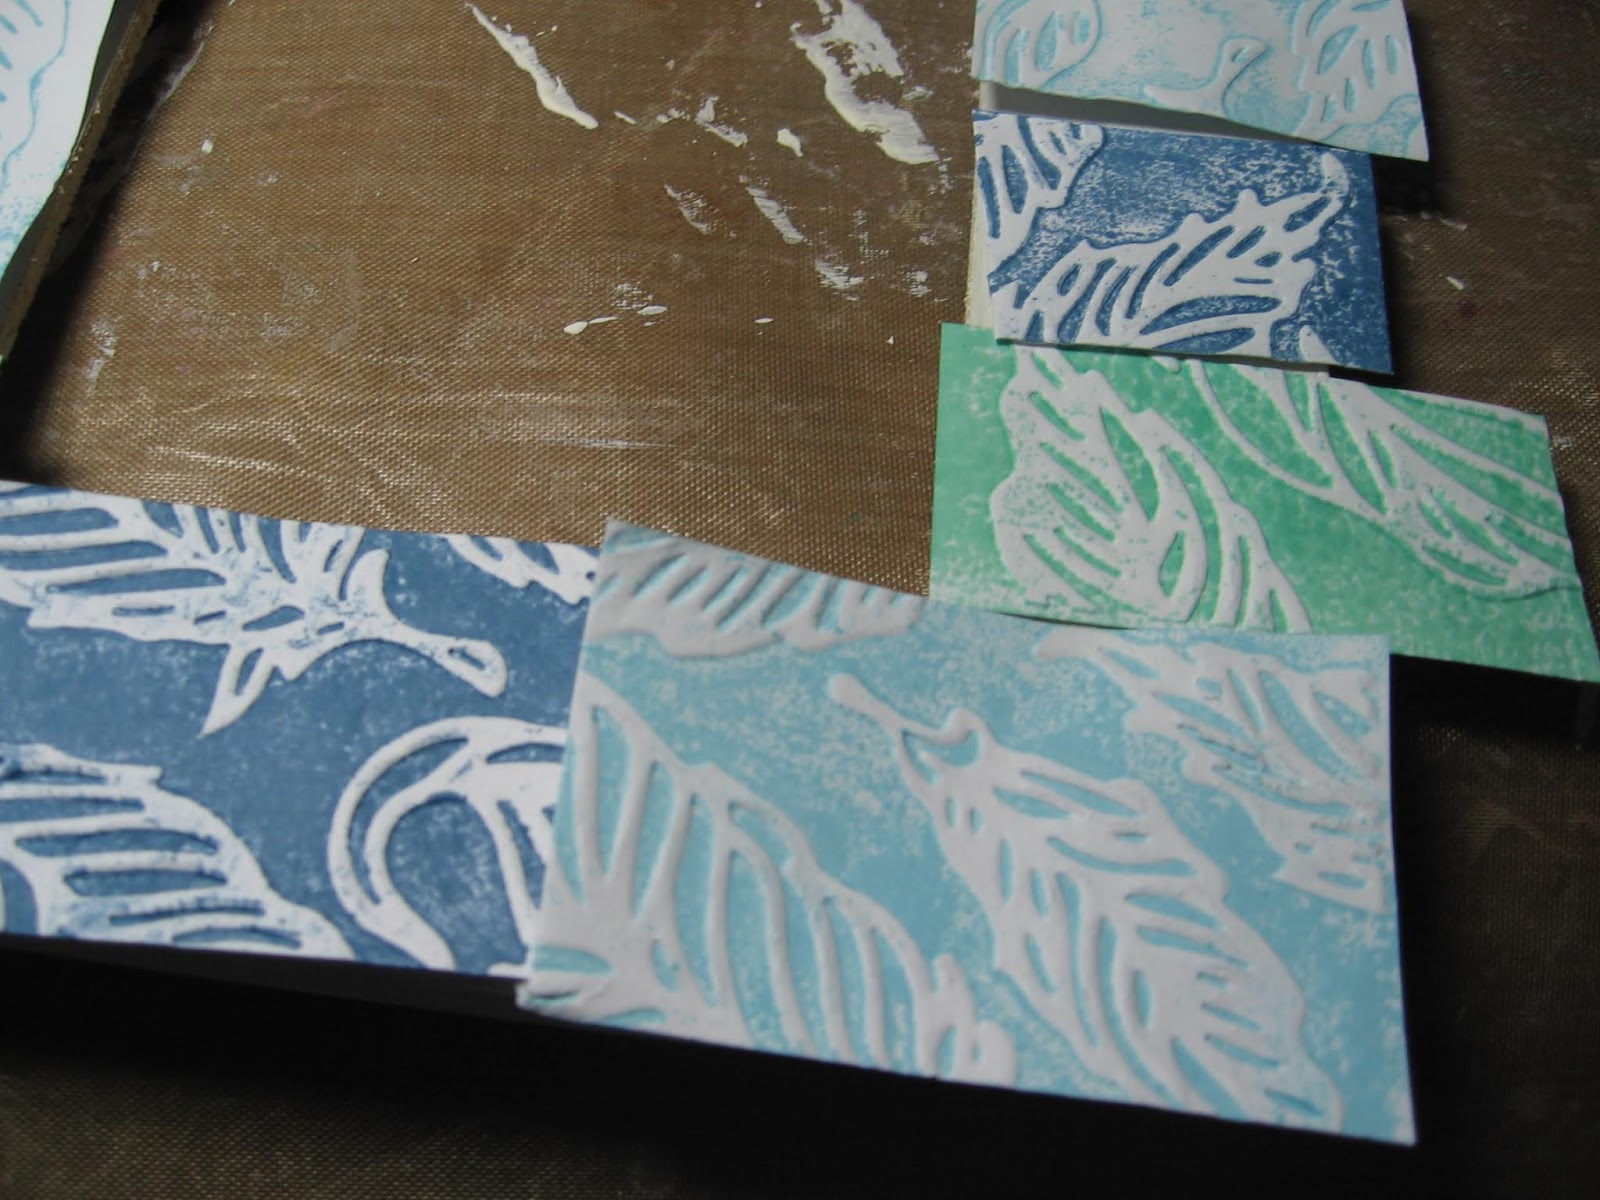
The first step is to choose your Distress Inks and Oxides which you wish to make your tiles into. You rub your inks directly on the flat side of your embossing folder. I am using an Elizabeth Craft feather embossing folder which you can find in the WRC shop.


Ink up your folder generously, I used Faded Jeans for this, and you may have to re ink it and run it through a second time, but be generous with the ink. I prefer the worn look, but for a more solid look on your paper you can run it through as many times as you wish. I used Cracked Pistachio and Tumbled Glass in the Distress Oxides


The result when it is embossed is that you have the dark space which you inked and when embossed, the white from the card stock will be raised up. Its a really cool effect and has so many applications!


The next step is to prep the frame, which I used some Americana Decor paint, but you can use what ever colour you like. 


Once the paint was dry, I took my paper and cut it up into squares and rectangles to make my faux tiles. I laid them out in a pattern I liked and alternated the size and colour of the tiles.


I glued the tiles down with a strong glue and cut off the excess and then sanded the frame to ensure the tiles looked even and smooth around the edges.


I wanted to make some embellishments that matched the feathers from the embossing folders, and decided to make some paper ones rather than use real ones. I did this by adding some thin wire in between two pieces of paper and then cut them into feather shapes, fringing around the edges. I then used my Distress Oxide in Tumbled Glass to give the feathers a bit of colour.


I added some of the Amercian Crafts Ivory Glitter Ribbon to the top of the feathers, and then
I added some glitter from my stash, and a Doodles Paper Playground Sparkle Blend called Vixen, to the feathers for some fun sparkle.


Next I added some pearls from my stash  and the gorgeous Recollections Flowers from WRC in coordinating colours.


I wanted to keep the centre of the frame simple, so I used a piece of paper from the Winter Moments by Craft O'Clock Paper Collection, and also the Breathe Stamp from the Kelly Creates Quotes 1 Stamp Set.


I felt the tiles needed some "grout", so I used some of my texture paste and a small brush and added it around the frame on each of the tiles.


I think the effect is something fun and different, and it gives you a new way to use up those embossing folders and create a fun home decor item.


Thanks so much for stopping by today, I really hope you have found some inspiration here!

White Rose Crafts Products Used

Other Items Used
Wooden Frame
Texture Paste
Paint by Americana Decor - Colour Lace
Pearls


Saturday, 1 April 2017

Home Sweet Home Altered Bird House for Fernli Designs DT

 
Good morning everyone, Kim here today with my next DT Project for Fernli Designs. This time I have altered one of the lovely birdhouses Fernli carries in their shop.
 
I used the Large Bird House, which you can find HERE

 
I painted the house with some white gesso, then gave it a coat of some Prima white crackle medium over about 75% of the house, leaving some areas with just the white paint as I wanted it to look like worn plaster.
 
 
Once the crackle medium was dry, I went over it with some Vintage Photo Distress Ink to give the cracks more depth.
Now it was time to move on to making the roof.
 
 
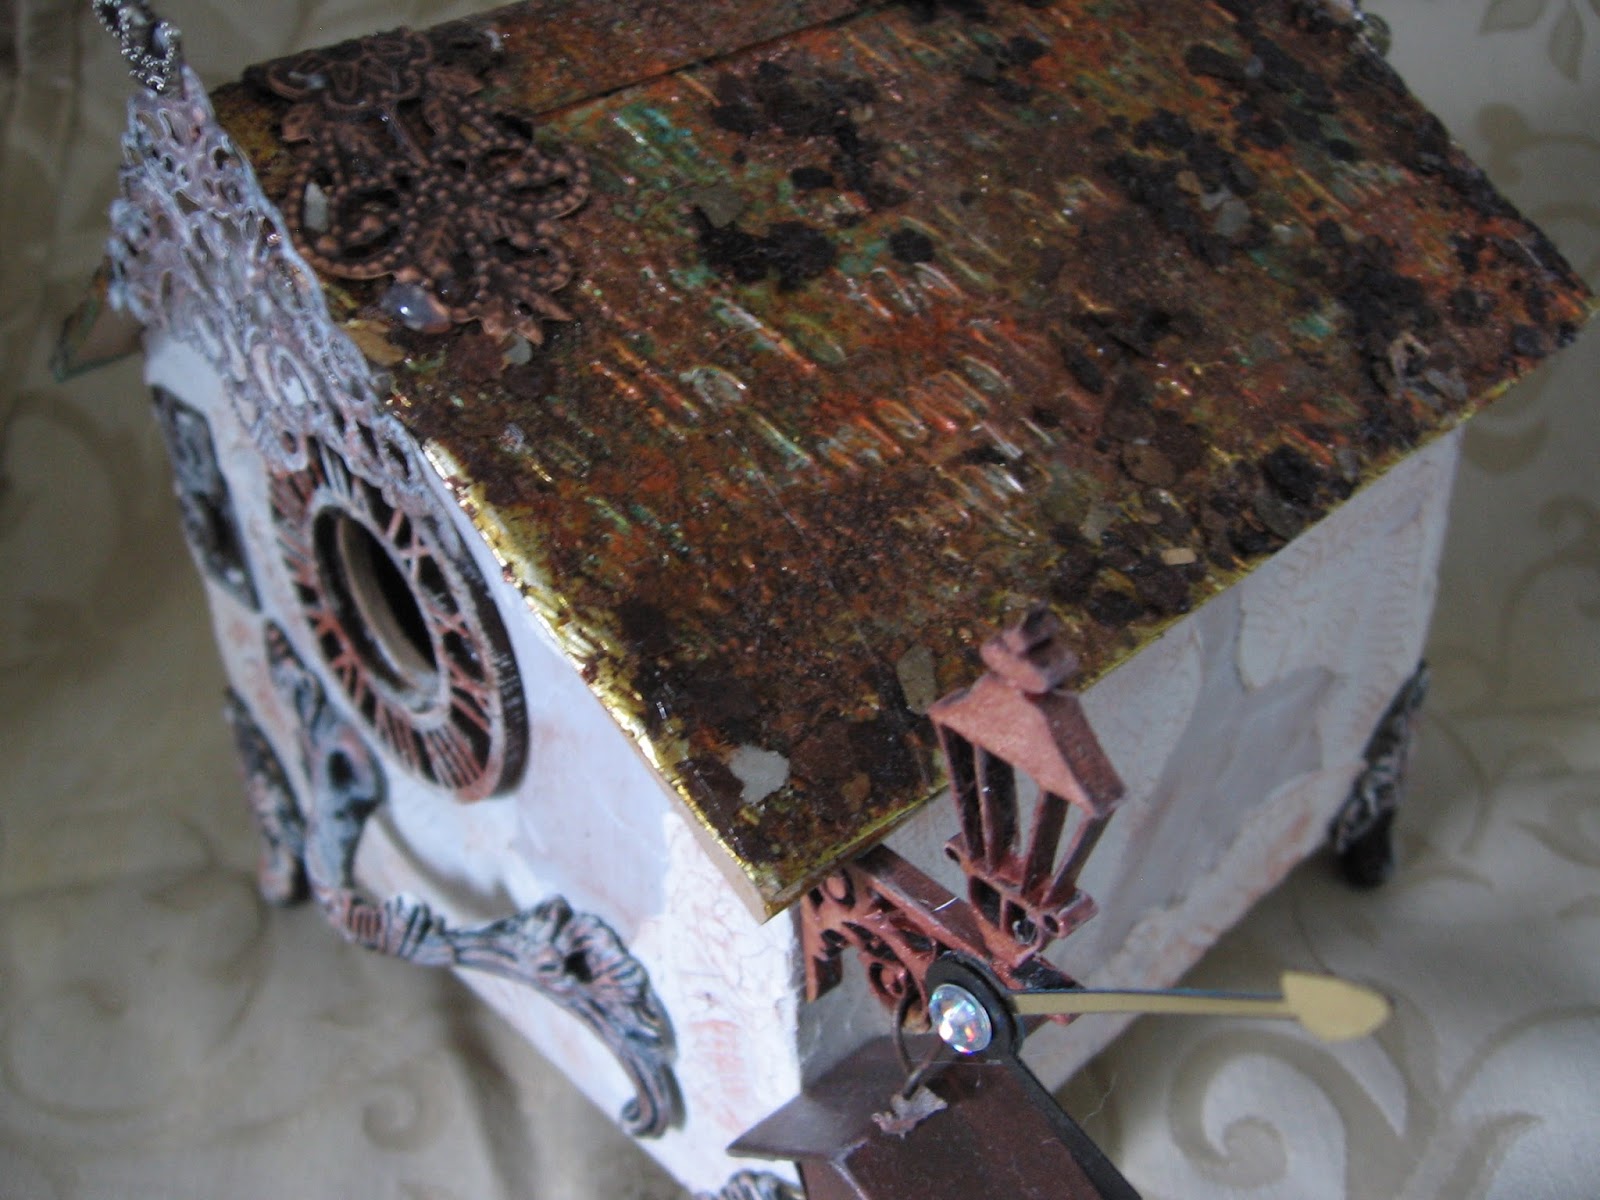
I measured the roof and used some metal tape from my hubby's workshop, which I raid often lol! I ran the tape thru my die cut machine in a script embossing folder, to give it some texture. I then got out some Martha Stewart copper paint and gave it a once over, also I used some soft teal paint from my stash in random places, as I wanted it to look like copper that had aged with patina.
 
 
Once the paint was dry, I used some Stampendous metals embossing powder on it in random spots, then a final touch of tea dyed mica flakes, also from Stampendous.


Now that the little house was ready, it was time for embellishments. I added this lovely little light to the side of the house also from Fernli Designs. I also added some funky clock hands and bling for fun.


For the roof, I added a metal corner from ButterbeeScraps, which I gave a light coat of gesso to, to shabby it up a little, and of course I had a finishing touch of a little crown from my stash.

 
I used some more items from my stash, a metallic handle for the little birdies to perch on, and what is a house with out house numbers? So I added some more little numerical metals from my stash to give the house a number.

 
I figured the house needed a little birdhouse of its own, and I had this tiny metal one in my stash which I hung from the lamp!
 
I had a little wooden clock in my stash that fit perfectly around the hole in the front, and I added some feet for a finishing touch.


Once again, here is the finished project!


I hope you have found some inspiration today, and will check out all the goodies in the Fernli Shop!