Showing posts with label ColourArte. Show all posts

Sunday, 2 August 2015

Vintage Heritage Layout for Gina's Designs And The Robin's Nest

 
Hello Friends! Today I have a fun share for all of you featuring papers and embellishments from The Robin's Nest.  All month long the team at Gina's Designs Lasercuts is cross promoting with the team at The Robin's Nest, and we have been having a blast playing with the amazing products from them.
 
 
I started of this layout with my inspiration being this lovely lady in one of my vintage photos from my collection.  She always looked "grumpy" to me, so I dubbed her "the grumpy lady".  I always wonder who these folks are, where they were from and how their photos end up in yard sales and in thrift stores.  I created some background texture on the "Fleur Honeycomb" paper with my texture paste and some Twinkling H2o's to pick up on the colour tones in the paper. I also added some of the Time Flies Rub ons from The Robins Nest to the background, I really love these, they fit in so well with the theme  of the layout.

 
Once the background was complete, I started to layer on more of the papers from The Robin's Nest, some burlap and more chipboard from Gina's.  I used this lovely chipboard frame from Gina's Designs. I took some of the Robin's Nest Dew Drops and placed them on the corner of the frame and then added a few to the ruler at the base of the photo to add some sparkle and shine!

 
My finishing touches were some lace from my stash and some gorgeous Petaloo flowers.  I hope my "Grumpy Lady" is happy in her new home, and maybe somewhere out there, she is smiling.
Thanks for stopping by today!
 
Please check out the links to The Robin's Nest Store and Blog and of course check out all the things happening over at Gina's Store, Blog and Facebook Group.


Other Items Used
Flowers by Petaloo
Twinkling H2o's by ColourArte
Prima Chipboard and Wood Door
Lace From My Stash
7 Gypsies Post Card
Prima Rose Stencil
13 Arts Texture Paste
 

Tuesday, 21 July 2015

"Art" Mixed Media Canvas for ColourArte Blog Challenge

 
Hello friends! I have a fun share for you today! Each month on the ColourArte Blog they are having a challenge. This months challenge is Texture.
 
I love texture, so any chance I get to play with some is a good day for me. I had this canvas board for a while, it was a yard sale find, and it needed some love and attention. I started off with some Prima paper, and ripped up some strips for my first layer of texture.  The thing about texture on a piece is that it can come from so many different places, and paper is a great way to start!
 
Once the paper was down, I got out some chipboard from Gina's Designs Lasercuts. I used some antique bronze spray and the chipboard piece I used as a stencil to add my next layer of dimension and texture.


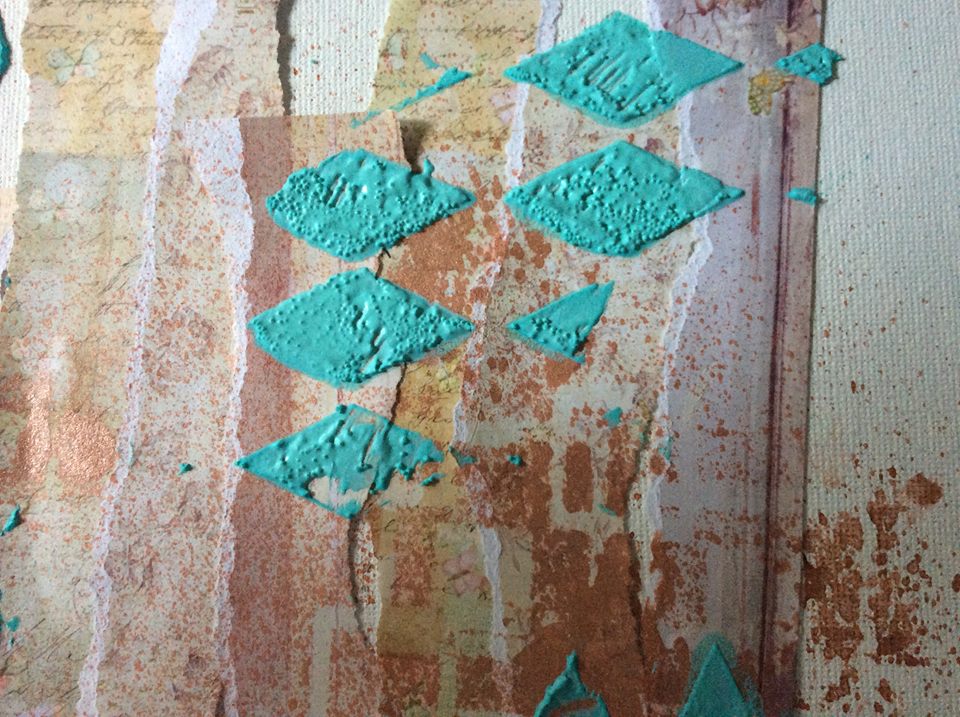
Now its time to get messy!  I mixed up a concoction of some African Jade Silks Acrylic Glaze, some Pop micro beads and some texture paste. Mix the whole lot up with a popsicle stick and you have some amazing textured paste to use on your art.


I love this, the beads and the colour from the Silks really made the texture on the canvas stand out.
 
 
On the left below you can see a close up of the texture I achieved with it. 
 
 
I next got out my Creative Paper Clay and made some molds of some butterfly wings and a fun little face. I used some Twinkling H2o's to colour the wings and then got out my script stamp and stamped on top of the wings for some fun texture as well.
 
 
 Now, back to the canvas. I used my Radiant Rain spray (did I mention that I LOVE these sprays??) and my water mister. I sprayed on in sections and then used some water to create drips down the canvas. This is simple and easy to do, but again it adds another dimension to the texture I am trying to achieve on the piece.  I used more of the script stamp on the background as well.


 Now its time to layer on your embellishments. I worked in some beautiful pieces from a Ken Oliver paper I had in my stash and some wooden pieces as well. You can see on the wood paint brush I used some gold crackle paint and more micro beads in gold as well for further texture. The trick I find with texture is to layer, layer, layer. Even things as simple as paper add that next level of dimension to your art.


 I kept on adding my paper clay pieces, paper from the paper line, wooden pieces and even and old hinge I had in my stash, which I used texture paste and rust alcohol inks on.
 
 
 Keep on adding some fun pieces until you achieve your desired look.
 
 
Here is the finished piece.  I am thrilled with the outcome, I had a blast making this piece. Remember Texture is visual as well as dimensional, and layering on things like colour, paper, stamps, metal and clay all add to a fun textural piece.
 
 
Don't forget to check out all the fun over on the ColourArte Blog or check out their Facebook Page HERE.
 
You can also find some fun ideas over on the Creative Paper Clay Blog
 
and last, but certainly not least, check out all the great stuff going on over at Gina's Designs Lasercuts Blog, their Facebook Group and YouTube Channel
 
Thanks for stopping by!
 
Products Used
 
 
Ken Oliver Studios Paper
ButterBeeScraps Metal Embellishments
13 Arts Texture Paste
POP Micro Beads, White and Gold
Prima Butterfly Paper, Script Stamp and Resin Light Bulb
Prima Gold Crackle Paste
Creative PaperClay Mould Pieces
Ranger Alcohol Ink
Patina and Copper Gilder's Paste
 

Fabric Floral Card for RebeccaBaer.com

 
Happy Tuesday friends! I have a fun, fabric, floral card (and a bit of alliteration as well!) to share with you today. I have created this card for rebeccabaer.com and used the Dragonfly Fantasy Stencil on top of some white canvas type fabric.
 
 
I used my Radiant Rain sprays from ColourArte to spritz over the stencil.  I used three different colours of the mica sprays. I love Rebecca's Stencils as they are thinner than other stencils and this gives such a crisp print on paper, canvas and this time on fabric. It didn't even bleed into the fabric, which is most impressive!


 I used some fun foam from my stash and some double sided tape on a 5 1/2'' by 4 1/2'' white cardstock base to pop up the fabric base on the card.
 
 
After the fun foam was adhered onto the card base, I used more double sided tape with a bit of fabric glue to attach the fabric on to the fun foam. Once it was glued down I got out some Stickles in Peacock to add some glitter and dimension to the card. I then layered on some burlap and lace and a sentiment for the card on top of it. The last step was some Prima chipboard and some lovely muted tone flowers. 

 
I hope you like my card, it was fun to make and very simple. Rebecca's stencils really are the star of the show here, and using them on fabric is another way to get more mileage out of your stencils!
Thanks for stopping by today!
 
 
Other Products Used
Petaloo Flowers
Prima Chipboard
Stampin Up! Sentiment Stamp
Peacock Stickles
Lace and Fun Foam From My Stash


Monday, 13 July 2015

Simple and Easy Background for a Layout Featuring ColourArte

Hello friends and happy Tuesday!  I have a super simple and easy background technique to share with you all today.  I have used my wonderful Twinkling H2o's and a piece of canvas paper to start.
 
 
I first started by spritzing the paper with some water and then apply random strokes of the watercolour to the page. Keep spritzing on lightly with your mister and move the paint around on the page. Remember to leave some white spaces on the page for contrast. Lastly, I took the darkest colour of the "Twinks" and wet my brush and again randomly splattered it on top of the background. That's all I did to create my background!  The point is to have fun, and remember there is no right or wrong way to do this!


Next, I got out my embellishments I wanted to add.
 
 
I next layered on the paper pieces  I chose and one of the chipboard pieces from Gina's Designs.
 
 
Once, I figured out my layout, I got out some stamps from my stash and did some stamping around the page. I didn't want to overwhelm the background so I didn't press too hard with the stamp, I just wanted some light "ghost" type images.


Lastly, I added some lovely Petaloo Flowers and I also added some Radiant Rain spray in Sunburst, and some Ranger Distress spray in Cracked Pistachio around the chipboard and resin pieces I added. 
 
 
 I added a butterfly for a finishing touch, tucking it in around the Prima resin heart.
 
 
I hope you will give this simple and easy background a try, the trick is to not be afraid and just play! 
Thanks so much for stopping by today!
 
List of Products Used


Prima Resin
Petaloo Flowers
Paper From My Stash
Inkadinkadoo Leaf Stamp
 

Wednesday, 8 July 2015

Mixed Media Canvas Featuring ColourArte

Hello friends!  I am so excited to share my project with you today!  I am featuring the amazing products of ColourArte today. They have the most fun things, watercolours, sprays, artist pigments, glazes and more. I have used just a small sampling but the effect turned out great!
I have created a 5'' x 12'' mixed media canvas.  I think doing mixed media is really my first love!
 
 
 Here is what I have used to create my Canvas. I love the Radiant Rain sprays. They are highly pigmented and have a fantastic shimmer to them. The Silks Acrylic Glazes have been a staple in my craft room for a long time, and are a very versatile product.
 
 
I started off my canvas with some white crackle paint. I wanted that as the base so when I used the sprays it would pick up on the crackle effect on the canvas. I used Teal Zircon and Pink Grapefruit from the Radiant Rain Line for the beginning of the base.

 
As you can see, the sprays worked great and really highlighted the cracks. I love how the pink and blue tones mixed to give a light purple colour in the crackle.  After I had done this I got out some texture paste and stencils and added a floral motif to the top and bottom of the canvas.

 
Next up, I got out some chipboard from Gina's Designs Lasercuts. This is the Tudor Rose shape set. I wanted them to be more dimensional, so I used some liquid pearls on them and did some random dots and lines on them. After that dried I painted them white and added them to my canvas.  I used them under my layers of paper which I fussy cut out from my Prima paper. I love the look of the little houses and birds, which also pick up on the lovely pastel tones I was going for on the piece.


I decided I needed a little bit of sunshine on my canvas, and so I got out the Sunburst Silks Acrylic glaze. I think the name "Sunburst" is so true, this colour of yellow is so very vibrant and fun!  I added some accents in this colour here and there on the canvas, and I think it really created some depth to it. I also used the Radiant Rain Sunburst Spray and added some fun splotches to the canvas. 


I also added some touches of Key Lime and Pixie Pink in the glazes as well, to the sides and top of the canvas to add a few more spots of colour.

Now, its time to embellish!  I got out some fun Prima chippy pieces and added a butterfly, fairy and friend sentiment to the top of the little house. I then added a little resin window and some lovely flowers and cameo to finish it off.


I am so happy with this piece, I think I may give it to a friend who loves fairies.  The ColourArte products made a huge difference to my canvas and I am so pleased with the outcome.
 
Check out the links below to all the ColourArte products, and of course see their BLOG for all the fun things going on, as well as their Facebook Page HERE
Thanks for stopping by!


Other Products Used
Prima Garden Fable Paper
Prima Butterfly Chipboard Embellishments
Flowers by Petaloo
Prima Resin Pieces
Deco Art Crackle Paint


Monday, 6 July 2015

Upcycled Mixed Media Canvas Featuring ColourArte


Good morning friends!  I am very excited to share my project today. I have an upcycled cracker box to show you! I got out my swiss cheese cracker box (my favorite crackers by the way!) and started to layer on different types of paper.


I used some vintage book paper, a bag from an online crafty purchase and some old music paper a friend sent me. I used mod podge to layer on the paper. It really made the box very sturdy and it holds up well to mixed media products.
 
 
Once the Mod Podge was dry, it was time for the fun to begin. I got out my Silks Acrylic Glazes and did some finger painting. This is why I love the Silks so much, they are a very forgiving product and you can use brushes, palette knives and even your stubby little fingers to apply them.
 

Once the Glazes were dry, I used my paint dauber to make some retro style polka dots on the back ground and also used one of my stamps which has a circle motif on it, stamping it with black Stayzon Ink.
 
Next, it was time to paint my embellishments. I started off with the chipboard glasses and I used some of the Pixie Pink in the Silks Acrylic Glazes and when that dried I put some Diamond Stickles on top. I really love how the glasses came out, they look so cool!
 
 
The retro diamond shapes and the TV shape I used some Twinkling H20's. The Diamonds however, got a coat of Key Lime Silks first then a few spots of the "twinks" in Lemongrass on top of that for some more shimmer. This is a great layering technique using both the Silks and the H20's. I start off with the Silks as the base layer then use coordinating colours in the H20's and apply them randomly to the chipboard. It gives the illusion of dimension through the shimmer of the paints. Its a very easy technique to do!
 
 
The television got a coat of Mediterranean Blue, Lemongrass and Teal Zircon. The Twinkling H20's are so highly pigmented I didn't even gesso the chipboard first and I got such great coverage from them!
 
 
I added some fun vintage images I had in my stash to pick up on the retro vibe of the chipboard and the colour palette.  I used some of my favorite childhood television shows and featured some of my all time favorite characters.  I had a ton of fun with this piece, it really brought back some fun memories!


I added some dimensional resin cast pieces and some flowers to finish it off.
 
 
I hope you have enjoyed my project today, and will give this type of upcycled project a try.  I really enjoyed making this and plan to make some more upcycled "canvases" in the future.
 
Don't forget to stop by the ColourArte Store HERE or the ColourArte Blog and Facebook Page to check out all the amazing products they have!
 
Thanks for stopping by!


Other Products Used
Prima Archival Cast Pieces
Prima Chipboard Sentiments, Sequins & Tea Cup
Petaloo Flowers
Kraftsupplies4U Flowers
Ranger White Paint Dauber
Ranger Diamond Stickles
Rubbermoon Circle Stamp
Black Stayzon Ink
Black & White Retro Images From My Stash