
Good morning Joggles fans! I am very excited to share this months DT project with you. This time I have created a "Fairy Queen" canvas, using a wooden canvas, and lots of goodies from the Joggles store.

Here is a list of products you will need to make this project.
Distress Ink Dauber
Martha Stewart Sycamore Paint
DecoCoat Grey Paint
Deco Art Soy Paint Black
Beacon 3 in 1 Glue
Hot Glue
Artificial Ivy
Paper Clay
Shimmers Texturez Sand Colour
Tree Bark
Prima Art Alchemy Clear Crackle
Quilting Pins
Prima Fairy Resin Pieces
Prima Bird Nest Embellishment

I started off using a wood canvas I purchased at my local dollar store. I am using the backside of this wood canvas, instead of the front to give the impression of a notch in a tree where fairies hide!
I gave the canvas a coat of gesso, then used some of the Prima clear crackle paste and set that aside to dry.

Once the canvas and crackle were dry, it was time to paint. I used several different tones of paints, and I added gesso to some of the shades to make them lighter. The idea was to make the wood look like the inside of a tree. I kept layering on and layering on until I was happy with the result.
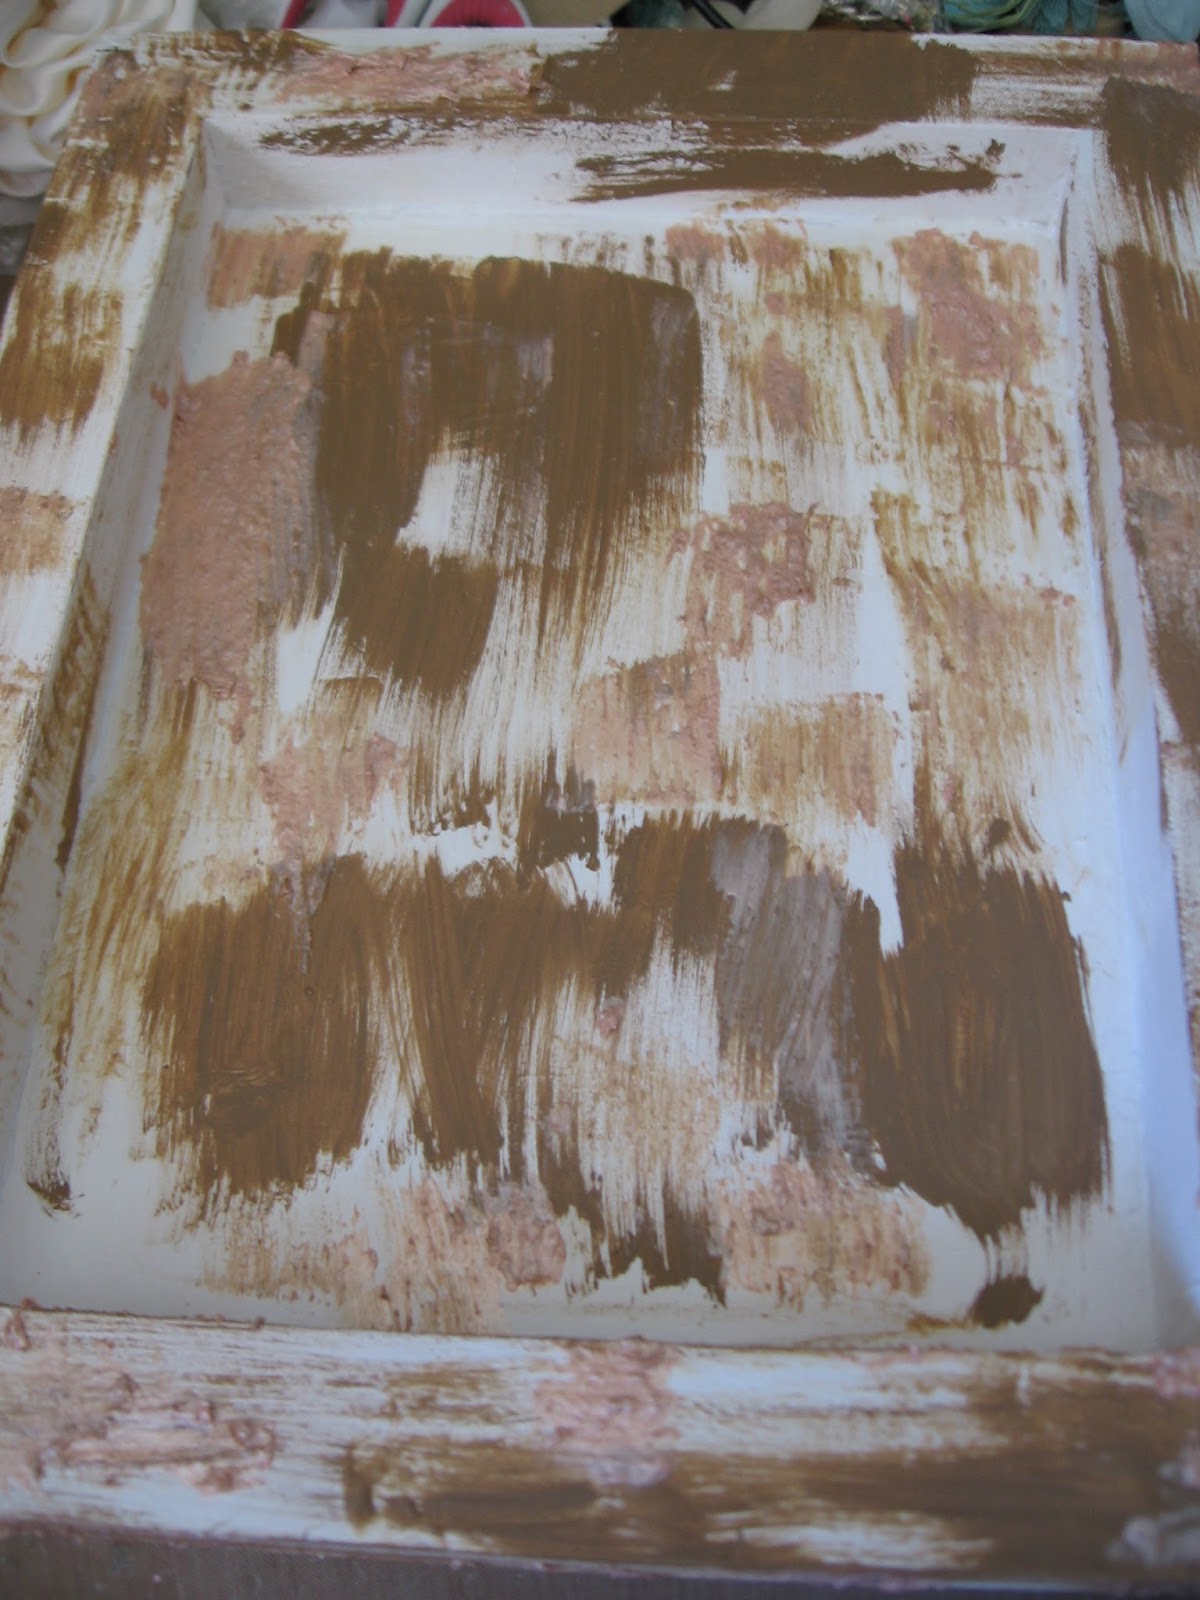
I added some black and grey paint as well on top of the brown tones and also some coloured textured paste from Shimmerz, this gave more dimension and gave it more of a "bark" look that I was going for. I know it doesn't look like a tree yet...but just wait ;)

After I was happy with the paint, I used some bark pieces I had from some wood my husband and I have stashed away for our fireplace this winter. Please never peel bark off of a live tree if you are going to recreate this project, always use bark from previously cut wood or fallen wood, never from a live tree!

I glued the bark down with hot glue in various places all over the canvas. Can you start to see a tree forming?

Now it is time to tuck in some moss here and there. I went all over the canvas trying to make the moss look natural, picking out different shapes and colour tones from the bag. I adhered the moss with hot glue, but please be careful in doing this, its very hot stuff when it has hot glue on it.

I love how the bark looks with the moss, it really ended up looking and feeling so natural.

Now it is time to add some mushrooms. I created my own, but did watch a tutorial by a super talented lady named Nichola Battilana, who has a fantastic tutorial for making clay mushrooms on her Youtube channel which you can find HERE

I made my mushrooms different, but did use long quilting pins in a similar fashion as she did to create the stem of the mushrooms. I dry brushed on some brown, black and white paints and also gave the mushrooms a coat of Diamond Stickles as well, because they needed to look like they had fairy dust on them!

Here you can see my little mushrooms peeking out from the bark and moss.

Continue all the way around the canvas with the moss until you are happy with the result. I also added some artificial ivy to mine as well to add a different texture and layer to the green moss.

Now it is time to cut out the collage images. This one of the fairy with the butterfly crown is one of my favorites! I placed her in the middle, gluing her down with some Beacon 3 in 1 glue. I had a wooden crown from my stash which I added to the top of the picture, as every queen does need a crown! I added some more stickles to the crown for added sparkle.

I tucked moss around her as well, as she is peeking out from the centre of the notch in the tree.
I also fussy cut out several of the butterflies from the Papillion 1 and Papillion II collage sheets and placed them fluttering around the Queen.

I added more Diamond Stickles to each of the butterflies, and also edged them with Vintage Photo Distress ink to make the edged look darker, rather than have the white of the paper show through.


I added a rustic little birds nest with some loose feathers from my stash around it in one of the corners of the canvas.

I also added some Prima resin fairies, which I went over with the Vintage Photo Distress ink and more of the Stickles.

You can see the Queen's little fairy helpers are spreading their fairy dust all over the forest!

A finishing touch was some gorgeous Petaloo flowers in the corners to add some softness.

....And again here is my finished piece.

The collage sheets from Joggles really made this piece come to life. I love how the butterflies look like they are in flight, and the beautiful Fairy Queen image who is holding a magical court over her fairy and furry friends.
Thanks so much for stopping by today. I had tons of fun with this project, and I hope you will give something like this a try too!
Please check out all the great items in the Joggles store!
No comments:
Post a Comment